

Acromioclavicular Joint Dislocation, How to Rehabilitate at Home
If you have any queries or suggestions, please feel free to reach out via email to info@harisonfitness.com. We will do everything in our capacity to ensure that you love your experience with us.
In daily life, it is inevitable to have physical injuries, and acromioclavicular joint dislocation is one of the more common physical injuries. Orthopedic surgery can treat acromioclavicular joint dislocation. After the surgery, it is best to carry out rehabilitation training if you want to accelerate the healing of the injury.
Home rehabilitation training for acromioclavicular joint dislocation is conducive to physical recovery, as well as improving the overall strength of the shoulder Reasonable home rehabilitation training for acromioclavicular joint dislocation can improve the stability of the joints of the upper limbs, exercise the shoulder muscle groups, to avoid muscle weakness or even atrophy phenomenon.
01 Notes on Home Rehabilitation Training
Before carrying out rehabilitation training for acromioclavicular joint dislocation, it is important to ask your doctor’s advice and develop a training program based on your personal physical condition and post-surgical status in order to achieve the purpose of rehabilitation. In the process of training, do not force yourself to do movements with too much intensity, and stop training if you experience strong pain.
When you first start training, you may not be able to complete some of the movements, so you can postpone some of the training movements. If you can’t do it on the first day, push it to the second day, and if you can’t do it on the second day, push it to the third day. Gradual training will help the injury heal.
02 Home Rehabilitation Exercises
Before you start your acromioclavicular joint dislocation home rehab, you need to prepare an elastic band and a pair of dumbbells.
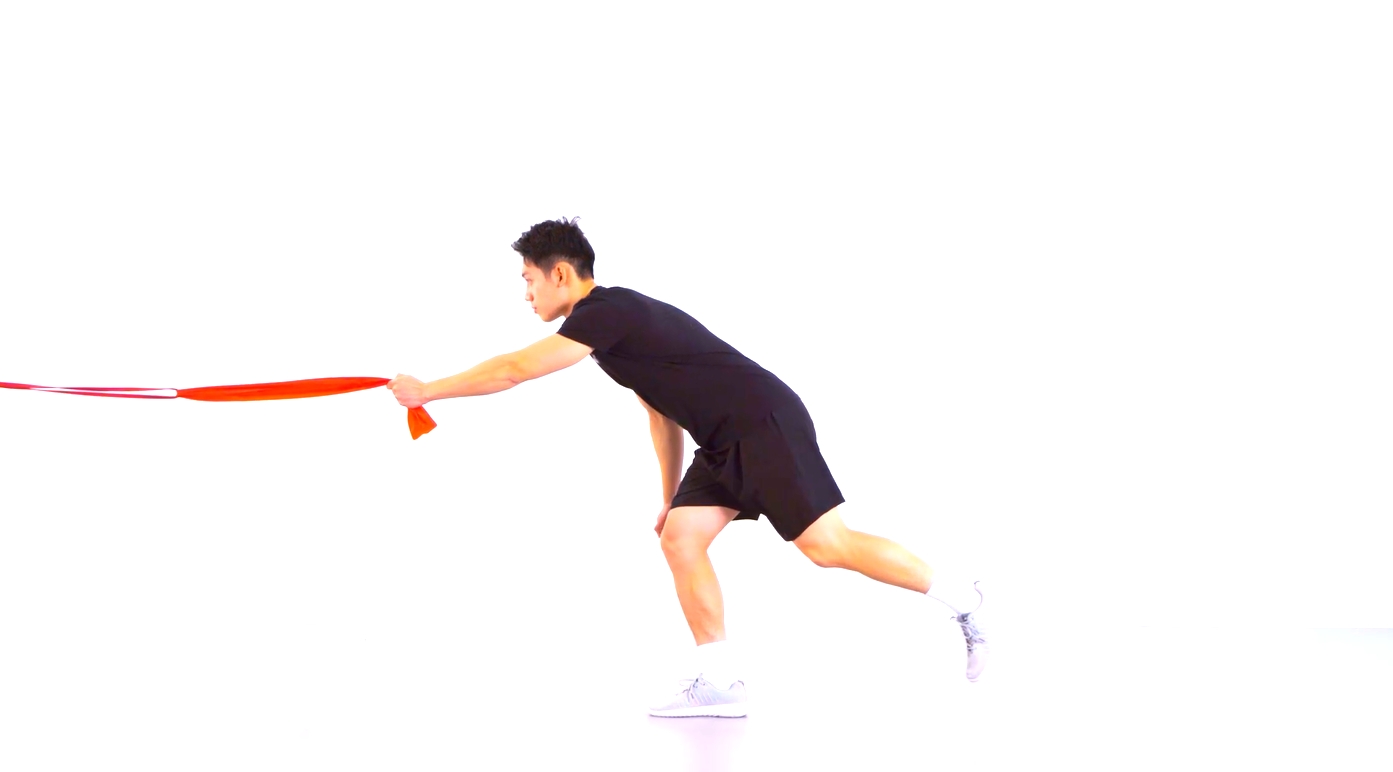
Action 1: Single leg hard pull rowing
The elastic band is fixed in the height of the chest position of the exerciser, the torso is bent forward, the injured arm is straight and pulling the elastic band, the same side of the leg is lifted up to extend the suspension, the center of gravity falls on the other side of the leg, the single-legged stand, the body shape is roughly the T word. Then pull the elastic band backward to the abdomen, at the same time, the suspended leg to the front knee, the torso with the action to become upright, the affected leg to keep bending the knee suspended.
Afterwards, slowly restore the elastic band, the suspended leg extends backward, the torso bends forward, and then restores. This action should pay attention to the distance between the elastic band and the exerciser, the initial state, the elastic band can not be a taut state, otherwise in the restoration of the traction will lead to the body center of gravity imbalance caused by injury. Repeat each set of movements 12 times, do three sets.
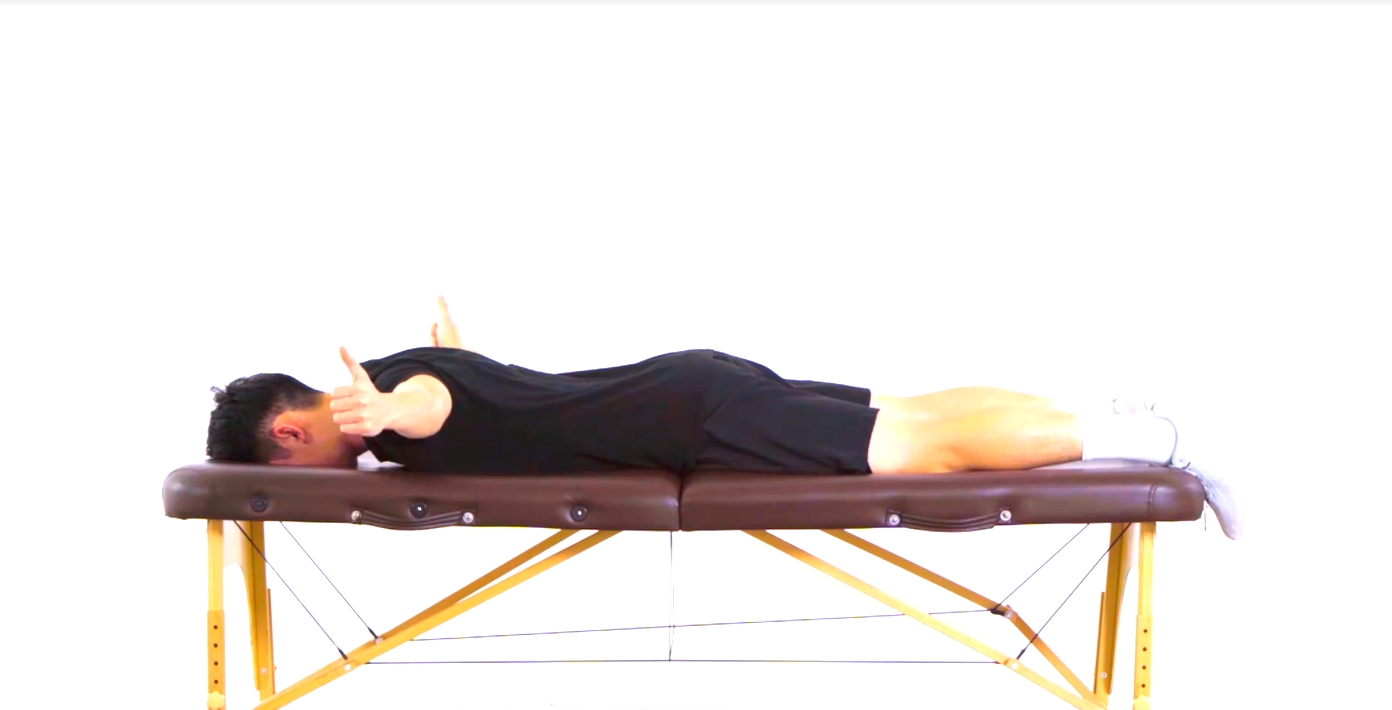
Movement 2: Prone TY
Lie prone with your arms hanging in the air and both arms unfolded in a Y or T body shape (corresponding to different arm unfolding angles). Then raise them upwards (in the direction of the roof). The two body shapes Y and T should be alternated so as to achieve a workout for different muscle groups. The arms should be kept in a hanging extension at all times for three sets of 12 reps each.
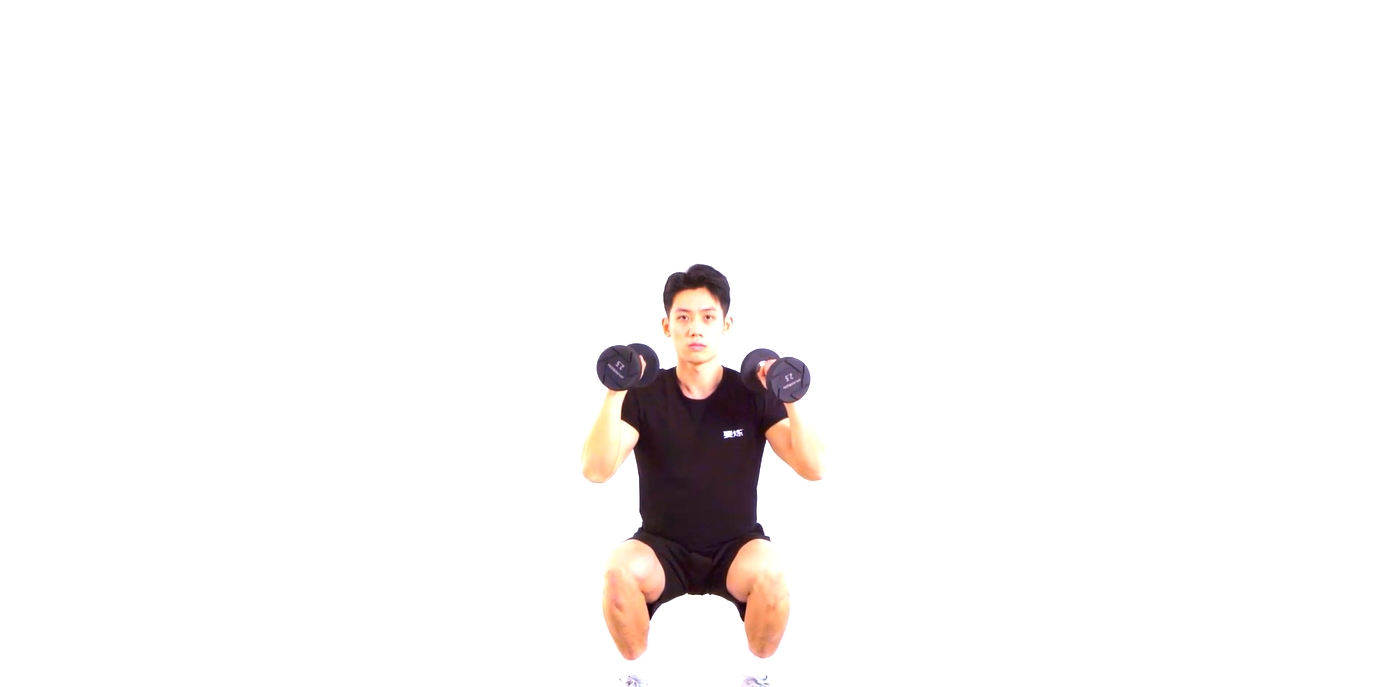
Action three: squat push-up
Feet and shoulder width open, stand naturally, arms holding dumbbells up to straighten, and then began to squat, arms bent to recover the chest dumbbells recovered to near the shoulders, squatting at the same time to inhale, in place after a short pause, and then began to stand up, arms up to dumbbells up to straighten, at the same time to exhale, to this completion of the action, the action of each group of 8 times, do two groups, exercisers can according to their own situation to reduce discretion.
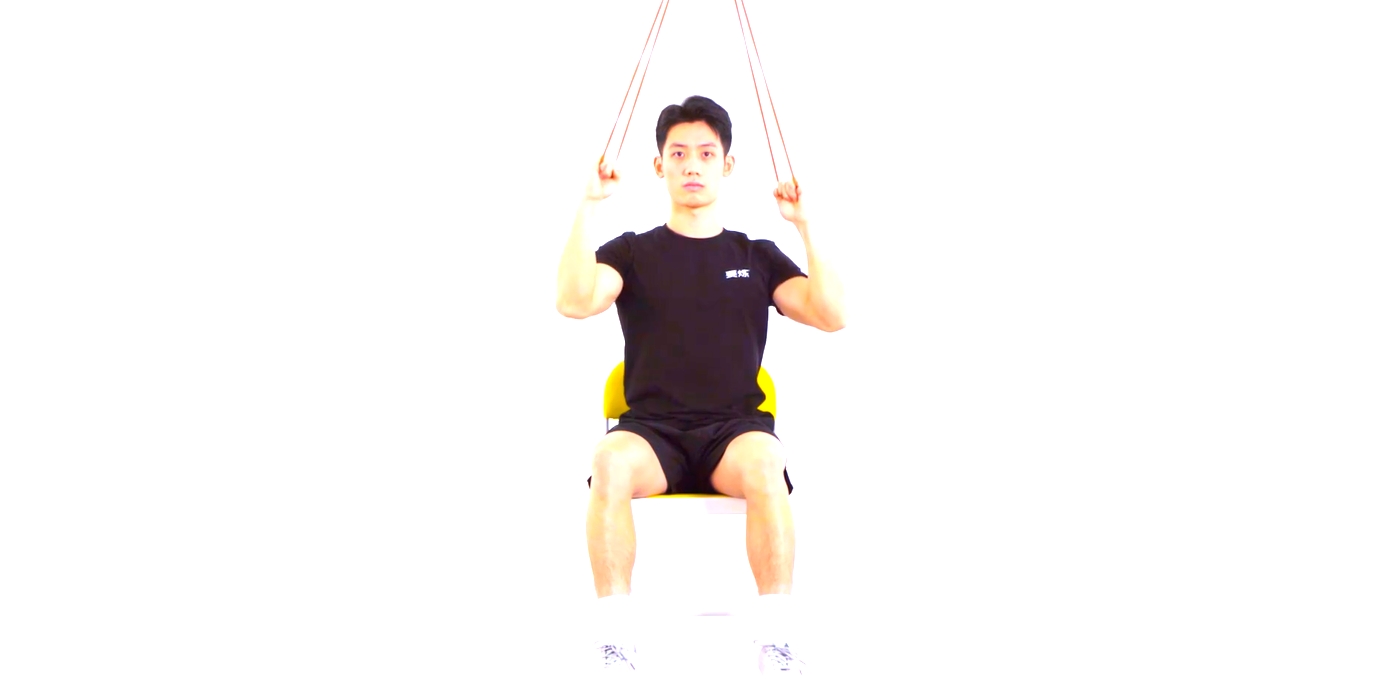
Movement 4: Pull Down
Using a seated position, the elastic band is fixed at the top of the head directly above, arms up to hold the elastic band, and then pull down to the shoulders. The distance between the arms should always be wider than the shoulders, the whole action requires always slow force to avoid violent force. Do eight reps per set and do three sets.
The above four movements are the home rehabilitation training movements for shoulder lock joint dislocation, you can start training after 40 minutes after meals, there may be pain in the process of training, if you can’t complete the movement, skip the movement, and carry out the next movement training. If you are unable to complete the movement, skip the movement and proceed to the next one. Train 2-3 times a day to promote the healing of the injury.


Leave a Reply
Want to join the discussion?Feel free to contribute!