Jump Rope: The Best Guide to Choosing, Using, and Caring for One at Home

Jump rope is one of the most efficient, space-friendly pieces of equipment you can add to a home gym. A single rope fits in a gym bag, takes up a few square feet of floor space to use, and can be used for quick cardio intervals, coordination work, warm-ups before strength training, or low-equipment circuit sessions. For apartment dwellers, garage gym owners, and anyone setting up a spare-room workout area, a jump rope can stretch the utility of small spaces without requiring power or assembly.

This guide walks through the practical differences between rope styles, the key features to evaluate when shopping, and how to set up and maintain a jump rope for safe, consistent use. Read on to learn how to pick the right rope for your ceiling height, training goals, and living situation so you get the most value from this simple but versatile piece of gear.

Why pick a jump rope for home workouts

Jump rope delivers cardiovascular stimulus, timing, and footwork training in a package you can stash behind a bench or hang on a peg. Compared with bulkier cardio equipment like treadmills or stationary bikes, a jump rope is inexpensive and portable. Compared with bodyweight-only alternatives like jogging in place, a rope adds rhythm and feedback—miss a swing and you feel it—helping improve coordination and ankle stability. It also complements Pilates, mobility, and strength sessions by offering a compact way to raise heart rate between strength sets.

That said, jump rope isn’t a perfect substitute for every piece of equipment. If you need steady-state cardio while working or watching media, a bike or treadmill may be more practical. If you lack vertical clearance, rope work may be limited. Use the jump rope to supplement other equipment—an excellent option for interval training, warm-ups, and compact cardio blasts.

Types of jump ropes and who they suit

When you start shopping, you’ll see a few common rope styles. Each has pros and cons depending on goals and experience.

  • Speed or cable ropes: Thin, often coated cable ropes designed for fast rotations. They’re great for high-rep drills, double-unders, and refining rhythm. They usually spin quickly through small handles and are favored by people working on agility and conditioning. These ropes can be less forgiving on rough surfaces.
  • Beaded ropes: Nylon or plastic beads on a cord add weight and visibility. They turn a bit slower, are durable for outdoor use, and give strong tactile feedback—useful for beginners and group classes where durability matters. Beaded ropes are also quieter on hard floors.
  • Leather and cloth ropes: Slightly heavier, with a traditional feel. A leather rope can be a good middle ground—durable and responsive, with a solid arc that helps beginners learn timing. Cloth ropes are softer on impact and may be quieter for apartment use.
  • Weighted and adjustable ropes: Some ropes let you add or remove weight from the handles or cable. Weighted ropes can increase muscular effort and encourage better arm engagement, but they turn slower and are less suited for speed work.

Choosing a style should be tied to what you’ll use it for: speed ropes for high-intensity interval training or double-unders, beaded or leather ropes for learning the basics or outdoor durability, and adjustable ropes if you want to tailor resistance.

Key selection criteria to consider

When comparing jump ropes, evaluate these practical features that matter in real use:

  • Length and adjustability: Ropes usually ship longer than you need and come with a simple adjustment system. Ideally, you should be able to shorten the rope so it clears your head but comes close to your heels when you stand on the middle. If multiple household members will use it, look for easy adjustability without tools.
  • Handle comfort and grip: Handles should feel secure during sweaty sessions. Foam, rubber, or textured plastic grips help prevent slipping. If you plan on long skill practice, prioritize ergonomic handles that fit your palm.
  • Bearing system: A smooth swivel in the handle lets the rope spin continuously. Ball bearings or similar systems reduce wrist fatigue and improve speed. If you’re practicing double-unders, smoother spin can make progress much easier.
  • Rope material and durability: Thin speed cables work best indoors on smooth surfaces; coated cables resist fraying and can handle occasional outdoor use. Beaded ropes and leather are more durable on rough surfaces and less likely to damage concrete.
  • Noise: If you live in an apartment or have downstairs neighbors, consider quieter options—beaded or cloth ropes and soft floor mats can reduce thumping.
  • Portability and storage: Ropes are inherently portable; some come with a small carry bag. If you travel, a rope that packs down without kinking makes it easier to take on trips.
  • Warranty and return policy: Look for a seller who offers a fair return window and some warranty against defects. Because rope length and handle comfort are personal, a straightforward return policy can make choosing easier.

Home-space and setup considerations

Before you buy, measure the space where you plan to use the jump rope. Most adults need 8 to 10 feet of horizontal space to swing comfortably and a vertical clearance of 8 to 10 feet depending on the rope and whether you’ll attempt higher jumps or double-unders. Garages and basements often provide ample height; many spare rooms and apartment living rooms will work too, but be mindful of ceiling fans and light fixtures.

Floor surface matters. Hardwood or rubber gym flooring is ideal—your ankles get good response and the rope wears more slowly. Concrete is the roughest and will wear cable ropes faster; a small jump mat or interlocking rubber tiles can protect both the rope and your joints. If noise is a concern, a mat also helps muffle impact and reduce neighbor complaints.

If you plan to use the rope outdoors on sidewalks or driveways, pick a durable beaded or coated rope and expect more wear. Also account for weather—store ropes indoors when not in use to preserve the handles and cable coatings.

Safe use and basic maintenance

Start with good basics to avoid frustration and reduce wear:

  • Warm up: Spend five minutes on dynamic mobility—ankle circles, hip swings, and marching—to prepare your joints. Jumping cold can feel jarring.
  • Learn the form: Keep your elbows close to your ribs, use your wrists to turn the rope, and jump softly from the balls of your feet about 1 to 2 inches off the ground. Keep your head neutral and gaze forward.
  • Progress gradually: If you’re new, use short intervals (20–30 seconds) with rest between sets. Build endurance over several weeks rather than trying long continuous sessions on day one.
  • Footwear and surface: Wear supportive athletic shoes with cushioning and good heel support. Avoid barefoot jumping on hard surfaces. If you have knee or ankle concerns, use a shock-absorbing mat and focus on shorter sessions.
  • Inspect and clean: Periodically check the cable or rope for frayed sections, especially if you use it outdoors. Wipe handles with a damp cloth to remove sweat. If the rope has a coated cable, avoid storing it kinked around the handles; loop it loosely to prevent creases.
  • Replace parts as needed: Some ropes have replaceable cables or end parts; keeping spare cables extends the life of a quality pair of handles. If bearings feel gritty, small amounts of lubricant can improve spin, but consult the manufacturer’s guidance before applying anything to plastic or rubber components.
  • Store properly: Hang the rope on a hook or coil it loosely in a bag. Avoid sharp bends that could weaken the cable over time.

Which jump rope is right for your goals?

If your priority is quick cardio intervals to slot into a crowded week, choose a comfortable, fast-spinning rope you can install quickly and keep handy. For learning technique and for beginners, a slightly heavier beaded or leather rope with forgiving arc and visible swing can speed progress. If you train in small apartments or shared living spaces, prioritize quieter ropes and a shock-absorbing mat. For skill-focused athletes working toward double-unders, a speed rope with smooth bearings will be most helpful.

Use this short checklist while shopping:

  • Will it fit the ceiling height and floor surface where you’ll use it?
  • Can you adjust length easily for different users?
  • Do the handles feel secure and comfortable?
  • Is the rope durable enough for indoor or outdoor use as you need?
  • Does the seller offer a reasonable return policy or warranty?

Conclusion

A jump rope can be a high-value addition to a home fitness setup—compact, affordable, and versatile. Match rope style to your skill level and training goals, check adjustability and handle comfort, and plan your space and surface to protect both your joints and the rope. If you’re ready to try one, pick a rope with easy returns and a clear warranty so you can test feel and length at home. Browse our curated selection to compare types and find a jump rope that fits your ceiling height, workout goals, and living situation—then add a mat if you need extra shock absorption or noise reduction.
Foam Roller: How to Choose, Use, and Care for One in Your Home Gym

A foam roller is a simple, affordable tool that can make your warm-ups, cooldowns, and mobility work more effective at home. Whether you’ve set up in a garage gym, basement, spare room, apartment living room, or a dedicated home studio, a foam roller can help you address tight muscles, improve range of motion, and support recovery after tough workouts. This guide focuses specifically on choosing the right foam roller, how to set it up in typical U.S. living spaces, safe use, and basic upkeep so the roller lasts and keeps working well.

Below you’ll find practical selection criteria and space considerations tailored to home use, clear guidance on safe techniques, and a direct comparison to close alternatives like massage balls and massage guns. The goal is to make a confident purchasing decision without guesswork—what length, density, and texture really matter for your setup and goals—and then get the most out of the roller day after day.

Why choose a foam roller for your home gym

A foam roller is portable, low-tech, and useful for a broad range of users from beginners to serious lifters. For most home gym shoppers, a foam roller can be a go-to tool for:

  • Easing muscle tightness after strength sessions or long runs.
  • Improving mobility before activities like squats, lunges, Pilates, or yoga.
  • Offering a self-massage option when you don’t want to book a professional session.

How it differs from close alternatives: massage balls and lacrosse balls offer much more pinpoint pressure for small areas like the glutes and shoulders, while massage guns deliver percussive therapy that can be useful for quick, targeted work. A foam roller covers larger muscle groups efficiently and is especially handy for back and leg work where rolling across a longer surface helps distribute pressure. For many home users, a foam roller is the best first purchase because it’s versatile and easy to use even in small spaces.

Types of foam rollers and how to pick one

Choosing the right foam roller starts with a few key decisions: length, density, and surface texture. Think about your typical workouts, your body size, and where you’ll store it.

  • Length: Short rollers (roughly a foot long) are portable and travel-friendly; mid-length rollers (around 18 inches) are the most versatile for single-person use; long rollers (about 36 inches) are often used for spine alignment, Pilates exercises, or when you want to roll while lying flat across the room. If you plan to use the roller for back alignment or partner-assisted work, a longer model may suit you better.
  • Density: Softer foam is more comfortable for beginners or people with very sensitive muscles; firmer foam provides deeper pressure and is common among experienced exercisers. If you’re unsure, choose a medium-density roller that balances comfort and effectiveness.
  • Surface: Smooth rollers give even pressure and are easy to clean. Textured rollers, with ridges or knobs, simulate a deeper massage and can be useful for breaking up tougher muscle knots, but they can feel intense at first.
  • Construction: Some rollers are solid foam, others have a hollow plastic core wrapped in foam. Solid rollers are simple and durable, while hollow-core options can be stiffer and sometimes lighter to move around the room. Consider weight if you’ll be moving it up and down stairs or storing it in a closet.

Selection criteria checklist:

  • Your experience level and pain tolerance (soft to firm).
  • Intended use: recovery, mobility, Pilates, or spinal alignment.
  • Storage space and portability needs.
  • Durability and cleaning needs (smooth surfaces tend to be easier to wipe down).

Home-space and setup considerations

A foam roller takes up little space, but a few practical details make it work best in a home setting.

  • Flooring: Use your foam roller on a stable surface. Hard floors, carpet, or a dedicated exercise mat all work; a mat gives extra grip and comfort for shoulders or elbows. If you have delicate hardwood or laminate, place a mat under the roller to protect the floor and prevent slipping.
  • Ceiling height and clearance: Rolling the upper back and shoulders requires enough room to extend your arms above your head while lying on the roller. Most apartments and garages are fine, but check for low light fixtures or rafters in a garage gym.
  • Storage: A mid-length roller fits under beds or along a shelf. Longer rollers can be stored vertically in a closet or attached to wall hooks. If space is tight, consider a travel-size roller for core mobility and short sessions.
  • Delivery, assembly, and returns: Most foam rollers arrive ready to use with no assembly. Check the retailer’s return policy in case density or textured surfaces don’t feel right when you try them at home.

How to use a foam roller safely and effectively

Start slow and learn to modulate pressure. A foam roller is effective when used with attention to breathing, muscle engagement, and steady motion.

  • Warm up first: A five- to ten-minute general warm-up (walking, light cycling) helps increase blood flow so rolling is more comfortable and productive.
  • Basic technique: Move slowly, about an inch per second, and spend 20–60 seconds on an area. Roll until you find a tender spot, then pause and hold pressure for 20–30 seconds while breathing deeply. Avoid rolling directly on bones or joints.
  • Spinal caution: When rolling the back, focus on the muscles on either side of the spine rather than rolling directly over the vertebrae. For neck work, use a softer roller and minimal pressure; supporting your head with your hands reduces strain.
  • Avoiding pain: You should feel pressure but not sharp pain. If something causes shooting pain, stop and reassess form or consult a healthcare professional. Foam rolling is not a substitute for medical evaluation for persistent pain.
  • Frequency and timing: Rolling before a workout can help increase mobility for warm-ups, while rolling after can help with cooldown and muscle relaxation. Daily short sessions or several times weekly tends to work for most people.

Sample beginner routine (10 minutes)

  • Calves: Sit with the roller under your calves, using hands to lift hips and roll from ankle to below the knee, 30–60 seconds each side.
  • IT band/glutes: Lie on your side with the roller under the outer thigh or glute, roll gently for 30–60 seconds per side; use hands and feet for support.
  • Quads: Face down with roller under the thighs, support yourself with forearms and roll from hip to knee for 30–60 seconds.
  • Upper back: Lie with the roller under your thoracic spine, arms crossed over chest or hands behind your head, roll for 30–60 seconds focusing on the mid-back.

Maintenance, cleaning, and lifespan

A foam roller is low-maintenance, but a few simple habits keep it sanitary and functional longer.

  • Cleaning: Wipe smooth surfaces with a mild soap and water solution or a gym-equipment cleaner after sweaty sessions. Avoid submerging foam that has a hollow core; instead, wipe thoroughly and let air dry.
  • Odor and sweat: Let the roller dry fully before storing to prevent odors. If it develops a persistent odor, a gentle vinegar solution can help, but test a small area first to ensure it won’t damage the finish.
  • Inspecting for wear: Check for cracks, splits, or permanent deformation. If the roller loses shape, becomes crumbly, or develops hard spots, it’s time to replace it.
  • Storage: Keep rollers out of extreme heat or direct sunlight, which can degrade foam. Storing vertically can save space, but avoid placing heavy objects on top of a foam roller for long periods.

When to choose a foam roller versus alternatives

A foam roller is a strong choice for general mobility and large-muscle work. But consider alternatives for specific needs:

  • Massage balls or lacrosse-style balls: Better for pinpointing small, stubborn knots in the glutes, shoulders, or feet. Bring one if you want very targeted pressure.
  • Massage gun/percussive devices: Useful for quick, handheld percussion on larger muscles when you want to combine speed with deeper tissue stimulation. Not necessary if you prefer a slower, rolling technique or need a travel-friendly option.
  • Vibration rollers: These combine rolling with vibration and can offer a different sensation that some users like for warm-ups. Try if you want additional sensory input, but they’re often more expensive and not essential.
  • Half-round or balance rollers: Designed more for stability and Pilates-style exercises than deep tissue work; choose one if balance training and core work are priorities.

Conclusion and next step

A foam roller is a versatile, space-friendly tool for most home gym setups—whether you’re in a garage, basement, apartment, or a spare room. Focus on the length, density, and texture that match your tolerance and intended use, plan where you’ll store and use it, and learn safe rolling techniques to get the most benefit. If you’re ready to add one to your home gym, start with a mid-length, medium-density model to cover the widest range of needs, and check the retailer’s return policy so you can swap densities if it doesn’t feel right. Browse rollers by length and texture, read customer feedback on feel and durability, and choose the foam roller that fits your space and routine.

How to Choose and Use Resistance Bands for Home Workouts

A productive home gym does not need bulky machines or stacks of cast-iron plates. Resistance bands provide a compact way to build strength, improve mobility, and practice functional movement. They work equally well in a large house, a small apartment, or a temporary workout space.


Available in multiple styles and tension levels, resistance bands can serve beginners, experienced lifters, athletes, and people returning to exercise. They allow you to adjust workout intensity without changing heavy plates, making them a practical and affordable option for home fitness. With the right band types and a thoughtful routine, you can support long-term progress without filling your living space with equipment.


Modern home training emphasizes accessible movement, useful strength, coordination, and consistency. Resistance bands support all of these priorities. They can be used for warmups, rehabilitation exercises, quick weekday sessions, strength training, and full-body circuits. Their portability also makes them convenient for travel.


Comparing the Main Types of Resistance Bands

Different resistance bands are designed for different exercises and training goals. Consider your preferred movements, required resistance, and available storage before choosing a set.


Tube bands with handles are popular for upper-body movements such as chest presses, seated rows, biceps curls, and overhead presses. Many kits include interchangeable tubes that connect to handles with carabiners, allowing users to increase resistance gradually. Inspect the clips, handles, and tubing regularly because hardware quality affects safety and durability.


Heavy loop bands, also called power bands, are continuous rubber loops used for pull-up assistance, squats, deadlifts, stretching, and supplemental powerlifting work. They provide strong resistance and can support both upper- and lower-body exercises. When using one with a door attachment, verify that the anchor is secure before applying tension.


Mini loop bands have a smaller circumference and are useful for glute activation, hip stability, side steps, monster walks, and squat variations. Placing one around the thighs or ankles adds resistance to lower-body movements. Fabric mini bands are often comfortable and less likely to roll during repeated exercises.


Flat therapy bands are wide, lightweight strips commonly used for rehabilitation, stretching, mobility work, and warmups. Their gradual resistance suits controlled exercises and lower-impact training. Fabric resistance bands are also popular because their woven construction can reduce rolling, pinching, and discomfort during lower-body workouts.


A complete home setup may include more than one style. Combining tube, loop, mini, and flat bands gives you more ways to adjust tension and train different movement patterns.


Why Add Resistance Bands to Your Workout Routine?

Resistance bands are known for progressive resistance. Unlike dumbbells or kettlebells, which are primarily affected by gravity, bands become harder to stretch as they lengthen. This rising tension can match the way muscles become stronger near the end of a movement’s range of motion.


The band can keep muscles engaged during both the lifting and lowering portions of an exercise. That sustained tension may increase time under tension and make a moderate load challenging without requiring a large weight collection. Bands can therefore complement free weights, bodyweight movements, and machines.


They are also a joint-friendly choice for many exercisers. Bands provide meaningful resistance without the same level of compressive loading associated with heavy equipment. This makes them useful for adults rebuilding strength after minor setbacks, older people working to maintain muscle and bone health, and anyone seeking a sustainable, lower-impact workout option.


Because bands offer limited momentum, they encourage controlled repetitions and attention to technique. Proper form is still essential, but adjustable tension makes them accessible to many ages and fitness levels.


Band Type Best Uses Main Advantages Important Considerations
Tube bands with handles Chest presses, rows, shoulder presses, and other upper-body exercises Comfortable grips and adjustable resistance Inspect handles, clips, and carabiners regularly
Heavy loop power bands Pull-up assistance, squats, deadlifts, and powerlifting support Strong tension and excellent versatility Use secure anchoring or stable footing
Mini fabric loop bands Glute activation, hip work, side steps, and lateral walks Comfortable, durable, and less likely to roll Each band offers a fixed resistance level
Flat therapy bands Rehabilitation, stretching, warmups, and mobility training Gentle, progressive, low-impact resistance Check for thinning, cracks, or tears

How to Build a Full-Body Resistance Band Workout at Home

A balanced resistance band workout should include pushing, pulling, squatting, and hinging so the upper body, lower body, and core all receive attention.


For upper-body training, anchor a heavy loop band to a reliable door attachment or another approved fixed point. Banded lat pulldowns, chest flies, face pulls, and seated rows can target the back, chest, and shoulders without a large cable machine. Tube bands with handles are useful for presses, rows, curls, and triceps exercises.


For lower-body work, place a mini loop band above the knees or around the ankles. Squats, lateral walks, monster walks, and hip-abduction drills challenge the glutes and hip stabilizers. Loop bands can also add resistance to Romanian deadlifts and other hinge patterns, helping develop balance, posture, and functional strength when performed with control.


Progressive overload keeps a home workout challenging. You can choose a stronger band, add repetitions or sets, extend the range of motion, slow the lowering phase, or improve control. Supersets and circuits can raise your heart rate while building strength. For example, pair a banded row with a squat, or combine a chest press with a lateral walk for an efficient full-body session.


Resistance Band Safety, Care, and Storage

Resistance bands are simple to use, but they still require regular inspection. A damaged band can snap, slip, or lose tension unexpectedly. Before each workout, check for tears, cracks, dry or brittle areas, worn seams, and signs of friction. Inspect door anchors, handles, clips, and other accessories as well.


Stop using any band with visible damage and replace it before high-tension training. Keep bands away from direct sunlight, excessive heat, and sharp edges. Clean them with a damp cloth and mild soap as needed, then allow them to dry completely. Avoid harsh chemicals that may weaken the material.


Maintenance Task Recommended Action Suggested Frequency
Visual inspection Check for tears, cracks, dry spots, and worn seams Before every workout
Storage Keep bands away from direct sunlight and heat After every use
Cleaning Wipe with a damp cloth and mild soap Monthly or as needed
Anchor inspection Confirm door anchors and attachments are fully secured Before every anchored set

Resistance bands also require very little storage space. A set can fit in a drawer, closet, gym bag, or small storage bin. Their portability supports consistent training at home, in a hotel room, or while traveling. Since they do not require heavy plates on the floor, they can also reduce trip hazards in shared workout areas.


Choosing the Right Resistance Bands for Your Home Gym

The best resistance band set depends on your fitness level, preferred exercises, storage space, and long-term goals. Beginners may benefit from a graded loop set or multi-level tube kit. More experienced users may prefer heavy power bands, fabric mini loops, and a dependable anchor system.


Think about your main training purpose before purchasing. Mini fabric loops are practical for glute and hip training. Tube bands with handles and a door anchor are useful for cable-style exercises. Flat therapy bands are often better for rehabilitation, stretching, and gentle mobility work.


You can expand your workout area with simple accessories such as a yoga mat, foam roller, or adjustable jump rope. The goal is not to own the most equipment. It is to create a convenient environment that supports good form, consistent movement, and gradual progression.


With the right resistance bands and a well-planned routine, you can improve strength, coordination, mobility, and muscular endurance from home. Choose equipment that matches your needs, inspect it regularly, and increase the challenge at a manageable pace. Consistency matters more than complexity, and a carefully selected resistance band setup can support your fitness journey for years.

Complete Kettlebell Buying and Training Guide for Your Home Gym

Investing in versatile strength training equipment is one of the smartest decisions you can make for your home fitness routine. Among the myriad of options available today, the kettlebell remains an unrivaled tool for building functional strength, boosting cardiovascular endurance, and enhancing core stability. Its unique offset center of gravity demands continuous engagement from stabilizing muscles, transforming traditional lifts into dynamic, full-body movements. Whether you are setting up a dedicated garage gym or carving out a small corner in your living room, understanding how to select and utilize this classic piece of iron is essential for long-term success.

Choosing the right fitness gear requires careful consideration of your current fitness level, available space, and specific training goals. Unlike traditional dumbbells, which distribute weight evenly across the hand, a kettlebell swings and pulls against your grip, challenging your forearms, shoulders, and core in entirely new ways. By exploring the core features of quality equipment, learning proper movement patterns, and structuring your workouts effectively, you can maximize your investment while minimizing the risk of injury. This guide will walk you through everything you need to know to make an informed purchasing decision.

Understanding Kettlebell Anatomy and Materials

When you begin shopping for a kettlebell, you will quickly notice that not all models are created equal. The market generally divides options into two primary material categories: cast iron and competition style. Cast iron models are the traditional choice found in most commercial and home gyms. They are typically cast as a single solid piece of iron or feature a welded handle, and their physical dimensions increase as the weight gets heavier. This means a lightweight cast iron model will be smaller in volume than a heavy one, which can alter how the weight feels against your forearm during movements like presses or squats.

Competition style models, on the other hand, are manufactured according to strict international standards set by weightlifting federations. Regardless of whether a competition model weighs eight kilograms or thirty-two kilograms, its exterior dimensions—including the handle thickness, window size, and overall ball diameter—remain identical. This uniformity is particularly beneficial for athletes who want their technique to remain consistent as they progress to heavier weights. Furthermore, competition models are usually made of steel rather than cast iron, providing a smoother finish and a predictable contact point.

Surface finish and handle texture also play a critical role in your daily training experience. Many manufacturers apply a protective coating to prevent rusting and floor damage, such as powder coating, vinyl dipping, or rubber encasement. While vinyl or rubber coatings protect delicate home flooring, they can sometimes trap moisture underneath or feel overly bulky during high-rep swings. Powder-coated cast iron strikes a popular balance among home users, offering a textured surface that holds chalk well and provides a secure grip even when your hands become sweaty during intense conditioning sessions.

Selecting the Right Weight for Your Goals

Choosing the correct starting weight is perhaps the most crucial step in your purchasing journey. Selecting a weight that is too heavy can compromise your form and lead to premature fatigue, while choosing one that is too light will fail to stimulate adequate strength adaptations. Because these tools are used primarily for multi-joint, explosive movements that leverage the power of your hips and legs, your starting weight will likely be significantly heavier than what you would use for isolated dumbbell curls or lateral raises.

For most adult beginners, fitness experts generally recommend starting with a standard benchmark weight depending on baseline strength and body weight. As a general baseline, many men begin their journey with a sixteen-kilogram option, while many women start with an eight-kilogram or twelve-kilogram option. However, these are merely guidelines rather than strict rules. If you are completely new to resistance training or recovering from a previous injury, starting on the lighter end of the spectrum allows you to master fundamental movement patterns without placing excessive stress on your lower back and joints.

Fitness Level / User Type Recommended Starting Weight (Men) Recommended Weight (Women) Primary Training Focus
Beginner / Untrained 12 kg to 16 kg (26–35 lbs) 8 kg to 12 kg (18–26 lbs) Form mastery, mobility, and basic endurance
Intermediate Fitness 20 kg to 24 kg (44–53 lbs) 14 kg to 16 kg (31–35 lbs) Strength building, ballistic swings, and complexes
Advanced Lifter 28 kg to 32 kg+ (62–70 lbs+) 20 kg to 24 kg+ (44–53 lbs+) Maximal power output, heavy conditioning, and sport

As your strength and work capacity improve over time, you will naturally need to expand your collection. Many home gym enthusiasts eventually acquire a progression of three distinct weights: a light weight for overhead pressing, a moderate weight for swings, and a heavy weight for lower-body dominant movements like goblet squats and deadlifts. Building your collection gradually ensures that you always have the right tool for progressive overload while keeping your initial investment manageable.

Essential Movement Patterns and Workouts

Once you have secured your equipment, the next step is mastering the foundational movement patterns that deliver maximum fitness benefits. The hallmark exercise in any routine is the swing, a ballistic movement that targets the posterior chain—including the glutes, hamstrings, and lower back—while elevating your heart rate. Unlike a squat, which is a knee-dominant movement, the swing is a hip hinge. The power originates entirely from the explosive snap of your hips rather than a pull from your arms, making it an efficient exercise for both strength and conditioning.

In addition to ballistic movements like the swing, snatch, and clean, these versatile weights excel at grinding strength exercises. The goblet squat, for example, is an exceptional lower-body movement that encourages an upright torso and deep range of motion. By holding the weight securely against your chest, you engage your upper back and core stabilizers while driving through your heels to build powerful quadriceps and glutes. Similarly, overhead presses challenge unilateral stability, forcing your body to correct minor imbalances between your left and right sides.

Integrating these movements into a structured routine does not require complicated programming. A simple, effective full-body workout can be structured using timed intervals or round-based formats. For instance, performing ten swings followed by five goblet squats and five overhead presses per arm, repeated for twenty minutes with strategic rest breaks, provides an intense cardiovascular and muscular challenge. Prioritizing movement quality over speed or weight volume during these sessions ensures that you build sustainable strength while protecting your joints from unnecessary strain.

Home Setup, Space Efficiency, and Safety

One of the primary advantages of incorporating a kettlebell into your home fitness ecosystem is its remarkable space efficiency. Unlike bulky cable machines or expansive multi-gym setups, a complete set of several weights takes up very little floor space. This compact footprint makes it an ideal solution for apartment dwellers, garage gym owners, or anyone who wants a comprehensive full-body workout without cluttering their living environment. Storing them on a simple, sturdy rack keeps your workout area organized and prevents accidental tripping hazards.

Safety should always remain paramount when training in a home environment without direct supervision. Because these dynamic tools involve swinging momentum and heavy iron masses, establishing a clear workout perimeter is essential. Ensure you have adequate clearance overhead for presses and sufficient horizontal space around you during swings so you never risk striking household furniture or walls. Furthermore, inspecting the handle surface regularly for rough spots or casting flaws prevents blisters and hand tearing during high-rep sets.

Floor protection is another practical consideration for residential workout spaces. Even if you maintain strict control over your equipment, accidental drops can occur during fatiguing sets. Laying down high-density rubber interlocking tiles or heavy-duty fitness mats absorbs impact, dampens noise, and protects underlying flooring from chipping. Wearing supportive athletic shoes with flat soles also enhances your stability during grounded movements, ensuring a secure foundation as you drive power upward from the floor.

Making Your Final Purchasing Decision

Navigating the vast landscape of home fitness equipment can feel overwhelming, but investing in a versatile, durable weight simplifies your path toward long-term health and physical resilience. By focusing on quality craftsmanship, selecting an appropriate starting weight that aligns with your current capabilities, and prioritizing safe training habits, you create a sustainable foundation for ongoing progress. Whether your goal is to enhance daily functional mobility, build lean muscle mass, or improve cardiovascular endurance, this classic piece of iron delivers unmatched value.

Explore our curated selection of high-grade fitness equipment designed to withstand rigorous daily use while complementing your personal training space.

Unlock Your Strength: 5 Essential Weight Bench Workouts for Beginners

Are you ready to transform your fitness journey and build a stronger, more confident you? If you’ve recently invested in a weight bench for your home gym, or are considering adding one, you’ve made an excellent choice! A workout bench is an incredibly versatile piece of equipment that can unlock a wide range of exercises, especially when combined with free weights like dumbbells or a barbell.

For beginners, stepping into strength training can feel intimidating. However, mastering the fundamentals using a weight bench provides the stability, support, and range of motion necessary to build a rock-solid physical foundation. This comprehensive guide is designed specifically for beginners, offering five fundamental exercises, proper biomechanical breakdowns, common mistakes to avoid, and a structured beginner routine to maximize your results at home.

Why a Weight Bench is Your Home Gym Essential

Before diving into the exercises, let’s briefly discuss why a weight bench is such a game-changer for home fitness.

When performing exercises on the floor (such as a floor press or floor bridge), your range of motion is strictly limited by the ground. Your elbows hit the floor before your chest can fully stretch, and your back support is flat and unnatural. A quality weight bench solves these limitations by:

  1. Unlocking Full Range of Motion:Allowing your arms and shoulders to move through a complete biomechanical arc, resulting in deeper muscle fiber recruitment.
  2. Providing Core and Spinal Support:Stabilizing your upper back and spine so you can safely lift heavier loads without straining your lower back.
  3. Offering Adjustable Angles:Flat, incline, and decline positions allow you to target different areas of major muscle groups (such as the upper and lower chest) with pinpoint precision.

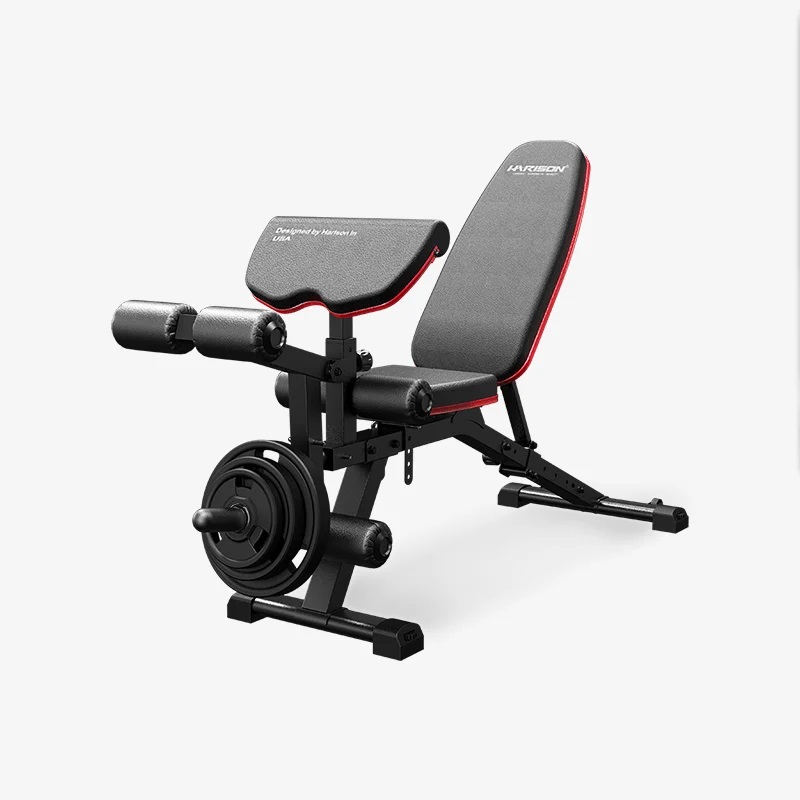
HARISON HR-609 Adjustable Weight Bench

The 5 Essential Weight Bench Exercises for Beginners

Here are five foundational exercises to get you started, focusing on proper form, controlled movements, and targeted muscle engagement. Remember to always start with light free weights to master the technique before increasing the load.

1. Dumbbell Bench Press

*   Target Muscles: Pectoralis major (chest), anterior deltoids (shoulders), triceps brachii.

*   Why It Matters: This is the ultimate upper-body pressing movement. Unlike a barbell, dumbbells require each arm to work independently, correcting muscular imbalances and engaging deep stabilizer muscles.

*   How to Perform:

  1. Lie flat on your back on the weight bench with your feet planted firmly flat on the floor to create a stable base.
  2. Hold a dumbbell in each hand at chest level, palms facing forward (away from you), with your elbows bent at roughly a 90-degree angle.
  3. Press the dumbbells straight up in a controlled motion until your arms are fully extended over your chest, without locking your elbows at the top.
  4. Slowly and deliberately lower the dumbbells back down to the starting position, feeling a gentle stretch across your chest.

*   Pro Tip: Keep your shoulder blades retracted (“pinned” into the bench) throughout the entire movement to protect your shoulder joints.

2. Supported Dumbbell Rows

*   Target Muscles: Latissimus dorsi (lats), rhomboids, rear deltoids, biceps.

*   Why It Matters: Many beginners suffer from “desk posture” (rounded shoulders). Rows strengthen the pulling muscles of the upper back, improving posture and balancing out your pressing strength.

*   How to Perform:

  1. Place your left knee and your left hand flat on the weight bench for stable support. Your back should be straight and roughly parallel to the floor.
  2. Hold a dumbbell in your right hand, letting your arm hang fully extended toward the floor.
  3. Pull the dumbbell upward toward your hip/lower ribcage, leading with your elbow and squeezing your shoulder blade at the very top of the movement.
  4. Lower the weight slowly back to the starting position. Complete all reps on one side before switching to the other.

*   Pro Tip: Avoid twisting your torso as you lift. Keep your hips square to the bench.

3. Incline Dumbbell Press

*   Target Muscles: Clavicular head of the pectoralis major (upper chest), anterior shoulders, triceps.

*   Why It Matters: The flat bench press builds overall chest mass, but the incline press specifically targets the upper chest, creating that full, well-rounded aesthetic while preventing upper-shelf sagging.

*   How to Perform:

  1. Adjust your workout bench to an incline of approximately 30 to 45 degrees.
  2. Sit back on the bench with a dumbbell in each hand resting on your thighs, then kick them up to your shoulders as you lie back.
  3. Press the dumbbells upward and slightly inward, focusing on squeezing your upper chest at the peak contraction.
  4. Lower the weights with control until they are level with your upper chest.

*   Pro Tip: Do not set the incline too high (above 60 degrees), or the movement turns into a shoulder press rather than a chest exercise.

4. Weighted Step-Ups

*   Target Muscles: Quadriceps, gluteus maximus, hamstrings, core stabilizers.

*   Why It Matters: Leg training is often neglected on benches, but step-ups are a phenomenal functional movement that mimics climbing stairs, enhances single-leg stability, and builds incredible lower body strength.

*   How to Perform:

  1. Stand facing your weight bench, holding a light dumbbell in each hand by your sides.
  2. Place your right foot firmly flat on top of the bench.
  3. Drive through your right heel, engaging your glute and quad to lift your entire body up onto the bench until your left leg joins it.
  4. Step backward down with your left foot first, followed by your right foot.
  5. Alternate your leading leg with each repetition.

*   Pro Tip: Never push off the floor with your trailing foot; let the leg on the bench do 100% of the lifting work.

5. Dumbbell Pullovers

*   Target Muscles: Latissimus dorsi, pectoralis major, serratus anterior, triceps, and core.

*   Why It Matters: The pullover is a classic bodybuilding movement that expands the ribcage, stretches the thoracic fascia, and works both the upper back and chest simultaneously.

*   How to Perform:

  1. Lie perpendicular (across) the weight bench so that only your upper back and shoulders are supported by the pad, with your feet planted flat on the floor and hips dropped slightly downward.
  2. Hold a single dumbbell with both hands directly above your chest, arms slightly bent at the elbows.
  3. Inhale deeply as you slowly lower the dumbbell in a smooth arc backward behind your head until it is level with the bench.
  4. Exhale as you pull the dumbbell back over your chest using your lats and chest muscles.

*   Pro Tip: Keep your hips stable and your core braced to prevent your lower back from arching excessively during the stretch.

HARISON HR-610 Multi-functional Weight Bench

Essential Considerations for Safe & Effective Workouts

To ensure you get the absolute most out of your home gym routine while avoiding injuries, keep these golden rules in mind:

Principle What It Means Why It Matters
:— :— :—
**1. Dynamic Warm-Up** 5-10 minutes of light movement and dynamic stretches before lifting. Prepares your joints, increases blood flow, and prevents muscle pulls.
**2. Form Over Weight** Prioritizing perfect technique over heavy numbers on the dumbbells. Ensures correct muscle activation and protects your joints from wear.
**3. Progressive Overload** Gradually increasing weight, reps, or sets over weeks and months. Forces your muscles to continually adapt, grow stronger, and tone.
**4. Rest and Recovery** Taking 48 hours of rest between training the same muscle groups. Muscles grow *during* rest, not while you are actively working out in the gym.

Sample 3-Day Beginner Weight Bench Routine

Put your new knowledge into action with this simple, highly effective 3-day full-body routine designed around a basic weight bench and dumbbells.

*   Day 1: Upper Body Push & Pull

*   Dumbbell Bench Press: 3 sets x 10 reps

*   Supported Dumbbell Rows: 3 sets x 10 reps per side

*   Incline Dumbbell Press: 3 sets x 12 reps

*   Dumbbell Pullovers: 3 sets x 12 reps

*   Day 2: Rest & Active Recovery (Light walking or stretching)

*   Day 3: Lower Body & Core

*   Weighted Step-Ups: 3 sets x 10 reps per leg

*   Dumbbell Romanian Deadlifts (holding weights while hinging at hips): 3 sets x 12 reps

*   Bodyweight Bulgarian Split Squats: 3 sets x 8 reps per leg

*   Plank on Bench: 3 sets x 45 seconds hold

*   Day 4 & 5: Rest or Light Cardio

*   Day 6: Full Body Hypertrophy Circuit (Repeat Day 1 & 3 movements with lighter weights for higher reps).

Conclusion: Start Your Strength Journey Today!

Incorporating these five essential exercises into your routine will lay an unbreakable foundation for your strength training goals. Your weight bench is much more than just a piece of padded metal and vinyl; it is a gateway to a stronger, healthier, and more confident you.

Grab your free weights, step up to your workout bench, and start building the physique you’ve always wanted in the comfort and privacy of your home gym. Consistency is the ultimate key to success—commit to your routine, listen to your body, and enjoy the incredible progress you will make week after week!

Rowing Machine Benefits: Unlock the Ultimate Full-Body Workout at Home

Are you searching for the most effective way to boost your fitness, sculpt your physique, and improve your cardiovascular health, all from the comfort of your own home? Look no further than the rowing machine. Often overlooked in favor of treadmills or ellipticals, rowing machines offer a truly unparalleled full-body workout that engages nearly every major muscle group. If you’re serious about home fitness and want to invest in cardio equipment that delivers maximum results, understanding the unique advantages of rowing will change your perspective.

In this comprehensive guide, we will dive deep into why rowing is considered the “king” of indoor cardio, the science behind the stroke, and how you can leverage this machine to achieve professional-level fitness results without ever stepping into a commercial gym.

Why Rowing is the King of Full-Body Workouts

Unlike many other forms of cardio equipment that primarily target the lower body, a rowing machine demands coordinated effort from your legs, core, and upper body. Each stroke is a symphony of muscle engagement, making it one of the most efficient exercises you can do. You’re not just pushing with your legs; you’re engaging your glutes, hamstrings, and quads, then powerfully pulling with your back, shoulders, and arms, all while stabilizing your core.

The 86% Muscle Engagement Rule

Research into biomechanics shows that a proper rowing stroke utilizes approximately 86% of your body’s muscles [1]. This includes major muscle groups like the latissimus dorsi (back), trapezius, deltoids (shoulders), and the entire posterior chain. Because so much muscle mass is active simultaneously, your heart rate climbs faster and your metabolic demand increases, leading to superior calorie burn compared to walking or light cycling.

The Anatomy of a Perfect Rowing Stroke

To truly unlock the benefits of rowing, you must master the four phases of the stroke. Proper technique not only prevents injury but also ensures you are getting the maximum “bang for your buck” with every movement.

1. The Catch

This is the starting position. Your knees are bent, shins are vertical, and your arms are extended forward, gripping the handle. Your back should be straight, leaning slightly forward from the hips (at about the “11 o’clock” position).

*   Common Mistake: Hunching the shoulders or curving the spine. Keep your chest up and core engaged.

2. The Drive

The power phase. The drive should start with the legs. Imagine you are jumping away from the footplates. Once your legs are nearly straight, you hinge your torso back to the “1 o’clock” position, and finally, you pull the handle toward your lower ribs with your arms.

*   The Power Ratio: Remember the 60-30-10 rule: 60% of the power comes from the legs, 30% from the core/torso hinge, and only 10% from the arms.

3. The Finish

At the finish, your legs are extended, your torso is leaning slightly back, and the handle is pulled into your upper stomach. Your elbows should be tucked in, not flared out. This position challenges your core stability and provides a brief moment of muscular tension.

4. The Recovery

The recovery is the drive in reverse. Extend your arms first, hinge your torso forward, and then bend your knees to slide back to the catch. This phase should be controlled and take twice as long as the drive. It is your “active rest” moment.

The Power of Low-Impact, High-Reward Exercise

One of the standout rowing machine benefits is its low-impact nature. For those with joint concerns or recovering from injuries, rowing provides an intense workout without the jarring impact associated with running or jumping.

Protecting Your Joints

When you run, your joints absorb forces up to 3-4 times your body weight with every step. In contrast, rowing is a seated, fluid motion. Your feet never leave the footplates, and the resistance is distributed across the entire body. This makes it an ideal choice for people of all ages and fitness levels, from beginners to elite athletes, ensuring a sustainable path to better health. It is particularly beneficial for those with osteoarthritis or those who are significantly overweight and need to avoid excessive knee strain.

Cardiovascular Health and Endurance

As premier cardio equipment, rowing machines excel at elevating your heart rate and improving cardiovascular fitness. Regular rowing sessions strengthen your heart and lungs, enhance blood circulation, and increase your stamina.

Aerobic vs. Anaerobic Training

The beauty of rowing is its versatility.

*   LISS (Low-Intensity Steady State): By maintaining a steady, moderate pace for 45-60 minutes, you build a powerful aerobic base and improve fat oxidation.

*   HIIT (High-Intensity Interval Training): By performing short bursts of maximum-effort rowing followed by rest, you improve your anaerobic capacity and trigger the “afterburn effect” (EPOC), burning calories for hours after your workout ends.

The Ultimate Home Fitness Solution

For anyone dedicated to home fitness, a rowing machine is an invaluable addition. It’s compact, often foldable, and relatively quiet, making it perfect for apartments or smaller living spaces.

Convenience and Consistency

The convenience of having such a powerful piece of equipment readily available means no more excuses about bad weather or crowded gyms. You can squeeze in a quick, effective workout whenever your schedule allows, ensuring consistency and faster progress towards your fitness goals. Plus, the engaging nature of rowing, mimicking the natural motion of being on water, can make your workouts more enjoyable and less monotonous than other forms of exercise.

Beyond Physical: Mental Benefits of Rowing

Beyond the physical transformations, rowing offers significant mental benefits. The rhythmic, repetitive motion can be meditative, helping to reduce stress and improve focus.

The “Zen” of the Stroke

Many rowers describe a “flow state” achieved during long sessions. The requirement for total focus on rhythm and breathing forces the mind to disconnect from daily anxieties. It provides a fantastic outlet for releasing tension and boosting your mood through endorphin release. The challenge of mastering proper rowing technique and pushing your limits can also build mental resilience and discipline, qualities that extend far beyond your workout.

Common Rowing Mistakes to Avoid

To ensure you reap the full rowing machine benefits, watch out for these common errors:

  1. The “Rainbow” Handle Path:Moving the handle up and over your knees. Your arms should extend *before* your knees bend on the recovery.
  2. Death Grip:Gripping the handle too tightly will fatigue your forearms. Keep a loose, “hook” grip.
  3. Leading with the Butt:If your seat moves back before your torso, you are losing leg power. The legs and torso should move in a coordinated sequence.
  4. Setting Resistance Too High:On air rowers, the “damper” is not a difficulty setting. Setting it to 10 too early can lead to poor form and back strain. Start at 3-5.

Sample 20-Minute Home Rowing Workout

Ready to start? Try this “Pyramid” workout to test your speed and endurance:

*   0-5 min: Warm-up at a light, steady pace (18-22 strokes per minute).

*   5-8 min: Moderate intensity (24 strokes per minute).

*   8-12 min: High intensity (28-30 strokes per minute).

*   12-15 min: Moderate intensity (24 strokes per minute).

*   15-20 min: Cool-down and light stretching.

Conclusion: Your Journey to a Stronger You Starts Here

In summary, the rowing machine stands out as the ultimate piece of cardio equipment for a comprehensive full-body workout. Its low-impact nature, incredible efficiency, and versatility make it an indispensable tool for anyone committed to home fitness. Whether you are a busy professional looking for a 15-minute blast or a dedicated athlete building endurance, rowing offers a path to a more toned physique, a stronger heart, and a clearer mind.

Don’t just work out; transform your entire body and mind. Discover the difference a rowing machine can make in your fitness journey today!

Selectorized vs Plate-Loaded Machines | Commercial Gym Guide | HARISON

Selectorized vs Plate-Loaded Machines – Which Is Better for Your Gym? 🏋️‍♂️⚖️

Buying commercial strength equipment is a major investment – a full 12-18 machine line typically costs 40,000to120,000. Facing the choice between selectorized (weight stack) and plate-loaded machines, many gym owners feel confused. Selectorized machines are quick and easy for the general crowd. Plate-loaded machines offer higher resistance ceilings and appeal to serious lifters. This guide helps you find the right mix for your facility. HARISON offers both types as part of our complete commercial strength lineup.

1. What Are Selectorized Machines? (Pin-&-Go Convenience) 🎯

How They Work – Built-In Weight Stack

Selectorized machines have a built-in weight stack. Users simply insert a pin to select resistance. The weight stack moves along guide rods, guided by pulleys and cams. Operation is intuitive – almost no instruction needed. HARISON’s G40 Track series is a prime example of smart selectorized equipment with real-time performance tracking.

Best For – High-Traffic, Mixed-Skill Facilities

Weight changes take just seconds. This makes selectorized machines ideal for commercial gyms, hotel fitness centers, corporate gyms, and apartment fitness rooms – anywhere with high traffic and varied user skill levels.

✅ Pros: Fast weight changes, low injury risk, enclosed weight stack stays clean

HARISON Selectorized Solutions

HARISON offers the G40 Track smart selectorized series, featuring 8 machines covering all major muscle groups – chest, back, shoulders, legs, and arms. Each machine includes an HD display tracking duration, calories, and strength per set. Connect to the HARISON App for personalized training suggestions.

2. What Are Plate-Loaded Machines? (Customizable Resistance) 🏋️

How They Work – Load Your Own Plates

Plate-loaded machines require users to manually add Olympic plates to weight horns or guide rails. This allows higher peak resistance and often features movement paths closer to free-weight training. HARISON’s heavy-duty plate-loaded lineup includes leg presses, chest presses, and row machines built for commercial intensity.

Best For – Performance-Driven Environments

Plate-loaded machines are more popular in athletic training centers, college weight rooms, and gyms with experienced lifter bases. They’re also budget-friendly for facilities that already own plate sets – you’re just buying the frame and pivot system.

✅ Pros: Unlimited resistance ceiling, biomechanically optimized paths, independent unilateral training options

HARISON Plate-Loaded Solutions

HARISON’s commercial plate-loaded series includes:

  • Leg Press – heavy-duty linear bearing design

  • Seated Chest Press – converging press path for natural feel

  • Seated Row – independent movement arms for unilateral training

  • Lat Pulldown – smooth cam profile for consistent tension

3. Key Comparison – At a Glance 📊

Feature Selectorized Plate-Loaded
Resistance Change Pin select – seconds Manual plate loading – slower
Best For All skill levels Intermediate to advanced lifters
Movement Path Guided fixed path – safer Closer to free weights, biomechanically tuned
Weight Capacity Typically 200-300 lbs per stack 400+ lbs, higher ceiling
Space Needed Smaller footprint More space for plate storage
Maintenance Low – enclosed design Moderate – simpler parts
Price Range 1,800–5,500+ 1,800–8,000+
Best Setting Commercial gyms, hotels, corporate, apartments Performance centers, powerlifting gyms, CrossFit
HARISON Series G40 Track Smart Series Heavy-Duty Plate-Loaded Line

4. What’s the Winning Strategy? The Smart Mix ✅

The Hybrid Approach (Best for Most Commercial Gyms)

Successful commercial strength floors use a “selectorized first, plate-loaded second” strategy. Selectorized machines serve the general member population – safe, efficient, easy. Plate-loaded machines attract serious lifters – heavy weight, advanced movement patterns. HARISON delivers both under one roof – simplifying procurement and service.

Recommended Ratio

Industry experience suggests for a mid-sized commercial gym: 60% selectorized + 30% plate-loaded + 10% free weights.

  • Selectorized should cover core muscle groups – chest, back, shoulders, legs

  • Plate-loaded should prioritize heavy movements – leg press, chest press, row

Why Choose HARISON for Your Strength Floor

  • Full-line supplier – both selectorized and plate-loaded from one brand

  • Smart integration – G40 Track series with performance tracking and HARISON App

  • Flexible sourcing – no MOQ, mixed container shipping

  • Free layout consultation – professional design for your floor plan

Conclusion – Choose the Right Mix for Your Members 🎯

There’s no single “better” – the right choice depends on your members.

  • Commercial gyms with diverse members: Prioritize selectorized for the main floor

  • Performance training facilities: Emphasize plate-loaded for serious athletes

  • Most successful strength floors: Blend both – selectorized for volume, plate-loaded for intensity

HARISON delivers both selectorized and plate-loaded commercial strength solutions – all from one reliable manufacturer. Contact our commercial team for a customized strength floor layout and quote.

Shop HARISON Commercial Strength Equipment

Frequently Asked Questions (FAQ) ❓

Q1: Are plate-loaded machines better for building strength?

A: Plate-loaded machines typically allow for heavier loading, making them excellent for progressive overload. The movement paths also often mimic barbell patterns more closely, which many advanced lifters prefer for strength development.

Q2: Why are selectorized machines more expensive than plate-loaded?

A: Selectorized machines include a built-in weight stack, guide rods, shrouds, and more complex pulley/cam systems – all of which add to manufacturing costs. Plate-loaded machines have simpler mechanical structures.

Q3: Can I convert a plate-loaded machine to selectorized?

A: Some manufacturers offer conversion kits, but generally, this is not possible for most machines. The reverse (selectorized to plate-loaded) is also not feasible.

Q4: Which type is quieter to use in a gym?

A: Selectorized machines are generally quieter because the weight stack moves along guide rods within a shroud. Plate-loaded machines can produce more noise from plates clanging against each other, though some designs include rubberized plate horns to minimize this.

Q5: How many strength machines do I need for a 500 sqm gym?

A: A 500 sqm facility typically accommodates 15-25 strength machines. The exact number depends on layout density, whether you include free weight areas, and your target member capacity. A balanced mix should include both selectorized and plate-loaded machines. HARISON’s team can help you plan the optimal configuration.

CES 2026 Day 2 Update: Energy & Excitement Build at HARISON Booth! 🎉🤝

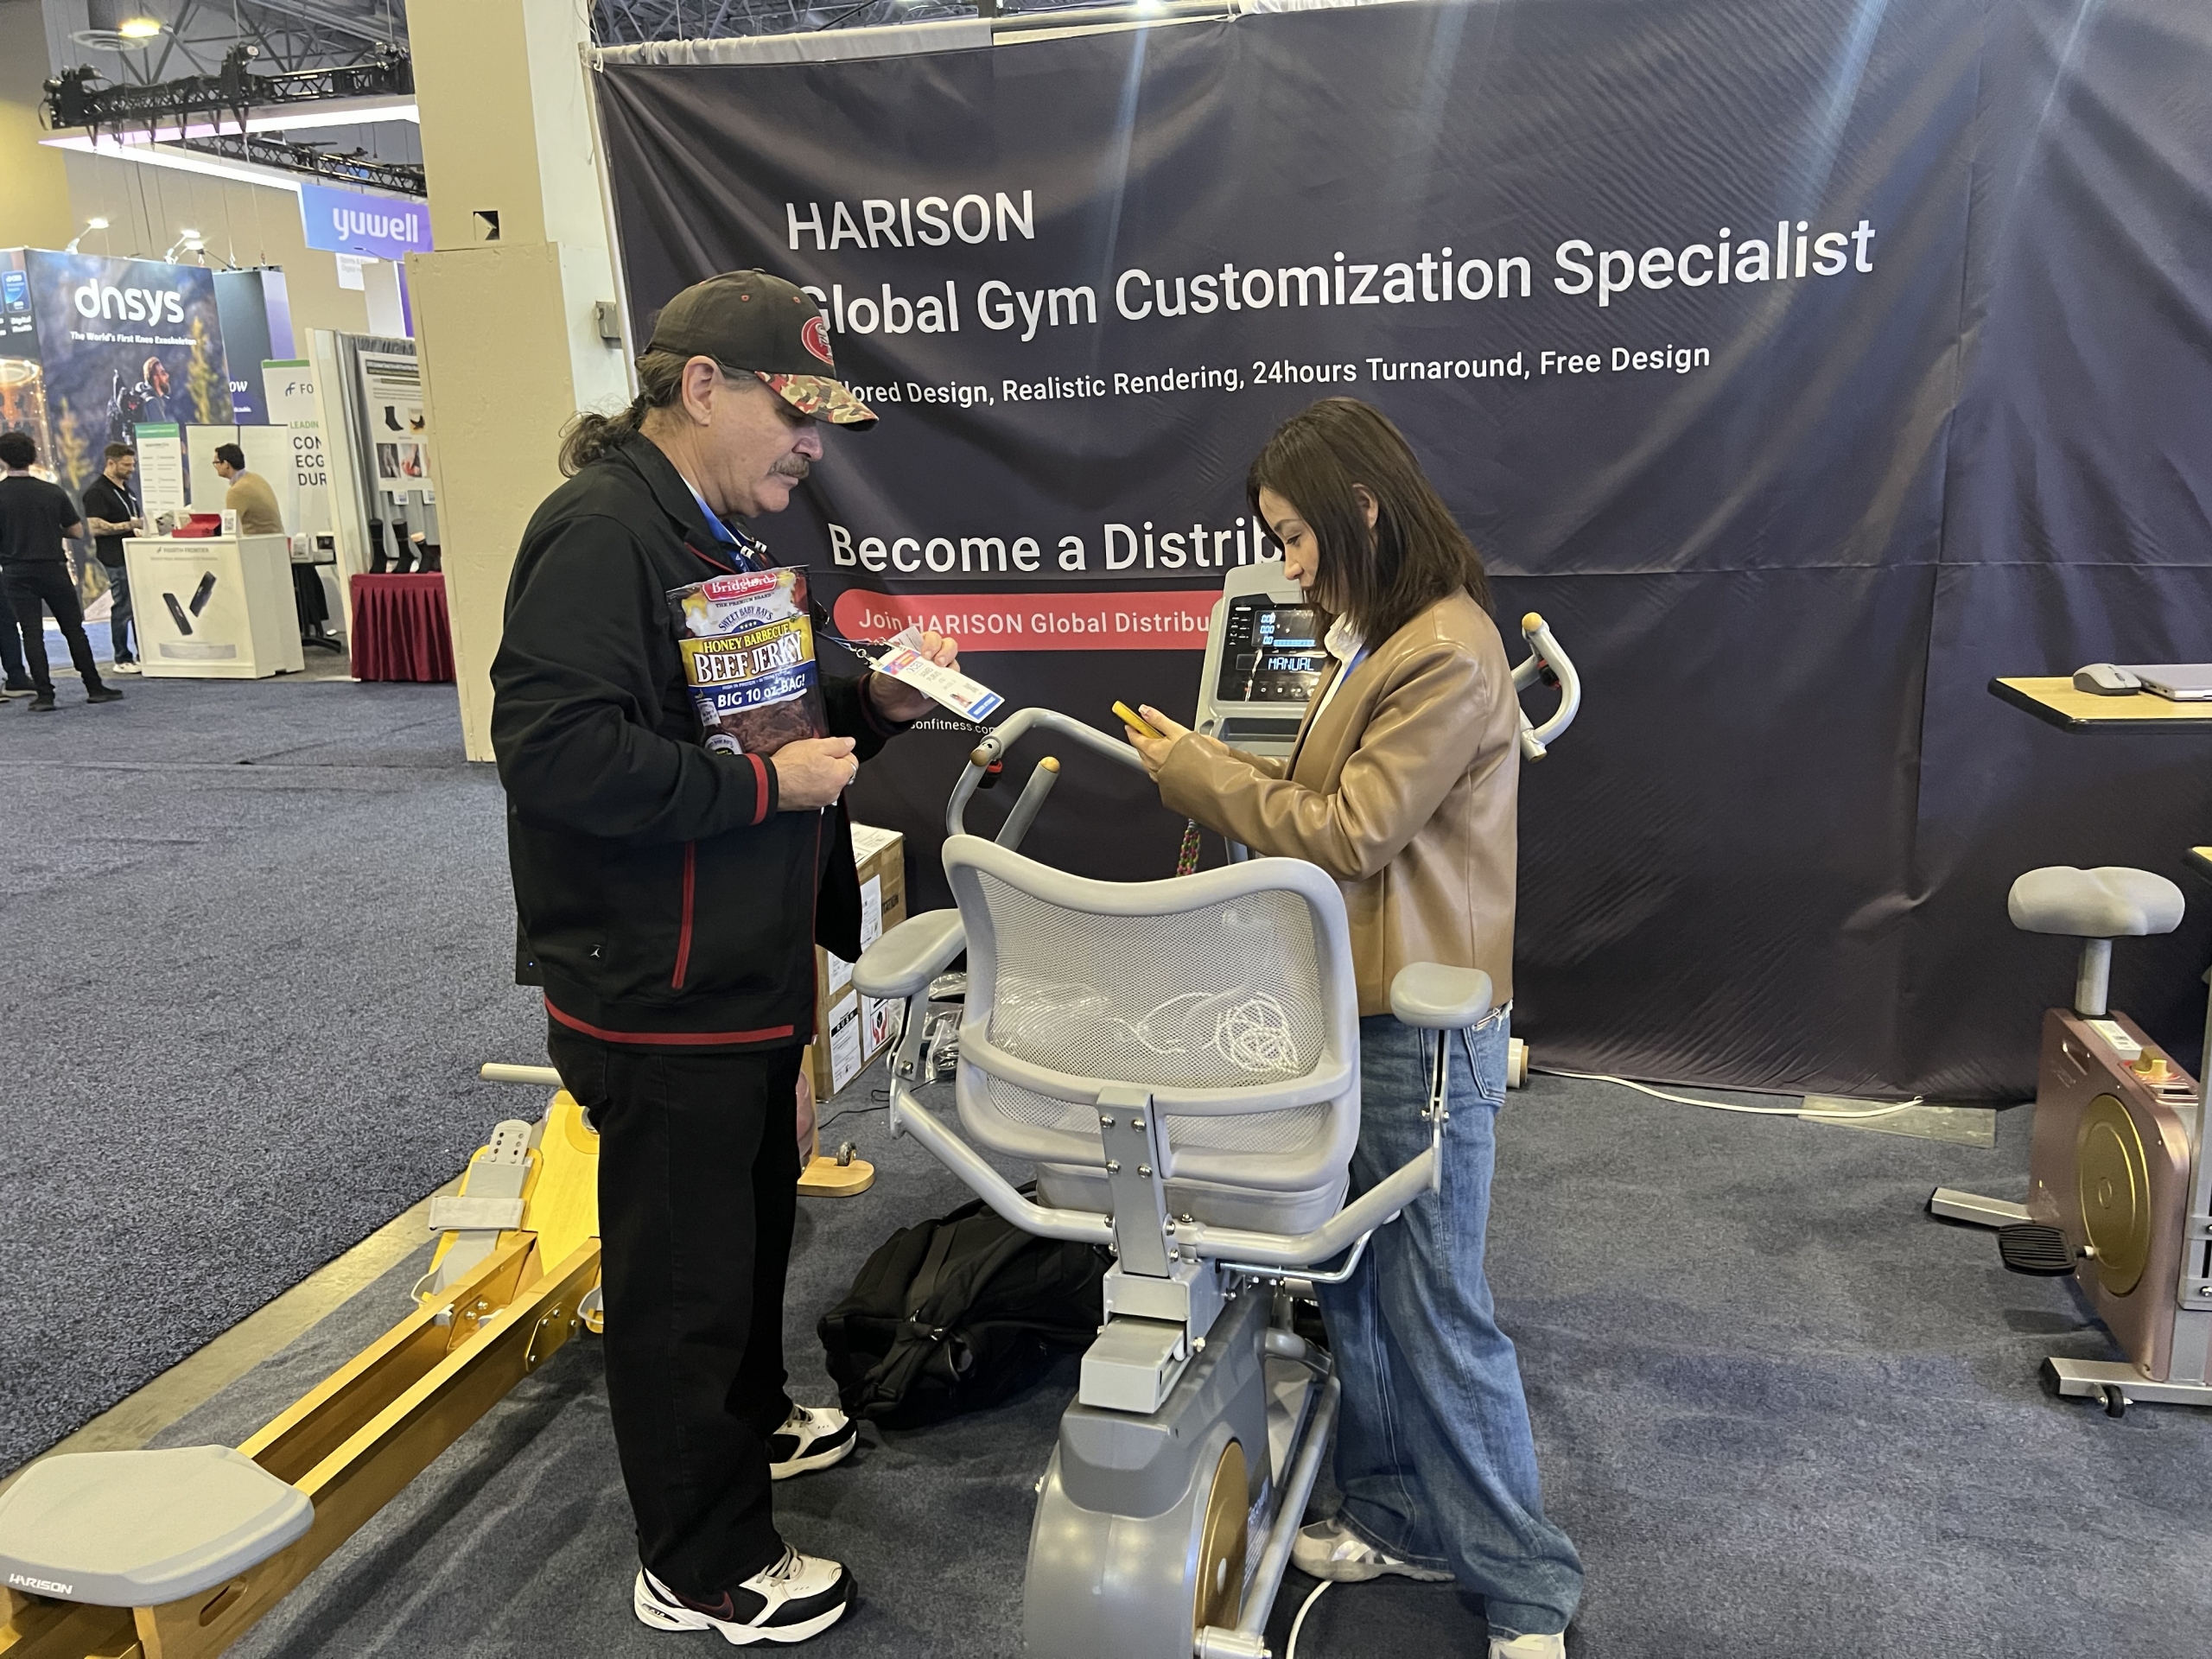
Wow, what a day! ✨ Day 2 at CES 2026 has wrapped up, and the energy at HARISON Booth 56429 just keeps growing! The Las Vegas Convention Center was buzzing, and our space became a true hub for fitness innovation conversations. From serious business talks to “wow” moments during demos, the vibe was incredible! 🚀

Energy & Excitement Build at HARISON Booth!

🌟 Today’s Booth Highlights: Where Connections Happened
The action never stopped! Here’s what made Day 2 so special:

🔥 Live Demo Zone Always Packed

Visitors loved getting hands-on with our smart equipment! Seeing their reactions when they experienced the seamless connection between our machines and the HARISON App was priceless. That moment when the data syncs up perfectly? Pure magic! ✨

🌍 Global Gathering in Full Swing

We welcomed visitors from all over the world today! 🌎 From North American gym owners to European distributors and Asian tech partners, the conversations were diverse and exciting. Business cards were flying, and connections were made!

📸 Photo-Ops & Social Buzz

The booth was Instagram-ready all day! 📱 Visitors snapped photos with our latest equipment, shared stories, and tagged #HARISONatCES2026. Seeing our tech light up your feeds is the best compliment!

💼 Serious Talks, Smiling Faces

Our meeting area was busy with productive conversations 🤝 – but never stuffy! The blend of professional discussions and genuine excitement about fitness innovation created the perfect atmosphere.

🎯 What People Are Talking About

The big theme today? “How does this work in MY world?”
Whether it’s a home user wanting smarter workouts or a gym owner planning a facility upgrade, visitors loved exploring how HARISON’s ecosystem adapts to their specific needs. The future of fitness isn’t one-size-fits-all – it’s personalized! 🎯

📅 Still Time to Join the Fun!
We’re only halfway through CES! 🗓️ There’s still plenty to see and do:

🎪 Visit Us at Booth 56429
Las Vegas Convention Center
3150 Paradise Road, Las Vegas
*January 8-9, 9 AM-6 PM*

🤩 What to Expect:
• Hands-on demos of our latest tech
• Face time with our product experts
• Special CES-only insights
• More networking opportunities!

🙌 Thank You, Day 2 Crew!

To everyone who stopped by today – thank you for the energy, the questions, and the great conversations! 💬 You’re why we do what we do, and your enthusiasm fuels our innovation.

The momentum is real, and we can’t wait to see what Days 3 & 4 bring! The future of fitness is happening here, and you’re part of it. 🏋️♂️💫

See you tomorrow at Booth 56429! Let’s make the second half of CES even more amazing! 🎊

Essential Gym Equipment for 2026: Building Successful Fitness Facilities 🏢💪

As we approach 2026, the commercial fitness landscape continues to evolve rapidly. Gym owners and operators face new challenges and opportunities: heightened member expectations, increased competition, and the need for smarter investments. The right equipment is no longer just about durability—it’s about creating experiences, maximizing space, and driving member retention. This guide breaks down the essential gym equipment every successful fitness facility needs in 2026, providing a strategic blueprint for both new gyms and facility upgrades.

2026 Commercial Fitness Equipment Selection Criteria 📊

Durability & Safety Standards for High-Traffic Facilities

Commercial gyms demand equipment that withstands 12+ hours of daily use by members of varying fitness levels. Look for EN957-H certification for heavy commercial use, reinforced steel frames with industrial-grade welding, and components tested for 500,000+ cycles. Safety features like emergency stop mechanisms, proper weight stack guarding, and slip-resistant surfaces aren’t just compliance issues—they’re essential for member trust and facility reputation.

Member Experience & Technology Integration

Today’s gym members expect seamless technology integration. Equipment should offer intuitive interfaces, progress tracking, and compatibility with popular fitness apps. Smart equipment that remembers individual settings and tracks progress creates personalized experiences that keep members engaged. The best commercial equipment balances robust construction with user-friendly technology that appeals to both tech-savvy millennials and traditional users.

Space Optimization & Traffic Flow

Maximizing your floor plan requires strategic equipment selection and placement. Consider equipment footprints, necessary clearance zones, and how pieces work together to create efficient workout flows. Multi-functional equipment that serves multiple purposes can dramatically increase your facility’s capacity without expanding square footage. Smart layout planning creates natural circuits and reduces congestion during peak hours.

The Essential Equipment Checklist for 2026 Gyms 📋

Commercial Cardio Foundation (40% of Floor Space)

Cardio equipment remains the cornerstone of member satisfaction and facility usage. Your 2026 cardio lineup should include:

  • Commercial Treadmills with at least 3.0 HP continuous duty motors, 60″ running decks, and intuitive consoles. HARISON commercial treadmills feature commercial-grade construction with smart connectivity for member engagement tracking.
  • Ellipticals offering varying stride lengths (18″-22″) to accommodate different user heights. Look for models with both upper and lower body engagement.
  • Exercise Bikes including upright, recumbent, and studio cycling options. Magnetic resistance systems provide smooth, quiet operation with minimal maintenance.
  • Stair Climbers & Rowers for cardiovascular variety. These specialty pieces attract members seeking low-impact alternatives and full-body workouts.

Strength Training Essentials (35% of Floor Space)

A comprehensive strength area accommodates everyone from beginners to serious athletes:

  • Power Racks & Squat Stations with safety bars and adjustable positions. HARISON power systems offer commercial durability with versatile attachment options for evolving training needs.
  • Adjustable Benches supporting 1000+ pounds with multiple incline positions. Commercial benches should feature heavy-duty frameworks and comfortable, durable padding.
  • Cable Machines with smooth, consistent resistance throughout the entire range of motion. Multi-functional cable systems maximize space efficiency while offering endless exercise variations.
  • Free Weight Areas with Olympic bars, bumper plates, and proper flooring. Dedicated spaces for functional training with kettlebells, medicine balls, and resistance bands.

Functional & Flexibility Zones (25% of Floor Space)

Modern members expect dedicated areas for functional training and recovery:

  • Functional Training Rigs offering pull-up bars, suspension points, and attachment options for bands and accessories.
  • Turf Areas for sled pushes, agility drills, and athletic performance training.
  • Stretching & Recovery Zones with foam rollers, massage tools, and dedicated space for mobility work.
  • Group Exercise Equipment that supports popular class formats from yoga to high-intensity interval training.
Equipment Category Essential Pieces Member Usage % ROI Timeline HARISON Solutions
Cardio Foundation 8-10 treadmills, 6-8 ellipticals, 4-6 bikes 60-70% 12-18 months ✓ Complete commercial lines
Strength Training 2-3 power racks, 4-6 benches, 2 cable machines 50-60% 18-24 months ✓ Power systems & racks
Functional Training Training rig, turf area, recovery zone 30-40% 24-36 months ✓ Custom design solutions

HARISON Commercial Solutions: Engineered for Gym Success ⚙️

Commercial Durability Meets Smart Technology

HARISON’s commercial equipment combines industrial-strength construction with modern technology. Our frames feature 3×3″ 11-gauge steel with reinforced welding at all stress points. Integrated smart technology connects to the free HARISON App, allowing members to track workouts and progress while providing facility owners with valuable usage data. Energy-efficient designs reduce operational costs without compromising performance.

Flexible Procurement for Growing Facilities

Understanding the financial realities of gym ownership, HARISON offers flexible commercial terms:

  • No Minimum Order Quantities for facility purchases
  • Mixed Equipment Shipments in single containers
  • US-Based Inventory for quick restocking of popular items
  • Phased Implementation allowing gradual facility buildup

Beyond Equipment: Complete Gym Support

HARISON provides comprehensive support extending far beyond equipment delivery:

  • Free Professional Gym Design Service creating optimized layouts for your specific space
  • Marketing Materials including high-quality photos, videos, and member onboarding content
  • Dedicated Account Management with direct access to commercial specialists
  • Ongoing Support for equipment maintenance and facility evolution

[Gym Owner Success Story]

“When expanding our chain to a fifth location, we needed equipment that could handle high traffic while fitting our budget. HARISON’s flexible ordering allowed us to equip the entire facility without overwhelming our cash flow. Their design service helped us maximize a challenging floor plan, and the equipment has performed flawlessly through two years of heavy use. The smart features particularly appeal to our younger members, who love tracking their progress through the app.” – Michael R., Multi-Site Gym Owner

Planning Your 2026 Gym Equipment Budget 💰

Phased Equipment Acquisition Strategy

Smart gym owners implement strategic equipment acquisition:

  • Phase 1 (Opening): Core cardio and strength equipment (70% of budget)
  • Phase 2 (3-6 months): Additional specialty pieces based on member feedback
  • Phase 3 (12+ months): Advanced equipment and technology upgrades

Consider leasing options for rapidly evolving technology pieces while purchasing foundational equipment outright. Regular equipment rotation (20% annually) keeps your facility feeling fresh and modern.

Maximizing Member Engagement Through Equipment

Equipment variety directly impacts member retention. Regularly introduce new pieces, rotate equipment placement, and create themed zones that encourage exploration. Equipment that supports popular training programs (like HIIT, functional training, or recovery protocols) keeps members engaged and reduces attrition.

Why 2026 Demands Smarter Equipment Choices 🧠

The post-pandemic fitness industry has permanently changed. Members now expect:

  • Hybrid Experiences blending physical equipment with digital tracking
  • Sanitation & Safety features that exceed minimum requirements
  • Personalized Experiences through technology integration
  • Community Spaces that facilitate social connection alongside physical training

Equipment that addresses these expectations becomes a competitive advantage, not just an operational necessity. Facilities that invest strategically in 2026-ready equipment will capture market share as consumer preferences continue to evolve.

Conclusion: Building Your 2026 Success Story 🏆

The right equipment foundation transforms your gym from a space with machines into a destination for transformation. By focusing on commercial durability, smart technology integration, and strategic space planning, you create an environment where members achieve their goals and your business thrives.

Remember: Quality equipment is an investment in your members’ success and your facility’s reputation. Partner with suppliers who understand commercial operations and provide comprehensive support beyond initial delivery. Your 2026 success starts with the equipment choices you make today.

Ready to equip your 2026-ready facility? Contact HARISON’s commercial team for a customized equipment plan, space design consultation, and flexible procurement options tailored to your specific business needs.

Frequently Asked Questions

Q1: How often should commercial gym equipment be serviced?

A: Commercial equipment requires quarterly professional servicing with monthly facility staff checks. High-use pieces like treadmills may need bi-monthly attention. HARISON provides detailed maintenance schedules and offers service contracts for commercial facilities.

Q2: What’s the ideal equipment-to-member ratio for a commercial gym?

A: Aim for 1 piece of major equipment per 15-20 members during peak hours. Cardio equipment typically requires higher ratios (1:12-15) than strength equipment (1:18-22). HARISON’s design service calculates optimal ratios based on your specific membership projections.

Q3: How do I choose between plate-loaded and selectorized strength equipment?

A: Plate-loaded appeals to experienced lifters and generally has lower maintenance, while selectorized offers quicker transitions between exercises. Most successful facilities offer both. HARISON provides guidance on the ideal mix for your target demographic.

Q4: What flooring is best under commercial fitness equipment?

A: 3/4″ rubber flooring for free weight areas, 1/2″ rubber for cardio zones, and specialized turf for functional areas. Proper flooring reduces noise, protects equipment, and prevents injuries. HARISON can recommend flooring partners for complete facility solutions.

Q5: How can I future-proof my equipment investment?

A: Choose equipment with upgradable consoles, modular designs allowing component updates, and manufacturers committed to backward compatibility. HARISON’s equipment architecture supports future technology upgrades without requiring complete replacement.


Welcome 2026 With HARISON: Your Partner for a Stronger New Year! 🎊✨

As the calendar flips to a fresh page, there’s a special kind of magic in the air—the magic of new beginnings. Welcome to 2026, friends! 🥳 This isn’t just another New Year’s Day; it’s your clean slate, your starting line, and your invitation to create something extraordinary. And here’s the best part: you don’t have to do it alone. At HARISON, we’re more than just a fitness brand—we’re your dedicated partner, cheering you on every step, rep, and mile of the way. Let’s make this year your most vibrant chapter yet, together. ❤️

✨ WHY YOUR 2026 STORY STARTS WITH HARISON

Think of HARISON not as a company that sells fitness equipment, but as your co-author in this year’s wellness journey. We believe that the right support system transforms resolutions into realities. This 2026, we’re not just providing tools; we’re offering partnership, innovation, and a community that believes in your potential. Every piece of HARISON fitness equipment is designed with one mission: to empower you to write your own success story, one day at a time.

🌟 BUILDING MORE THAN A HOME GYM—BUILDING A LIFESTYLE

With HARISON by your side, you’re building more than just a collection of gear. You’re creating:
• A SANCTUARY: A dedicated space for energy, focus, and personal growth.
• A ROUTINE: The comforting rhythm of consistent, enjoyable movement.
• A LEGACY: Investing in long-term health for yourself and your loved ones.
• A COMMUNITY: Joining thousands who choose to show up for themselves daily.

This New Year is about crafting a lifestyle where fitness feels less like a chore and more like a cherished part of your day—a moment just for you.

🔥 THE HARISON DIFFERENCE: BEYOND THE EQUIPMENT

What does it mean to welcome 2026 with HARISON? It means access to:
• INNOVATIVE ENGINEERING: Smart technology that adapts to your evolving goals.
• THOUGHTFUL DESIGN: Fitness equipment created for real homes and real lives.
• UNWAVERING SUPPORT: A team dedicated to your long-term success.
• A VISION FOR HEALTH: A commitment to helping you live stronger, longer.

We’re here to ensure that your fitness journey is sustainable, enjoyable, and perfectly tailored to the life you’re building this year.

🎯 YOUR 2026 HARISON GAME PLAN

SET INTENTIONAL GOALS: Dream big for your 2026. What does a stronger, healthier you look like?

DESIGN YOUR SPACE: Whether it’s a corner of your bedroom or a full garage, make it yours.

EMBRACE THE JOURNEY: Celebrate small victories. Progress, not perfection, is the goal.

STAY CONNECTED: Share your journey. Your story might inspire someone else to start theirs.

💫 MAKE THIS YEAR UNFORGETTABLE

This 2026, let’s move beyond temporary fixes and build something lasting. With HARISON, you’re not just buying fitness equipment; you’re investing in a partnership that grows with you. Imagine looking back next New Year’s Eve, proud of every milestone you reached and knowing you had the perfect support system to make it happen.

The first step is the most powerful. It’s a decision, a commitment, a promise to yourself. And we’ll be right here, providing the quality, innovation, and support to make that promise a reality.

🚀 YOUR STRONGER 2026 AWAITS

The blank page of 2026 is yours to fill. Will it be the year you prioritized your well-being? The year you discovered a stronger version of yourself? The year fitness became a source of joy? With HARISON as your partner, the answer is a resounding yes.

Let’s turn the page together. Let’s make this year count.

👉 Start Your 2026 Partnership with HARISON Today

Here’s to a year of strength, health, and incredible achievements. Happy New Year from your partners at HARISON! 🥂🎆