Scammer Websites List Which Sells Harison Fitness Products

Important Notice: Scammer Websites List Which Sells Harison Fitness Products (Updating…)

Harison fitness Important statement about customers being deceived by buying products through unofficial channels


Dear HarisonCustomers,

Recently, a lot of scammer’s website appears as attractive offer or pretend itself a large online shopping site, users are more receptive to these schemes. And they caused Harison customer transaction funds to be deceived. In order to protect the safety of your funds, Harison Fitness Team hereby declares:


1. Please use your real-name account to purchase Harison products. The only official purchase channel for Harison products is http://www.harisonfitness.com/ and Harison Amazon Store. Any other losses caused by third-party transactions shall be borne by the customer;

2. If a user has encountered a similar fraud, it is recommended to report to the police immediately, and Harison Team will fully cooperate with the investigation and provide corresponding evidence;

3. If users have any problems during the transaction of Harison products, please contact us in time.

4. Please comment below if you notice some scammer website that sells Harison Products, After we confirm it we will send a $30 coupon (no min use limited) to your email for a reward!

Online customer service: Below Red Chatbot, Customer Support: support@harisonfitness.com.


Scammer Websites: 

Harison bike X6:   https://icta.hk/news-article/throwback-thursday-the-discovery-of-penicillin/

Harison treadmill TT:  https://www.obhmarket.com/ 

Updating…


Scammer Websites List Which Sells Harison Fitness Products

Your Next Steps

If you paid a scammer using a money transfer app:
  • If the app is linked to a credit or debit card, contact that company or bank first. Find out how to dispute a credit or debit card charge here.
  • Contact the company behind the app. Ask if they can reverse or stop the transfer, and make sure they know the transaction was fraudulent.
Scam Advice:

How to Treat Proximal Femoral Fractures: Scientific Exercise Aids Recovery

If you have any queries or suggestions, please feel free to reach out via email to info@harisonfitness.com. We will do everything in our capacity to ensure that you love your experience with us.

The proximal femur is located in the thigh bone, near the hip joint. A fracture in this area is not only very painful but also affects walking and daily activities. So, how should a proximal femur fracture be treated?

01 How to Treat Proximal Femoral Fractures

For patients with proximal femoral fractures, the treatment approach depends on the patient’s specific condition and can generally be divided into two categories: conservative treatment and surgical treatment.

1. Conservative Treatment

Simply put, conservative treatment refers to treatment that does not require surgery. Conservative treatment is appropriate in three situations: first, for patients whose fracture site shows no displacement and remains properly aligned. The second scenario involves patients whose fracture has some displacement but only to a minor degree, and who can be successfully reduced through manual manipulation. The third scenario involves patients in particularly poor general health who are unable to undergo surgery; in such cases, conservative treatment is typically chosen.

2. Surgical Treatment

Patients for whom conservative treatment has failed, those with significant fracture displacement, or those with comminuted fractures may opt for surgical treatment. Prior to surgery, an initial examination must be conducted to determine if there are any contraindications. Then, under anesthesia, an incision is made at the affected site to perform internal reduction and fixation. Rest is also required after surgery to promote bone healing. In the later stages of healing, moderate exercise is permissible; however, patients should not engage in arbitrary movements, as this can easily cause secondary injury to the affected area. Following scientifically guided exercise protocols is the most appropriate approach.

02 Scientific Exercise Methods

Exercise 1: Butterfly Stretch

Key Points: Perform this exercise in a seated position. Keep your upper body upright, cross your legs, place the soles of your feet together with toes pointing forward, and hold your toes with both hands while breathing naturally. You should feel a stretch in your thigh muscles throughout the exercise. Repeat this exercise, doing 2 sets each time, holding each set for 15 seconds.

Exercise 2: Seated Internal Rotation Stretch

Key Points: Perform this exercise in a seated position with your upper body upright and arms hanging naturally at your sides. Place the unaffected leg on the floor with the lower leg at a 90-degree angle to the floor. Keep your legs naturally apart at shoulder width. Gently rotate the affected leg inward—avoid excessive rotation—and maintain even breathing. Repeat this exercise for 2 sets, holding each set for 15 seconds.

Exercise 3: Kneeling Hip Flexor Stretch

Instructions: Perform this exercise in a kneeling position. Keep your upper body upright. Kneel on one knee with the affected leg, and step forward with the unaffected leg so that the thigh is parallel to the ground and the lower leg forms a 90-degree angle with the ground. Raise the arm on the affected side upward, and rest the arm on the unaffected side on the bent knee. Breathe naturally and feel a gentle stretch along the front of your thigh and pelvis. Repeat this exercise for 2 sets, holding each set for 15 seconds.

Exercise 4: Prone Quadriceps Stretch

Instructions: Lie on your back with your upper body straight. Place one leg flat on the ground with your toes pointing upward. Raise the other leg, aiming for a 90° angle with your body, but do not strain. Hold the raised leg with both arms and maintain even breathing. Repeat this exercise, performing 2 sets each time, holding each set for 15 seconds.

The four exercises above can improve lower limb mobility and help prevent postoperative adhesions. However, please note that they should be performed 40 minutes after a meal, 2 to 3 times daily.

What to Do About Knee Pain and How to Relieve It

If you have any queries or suggestions, please feel free to reach out via email to info@harisonfitness.com. We will do everything in our capacity to ensure that you love your experience with us.

As one of the largest joints in the human body, the knee not only bears most of the body’s weight but also plays a vital role in our daily mobility and activities. Knee pain is very common among middle-aged and older adults. In fact, we can alleviate knee pain symptoms in our daily lives. Keep these five points in mind to relieve your chronic pain.

01 How to Manage Your Weight
For obese individuals with a larger body size, losing weight is very effective in relieving knee pain, as it reduces the pressure on the knee joints. You don’t need to be extremely slim; you just need to have a normal BMI. The BMI formula is: Weight (kg) ÷ Height (m)². For example, if Xiaoming is 1.65 m tall and weighs 68 kg, his BMI is: 68 ÷ 1.65² ≈ 24.9. According to the BMI chart, Xiaoming is classified as overweight and needs to engage in some fat-burning exercises.

02 Don’t Just Lie Still
Many people think, “Knee pain is just caused by overuse, so if I don’t use my knees and just lie still in bed, won’t that be enough to rest them?” This line of thinking is completely wrong! Doing so actually causes the muscles to atrophy, fails to protect the bones and joints, and can even worsen knee pain. Therefore, people with knee pain should still exercise regularly, choosing gentle activities that won’t cause further damage to the knees, such as swimming or walking.

03 Increase Exercise
In fact, knee pain is also related to muscle strength to some extent. People with knee pain can engage in targeted strength training; this not only builds muscle but also ensures that strong muscles provide better support and protection for the knee joint.


It’s best to consult a professional or doctor before starting an exercise program. In addition, stretching exercises can be very effective—for example, Tai Chi or yoga—as they help relax the muscles and improve balance. Exercise in moderation; avoid high-intensity workouts, as these won’t relieve knee pain but may actually worsen it. Be sure to avoid activities such as lifting heavy objects, walking long distances, or hiking.


If knee pain is caused by a minor injury or osteoarthritis, you can try the following methods for relief: First, allow the knee joint to rest fully. You can apply ice to the joint to reduce swelling or elevate your leg to a higher position.


Finally, if you experience knee pain right from the start, be sure to seek medical attention promptly. Only by identifying the cause of the pain at a hospital can you further prevent damage to your knees.


What Is Creatine? Here’s a Quick Guide to Creatine

If you have any queries or suggestions, please feel free to reach out via email to info@harisonfitness.com. We will do everything in our capacity to ensure that you love your experience with us.

Anyone who works out is familiar with creatine, but what exactly is it, and what does it do? Today, let’s take a closer look at creatine.

01 What Is Creatine?
Creatine is typically classified into three types: creatine monohydrate, creatine hydrochloride, and creatine complex. They all serve the same function but differ in usage and effects. Among these, creatine monohydrate is pure creatine and is also known as “traditional creatine.” Creatine is a nitrogen-containing organic acid that occurs naturally in vertebrates; it helps provide energy to muscle and nerve cells. The higher the creatine levels, the greater the muscle performance.

Most of the body’s creatine (95%) is stored in skeletal muscle, while a small portion (5%) is stored in the brain and testicles. Approximately 1–2% of creatine is broken down daily into creatine kinase (ps: creatine kinase is a metabolic byproduct of creatine). The body requires 1–3 g of creatine daily (depending on your muscle mass) to maintain normal creatine stores. About half of this can be obtained from the diet; however, the creatine content in food is relatively low.

02 What Is Creatine Used For?
Creatine provides energy to the body’s tissues, primarily targeting muscle and nerve cells; it supplies energy for physical activity, helps build muscle, and alleviates fatigue—which is why drinking Red Bull and Lehu can help relieve fatigue.

Coffee contains caffeine, which inhibits the performance-enhancing effects of creatine and affects the hydration of muscle cells, leading to some degree of dehydration. Therefore, it is not recommended to drink coffee immediately after taking creatine; wait at least two hours. In addition to avoiding caffeine, creatine should not be consumed with orange juice, as the acidic compounds in orange juice may cause the creatine hydrate to break down into waste products.

03 What Is the Connection Between Creatine and Water?

Once you start taking creatine, you should drink at least an additional 1,200 ml of water per day on top of your usual daily intake to fully leverage creatine’s hydrating effects and ensure it is fully absorbed. You can also drink a small amount of sugar-sweetened water or beverages to improve creatine absorption. Furthermore, insufficient water intake after taking creatine may interfere with cellular hydration, leading to adverse reactions such as muscle tightness, stiffness, and cramps. This is why it is recommended to drink plenty of water when taking creatine.


Creatine is primarily a dietary supplement designed for fitness enthusiasts who regularly engage in intense exercise; it is not a performance-enhancing drug. Therefore, athletes are permitted to take creatine. However, creatine pyruvate is classified as a performance-enhancing drug and has a stimulating effect on the mind. It is crucial to remember that athletes must not take creatine pyruvate before a competition.

04 How to Choose a Healthy and Safe Creatine Supplement
First and foremost, the most important factor when choosing a creatine supplement is purity! If a creatine supplement has low purity, it will contain a high level of impurities, which can have a very negative impact on kidney function and metabolism.

The second key factor is the rate of absorption. When making a choice, we should opt for creatine that is absorbed quickly and efficiently. Compared to creatine capsules and tablets, creatine powder is finer in texture and is absorbed more rapidly.

Among creatine monohydrate, creatine complexes, and creatine hydrochloride, creatine monohydrate—as a pure form of creatine—is more popular on the market. Many retailers deliberately exaggerate the actual effects of creatine complexes and creatine hydrochloride, but in reality, they offer poor value for money. Simply mixing creatine with a sugary drink or glucose powder can achieve many of the effects advertised for creatine complexes, while creatine hydrochloride is merely a process-enhanced version of creatine monohydrate—its active ingredients are identical to those of creatine monohydrate. Therefore, when choosing and purchasing creatine, be sure to do your research, compare options, and make your purchase with caution!

Taking creatine in moderation can indeed help improve fitness results to a certain extent. However, if you rely solely on the effects of creatine, believing that “more is better,” and take excessive amounts, it can cause damage to your organs and lead to rapid weight gain.


How to Recover from a Tibial Plateau Fracture

If you have any queries or suggestions, please feel free to reach out via email to info@harisonfitness.com. We will do everything in our capacity to ensure that you love your experience with us.

The tibial plateau refers primarily to a bone in the knee; it works in conjunction with other bones to enable us to walk and move normally. However, although it is a bone, it is quite fragile and is very prone to fractures in the event of an accident. So, what exactly are the causes of these fractures?

01 Causes of Tibial Plateau Fractures

1. Direct Trauma

If the knee is struck forcefully with an object—whether on the inner or outer side—it can very easily result in a fracture of the medial or lateral tibial plateau, impairing the ability to walk.


2. Indirect Trauma

When falling from a height, if the knee or foot hits the ground first and the body then falls to one side, a force acting from the bottom upward is exerted. Combined with the person’s own body weight and the acceleration during the fall, these forces can damage the tibial plateau, leading to its collapse. In addition to falls, collisions in car accidents can also cause tibial plateau fractures.


3. Falls

For the elderly, due to osteoporosis and limited mobility, a fall can easily result in damage to the tibial plateau. Younger people, however, have stronger bones and quicker reflexes, so even if they fall, the likelihood of this outcome is relatively low.

02 How to Recover Quickly

Exercise 1: Quadriceps Contraction

Key Points: For this exercise, lie on your back or sit on the bed with your upper body upright and your arms behind you to support your body. Tighten the muscles on the front of the affected thigh, pointing your toes upward, then relax. Repeat this exercise, performing two sets of eight repetitions each.

Exercise 2: Heel Glide

Instructions: Lie on your back with your upper body still and arms at your sides. Keep the healthy leg relaxed and still. With the heel of the affected leg flat on the bed, slide it backward, then return to the starting position. Maintain even breathing throughout the exercise. Repeat this exercise, performing 2 sets of 8 repetitions each.

Exercise 3: Ankle Pump

Key Points: Perform this exercise in a seated position with your upper body straight and still, and your arms supporting you behind your back. Keep both legs straight. Using the ankle joint as the pivot point, move the foot of the affected leg back and forth. When curling your toes inward, you should clearly feel the ligaments in your calf stretching and tightening. Maintain even breathing throughout the exercise. Repeat this exercise, performing two sets of 8 repetitions each.

Exercise 4: Patellar Mobilization

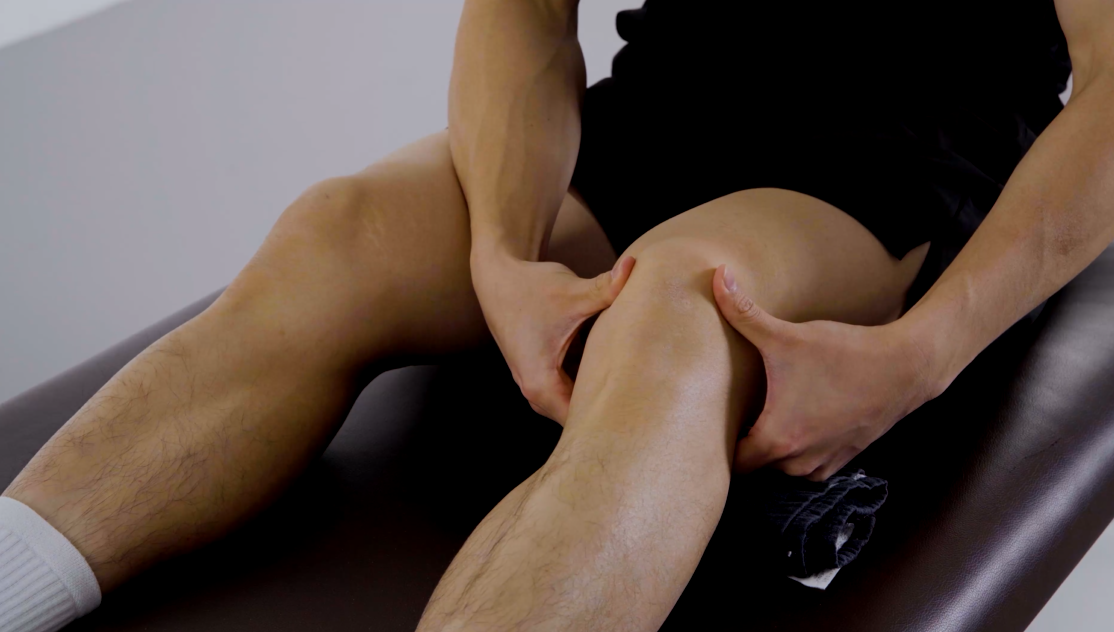
Instructions: Perform this exercise while seated. Keep your upper body upright with knees bent. Extend both legs straight forward, keeping them naturally apart. Place a pillow or cushion under the knee of the affected leg to keep the knee slightly bent. Then, place both hands on either side of the kneecap and gently rock it from side to side. Repeat this exercise 30 times.

The four exercises above should be performed 40 minutes after a meal, 2 to 3 times daily. Consistent practice will help improve lower limb range of motion and prevent postoperative adhesions.

How can I recover from an ankle fracture?

If you have any queries or suggestions, please feel free to reach out via email to info@harisonfitness.com. We will do everything in our capacity to ensure that you love your experience with us.

Ankle fractures are very common. For example, a hard blow, a car accident, or a fall from a height can all lead to a fracture in the ankle. Fractures in this area are very painful; not only do they cause significant discomfort, but they also make walking extremely difficult. So, what is the best way to treat a fracture in this area?

01 Treatment Methods for Ankle Fractures

1. Emergency Treatment

If you suffer an ankle fracture in an accident, it is essential to remain calm. First, lay the affected leg flat and avoid moving it as much as possible. Then, call 120 for emergency assistance and wait patiently. If there are others nearby, you can ask them to find a board to immobilize the injured area. This will help prevent the fracture from dislocating and causing further complications.


2. Medication

If the fracture is not severe, medication may be an option, but it must be taken under a doctor’s supervision. Do not take medication on your own. If the medication is not appropriate for your condition, or if you refuse treatment despite a serious injury, you risk delaying proper care, which could result in a lifelong disability. Additionally, it is important to understand that medication does not provide immediate results; it can only relieve pain, reduce swelling, and alleviate inflammation. Expecting instant results is unrealistic.


3. Surgical Treatment

If the fracture is severe, open reduction and internal fixation may be performed to stabilize the broken bone from within. However, surgery cannot be performed at any time. If there is severe swelling in the ankle area—or even blisters—the procedure must be postponed to avoid the risk of infection.

02 What Are the Postoperative Outcomes?
Ankle fractures can be fully healed. Although the initial results are generally satisfactory, over time and with increased activity, the ankle joint will experience progressively greater wear and tear. While individuals with healthy ankles may not notice any significant changes, patients with a history of fractures may perceive a difference; in more severe cases, they may even feel that certain functions are impaired.

03 Postoperative Recovery
Exercise 1: Progressive Weight-Bearing on One Leg

Key Points: Perform this exercise while standing. Keep your upper body upright, with both arms hanging naturally and relaxed at your sides. Stand with both feet together, then step forward with the affected leg. Gradually and cautiously shift your body’s center of gravity onto the affected leg. The toes of the unaffected leg should remain on the ground, though the heel may be raised slightly. Throughout the exercise, maintain body stability. You should feel increasing pressure on the ankle joint and growing tension in the calf muscles. Repeat this exercise, performing 2 sets of 8 repetitions each.

Exercise 2: Seated Balance Board Exercise

Key Points: Perform this exercise while seated, keeping your upper body relaxed and your lower body resting on the floor. Prepare a balance board and place the affected foot on it. Rock the foot back and forth and side to side to increase the range of motion in the ankle joint. If you don’t have a balance board, you can place a tennis ball under a wooden board to achieve the same training effect. However, using a tennis ball may make the board less stable and cause significant wobbling, so be very careful when performing this exercise. Repeat this exercise 3 sets at a time, holding each set for 30 seconds.

Perform these two exercises 40 minutes after a meal, 2 to 3 times a day. This will effectively improve joint stability and aid in recovery.


How to Exercise Properly After a Patella Fracture

If you have any queries or suggestions, please feel free to reach out via email to info@harisonfitness.com. We will do everything in our capacity to ensure that you love your experience with us.

Most people with a patellar fracture can make a full recovery with proper treatment and will experience no significant limitations in their daily activities. However, some patients are not so fortunate; this may be due to incomplete treatment or a failure to follow a scientifically sound and reasonable postoperative exercise regimen, which can lead to complications and cause them significant suffering.

01 Complications Following a Patellar Fracture

A patellar fracture may lead to traumatic patellar arthritis. If the fracture is severe, or if the surfaces do not align properly after medical reduction, this can cause significant pain in the patella. If an X-ray reveals increased bone density in the area and a narrowing of the joint space, this indicates traumatic patellar arthritis. For patients with mild pain and relatively mild symptoms, medication may be sufficient. However, if the condition is severe, a second surgical procedure may be necessary.

A secondary fracture may occur following a patellar fracture. The probability of this happening is not very high, primarily because the original fracture has not fully healed, resulting in poor stability of the knee joint. When the patient attempts to walk, they may suddenly feel their leg give way and be unable to bend the knee. Although the brain knows what to do, it cannot control the affected leg, and the patient is unable to prevent a fall. A combination of factors can lead to a re-fracture of the patella. If the re-fracture is minor or merely a hairline crack, it can be stabilized with a cast. However, if the fracture is severe—or if there is bone displacement—a second surgery will be required to perform internal fixation.

After a patellar fracture, some patients may experience delayed or non-union. The probability of this occurring is not very high. Generally, patients can make a full recovery within 4 to 6 weeks; however, a very small percentage of patients still show no signs of healing even after 6 weeks, which is classified as delayed or non-union. If symptoms are mild, conservative treatment is used; if the condition is severe and pronounced, surgical intervention is required.

02 Lifestyle Taboos to Be Aware Of

Patients with patellar fractures must avoid excessive knee movement in their daily lives. This includes activities such as hiking or climbing stairs. If such activities cannot be avoided, patients should make sure to get plenty of rest and, ideally, wear a knee brace. Patients should also manage their weight, as excessive body weight places additional strain on the knee. In addition, patients should pay attention to their diet, opting for light, well-balanced meals, as this will aid in the recovery from the fracture.

03 How to Exercise Scientifically

Exercise 1: Lunges

Key Points: Start in a standing position with your upper body upright and hands on your hips. Stand with your legs apart, shifting your weight onto your front supporting leg. Squat down as you inhale, and stand up as you exhale. Throughout the movement, keep your knees aligned with your toes. Repeat this exercise, performing 2 sets of 10 repetitions each.

Exercise 2: 45-Degree Straight-Leg Raise

Key Points: Lie on your back with your upper body stable and arms at your sides. Raise the affected leg straight up to a 45-degree angle, then lower it slowly, taking care not to exceed 45 degrees. Repeat this exercise, performing 2 sets of 12 repetitions each.

These two exercises can help improve lower limb joint stability, restore limb function, and increase overall strength. You only need to do them 2 to 3 times a day, but be sure to wait at least 40 minutes after a meal before starting, otherwise it may interfere with digestion.

In our view, no matter what type of fracture you’ve experienced, a long rehabilitation period is inevitable. We recommend that you approach your rehabilitation exercises with patience. As long as you follow your doctor’s instructions and take postoperative care seriously, you will surely make a full recovery and regain your health!

Dumbbell Sets for Home Gyms: How to Choose the Right Setup

A well-chosen dumbbell set can serve as the foundation of a practical home gym. Dumbbells take up less space than many machines, support a wide range of movements, and work for both strength sessions and fast-paced conditioning circuits. Whether your workout area is in a garage, basement, spare bedroom, or apartment, the right set can help you train progressively without filling the room with unnecessary equipment.


Before purchasing, think beyond the number printed on the weight. Fixed, adjustable, and selectorized dumbbell sets offer different experiences in terms of storage, durability, speed of weight changes, grip, delivery, and maintenance. You also need to consider the size of your workout area, floor protection, noise, and the amount of weight you expect to use in the future.


This guide explains the main types of dumbbell sets, the most important shopping criteria, home delivery and setup considerations, safe use, basic care, and how to match a set to your training goals and budget.
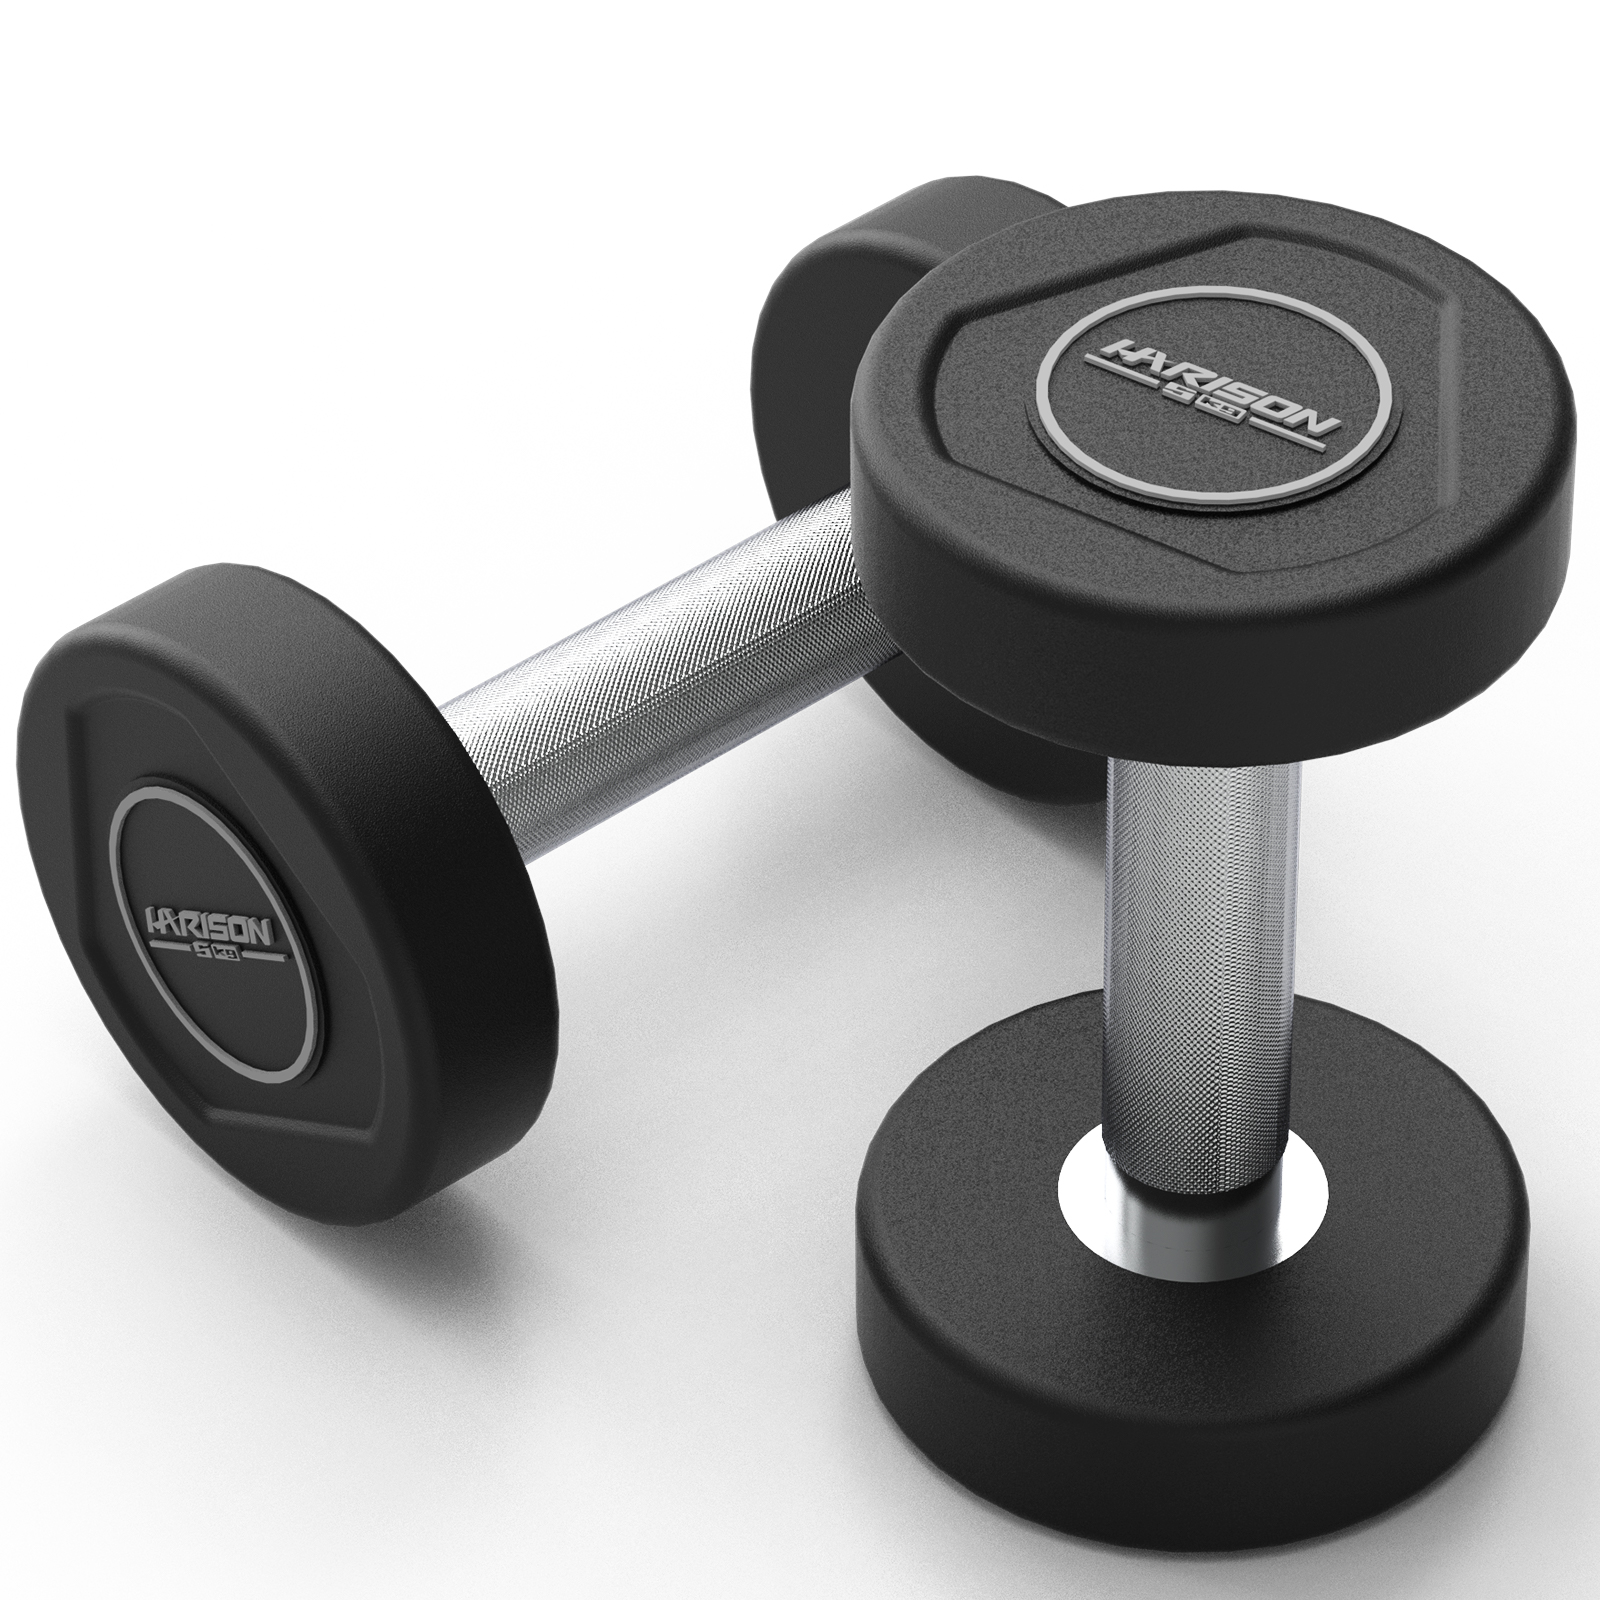
HARISON TPU Dumbbells – Non-Slip Textured Grip, Floor-Friendly, Eco-Friendly Material (2.5–25 kg)


Why Use a Dumbbell Set at Home?

Dumbbells can handle presses, rows, curls, lunges, squats, carries, unilateral exercises, and many other strength movements. Because each side of the body works independently, dumbbell training can challenge balance and coordination while helping you identify strength differences between sides.


A single set can support heavier, slower strength work as well as high-repetition circuits. If you have limited space, an adjustable or stackable set can provide several resistance levels without requiring a full rack. Rubber-coated heads and a suitable storage stand are also useful in an apartment because they can reduce floor impact and keep equipment organized.


Dumbbells are not a complete replacement for every piece of strength equipment. People focused on very heavy barbell squats, deadlifts, or bench presses may still need a barbell, plates, and rack. For general home strength, accessory training, conditioning, and unilateral work, however, dumbbells offer a highly adaptable solution.


Fixed, Adjustable, and Selectorized Dumbbell Sets

Fixed Dumbbells

Fixed dumbbells have a permanent weight and are ready to use immediately. With no adjustment hardware, they usually feel solid during heavy lifts and can withstand repeated use when stored properly. Common designs include rubber-coated hex heads and traditional round cast-iron heads.


A fixed set works best when you have enough space for a rack and already know which weights you use most often. The main disadvantages are the cost and floor area required as you add more pairs. A complete collection can also be difficult to move through narrow doorways or up stairs.


Plate-Loaded Adjustable Dumbbells

Plate-loaded adjustable dumbbells use one handle with removable plates secured by collars. They allow several weights in one compact package and are often less expensive than selectorized models. The weight can be customized by adding or removing plates.


The drawback is that changing resistance takes longer, especially between exercises. You must handle loose plates and check that every collar is tight. The handle may also feel different from a fixed dumbbell, which can affect comfort during higher-repetition work.


Selectorized Dumbbells

Selectorized models use a dial, pin, or locking mechanism to choose the desired load. They are convenient for supersets and circuit workouts because weight changes are fast and unused plates stay in a base or cradle.


These systems are usually more compact than a fixed rack, but they include more moving parts. Check that the selector clicks into place securely and that the cradle aligns correctly. Selectorized sets can also be more expensive or heavier than basic plate-loaded designs.


Type Main Strength Main Trade-Off
Fixed dumbbells Durable, stable, and ready to use Need more space and cost more as the set grows
Plate-loaded adjustable Compact and often budget-friendly Weight changes are slower and require collars
Selectorized Fast adjustments and efficient storage More moving parts and usually a higher price

What to Check Before Buying

Weight range and increments: Make sure the set includes your current training weights and leaves room for future progression. Smaller increases, such as 2.5- to 5-pound steps, make it easier to build strength gradually. A set with a low maximum weight may become limiting quickly.


Handle diameter and grip: Handles should feel secure without causing unnecessary hand fatigue. Aggressive knurling can improve traction but may irritate the palms, while very thick handles may be difficult for people with smaller hands. If possible, test the grip before buying.


Materials and floor protection: Rubber or urethane heads are quieter and can help protect concrete, wood, or finished flooring. Cast iron is durable but can be louder and may damage a floor if dropped. A rubber mat is recommended regardless of head material.


Storage: Check whether the set includes a rack, tray, or cradle. Organized storage keeps the workout area clear, makes weight selection easier, and reduces the chance of tripping over loose equipment.


Build quality and warranty: Look for secure welds, tight collars, reliable selector parts, and a manufacturer warranty. The return policy should explain who pays shipping and whether restocking fees apply to heavy items.


Assembly and weight accuracy: Confirm whether the set arrives ready to use. Plate-loaded models may require collars and plates to be installed, while selectorized products may need basic initial setup. Adjustable components should lock firmly and correspond accurately to the selected weight.


Noise: Apartment users should prioritize rubber-coated heads, controlled placement, and a quality floor mat. Avoid dropping dumbbells, even when the product is marketed as durable.


Space, Delivery, and Installation Planning

Consider the route from the delivery vehicle to the final workout area. Stairs, narrow doors, low ceilings, and tight corners can make a fixed dumbbell rack difficult to move. Adjustable sets often arrive in smaller boxes, although heavier maximum-weight models may still require two people.


Ask the retailer whether delivery is curbside, threshold, room-of-choice, or white-glove service. Confirm whether assembly is included and whether the stand or rack arrives separately. Keep the instruction manual, tools, and small components in a labeled location.


Measure the area where you will train and leave enough room to move safely. Overhead clearance matters for presses, snatches, and other exercises performed above the head. A standard garage or basement should generally provide at least eight feet of height, with additional clearance if you stand on a bench.


Use a rubber mat approximately 3/8 to 1/2 inch thick to protect the floor and reduce impact noise. In an apartment, combine the mat with rubber-coated dumbbells and schedule workouts at reasonable times to limit disturbances for downstairs neighbors.


Review the return timeline before ordering. Some retailers set short deadlines or charge restocking and return-shipping fees for heavy equipment. Make sure you can test the grip, weight selection, and storage system within the allowed period.


Safe Use and Basic Maintenance

Warm up before heavy lifting and use controlled movements, especially during overhead and single-arm exercises. Keep a clear four- to six-foot workout zone so you do not hit walls, furniture, or other equipment. Use a stable bench for presses and supported rows rather than improvised furniture.


Plan how you will finish a heavy set. Lower the dumbbell onto a bench, step, or mat instead of dropping it onto a hard floor. Children should not have access to unsecured weights, so store dumbbells on a rack or in another location that is out of reach.


Wipe handles and heads after workouts to remove sweat. Clean rubber and urethane surfaces with mild soap and water, and avoid harsh solvents. Check collars, screws, fasteners, and selector mechanisms periodically. If a cast-iron dumbbell develops a small rust spot, clean it and apply a light protective coat of oil as appropriate.


Do not use a dumbbell with a loose head, damaged handle, bent part, or compromised locking mechanism. Replace the part or contact the manufacturer before returning the equipment to service. Regular inspection is especially important for adjustable designs because their moving components experience more wear than fixed dumbbells.


How to Choose Your Best Dumbbell Setup

If you have sufficient room and expect to lift heavy for many years, a combination of fixed dumbbells for frequently used heavy pairs and an adjustable set for accessory work can be effective. Fixed weights provide a solid feel and immediate access, while adjustables reduce the number of pairs you need to store.


If your budget or floor space is limited, a high-quality adjustable set may provide the best value. Apartment residents should prioritize rubber-coated heads, a protective mat, compact storage, and delivery options that reduce the difficulty of moving heavy equipment.


Before purchasing, compare maximum weight, increment sizes, handle design, materials, rack or cradle dimensions, warranty coverage, and return terms. If possible, visit a local store to check grip and knurling in person. Choose equipment that fits your room, training program, and everyday habits rather than selecting the largest set available.


Final Buying Advice

A dumbbell set can become the long-term core of a home gym when it offers the right weight range, comfortable handles, dependable construction, and manageable storage. Fixed sets are ideal for maximum durability and fast access to familiar weights. Adjustable and selectorized options are more space-efficient and often better suited to apartments or multipurpose rooms.


Measure the area, protect the floor, and confirm delivery before placing an order. Review the warranty and return policy, use the equipment with controlled technique, and maintain it after each session. A thoughtful dumbbell purchase can support strength training, conditioning, and progressive overload for years without overwhelming your home.


Causes of Proximal Femoral Fractures and How to Recover as Quickly as Possible After Surgery

If you have any queries or suggestions, please feel free to reach out via email to info@harisonfitness.com. We will do everything in our capacity to ensure that you love your experience with us.

Proximal femur fractures are a very common condition, and many people suffer from them. Once a fracture occurs, it is not only painful but also interferes with daily life and work. So, what causes proximal femur fractures?

01 Causes of Proximal Femoral Fractures

There are many causes of proximal femur fractures, and any situation can lead to this type of injury. Broadly speaking, there are two main causes.

First Cause: Traumatic Injury

Most patients with proximal femur fractures sustain them as a result of traumatic injury. Traffic accidents, falls from heights, or even a heavy blow can all lead to a proximal femur fracture.

Second Cause: Osteoporosis

For some older adults, due to declining physical function and osteoporosis, even a slight external force can result in a fracture. For example, a minor collision that might cause only a bruise in a young person could lead to a proximal femur fracture in an older adult.

02 Clinical Manifestations of Proximal Femoral Fractures

The primary symptom of a proximal femur fracture is pain—not just tenderness upon pressure, but excruciating pain even without touching the area—and the inability to move freely. In addition, most patients with this type of fracture experience swelling and bruising; if there is an open wound, fresh blood may also be visible. Furthermore, in some severe cases, the limb may even become deformed, such as twisting into an abnormal position or appearing shorter than normal.

03 How to Recover as Quickly as Possible After Surgery

Exercise 1: Ball-Squeeze Isometric Contraction

Key Points: For this exercise, lie on your back with your upper body resting on the bed and keep it still. Let your arms hang naturally at your sides and remain relaxed—do not clench them. Bend your knees so that your feet form an angle of approximately 60 degrees with the bed. Before beginning the exercise, prepare a small ball—preferably an inflatable rubber ball with a diameter of about 10 centimeters. If you don’t have a ball, you can use a pillow or similar item, though it won’t be as effective as a ball, which provides elasticity and allows you to feel resistance and rebound during the exercise. Place the ball between your bent knees, maintain tension, and breathe evenly. Repeat this exercise for 2 sets, holding each set for 15 seconds.

Exercise 2: Active Hip External Rotation

Key Points: Perform this exercise while seated. Keep your upper body upright, with both arms hanging naturally at your sides. Bend both knees so that your thighs are parallel to the floor and your calves form a 90° angle with the floor. Keep the unaffected leg stationary, with the sole of the affected foot flat on the floor. Use your thigh to move the lower leg back and forth—inward and outward—while maintaining even breathing. Do not over-extend your range of motion; use your own sensations as a guide. Mild discomfort is acceptable, but if you feel severe pain, stop immediately and do not push yourself. Repeat this exercise, performing 2 sets of 12 repetitions each.

Exercise 3: Prone Internal Rotation Squeeze

Key Points: Lie on your stomach with your upper body straight. You may place your hands behind your head or at your sides, palms facing up, in a relaxed position. Keep the healthy leg flat on the bed and still, and keep the thigh of the affected leg stationary. Lift the lower leg upward until it forms a 90° angle with the floor, then gently sway it from side to side. The range of motion does not need to be large—adjust it according to your comfort level—while maintaining even breathing. Repeat this exercise, performing 2 sets of 8 repetitions each.

All three of these exercises can be used for postoperative recovery. They help improve motor control of the pelvis and lower limbs while enhancing core stability. However, remember to perform these exercises 40 minutes after a meal, 2 to 3 times a day.

What complications can result from a proximal femur fracture, and how can one properly recover?

If you have any queries or suggestions, please feel free to reach out via email to info@harisonfitness.com. We will do everything in our capacity to ensure that you love your experience with us.

Although proximal femur fractures are not considered serious conditions and can be cured through conservative treatment or surgical reduction, if they are not treated properly or do not heal well after treatment, complications can still arise. So, what kinds of complications are likely to occur?

01 What Complications Can Proximal Femoral Fractures Cause?
1. Pulmonary Infection

After a proximal femoral fracture, even if the fracture heals well, the patient must undergo long-term bed rest at home and should not move around freely. While bed rest promotes bone healing, prolonged inactivity can weaken the immune system, making the patient susceptible to aspiration pneumonia. In severe cases, it may even lead to pulmonary embolism.

2. Lower Limb Venous Thrombosis

If the fracture damages the vascular endothelium and is not treated promptly, it can easily lead to exogenous thrombosis. Additionally, prolonged bed rest significantly slows blood flow. If the patient is obese, elderly, has high blood lipid levels, or has thick blood, this further increases the risk of thrombus formation. Therefore, in such cases, family members should provide frequent massages to promote blood circulation and prevent blood clots.

3. Pressure Ulcers

Due to the fracture, patients must remain bedridden for extended periods. During this time, certain body parts are subjected to prolonged pressure, which impedes blood circulation and significantly slows blood flow. As a result, the skin tissue in the compressed areas experiences prolonged ischemia or hypoxia, leading to tissue ulceration or even necrosis. To prevent this from happening, on one hand, someone needs to regularly help the patient change positions so that no single area remains under constant pressure, thereby restoring blood flow. On the other hand, it’s also important to frequently help the patient wash, change clothes, and change bed linens to minimize the risk of bacterial infection. By combining these two approaches, pressure ulcers can be effectively prevented.

4. Constipation

After suffering a fracture, many patients subconsciously believe they should increase their meat intake, so they frequently eat meat, bones, and very greasy foods. While these foods may be tasty, they can easily lead to nutritional imbalances. Not only do they offer no benefit to recovery, but they can also contribute to obesity and constipation. To avoid this, patients should eat more vegetables and fruits, which provide a well-rounded nutrition and help prevent constipation. At the same time, massaging the abdomen can help promote digestion.

02 How to Recover Through Exercise

Exercise 1: Standing Hip External Rotation

Key Points: Perform this exercise while standing, keeping your upper body upright and placing both hands on the wall. Keep the unaffected leg stationary and slightly lift the affected leg off the ground. Then, using the hip joint as the center of rotation and keeping the heel stationary, rotate the lower leg outward by moving the thigh. Repeat this exercise, performing 2 sets of 8 repetitions each.

Exercise 2: Standing Hip Lifts

Key Points: Perform this exercise while standing. Keep your upper body still and place both hands on the wall. Stand on the affected leg only, lift your pelvis upward, then lower it back down, maintaining even breathing. Repeat this exercise, performing 2 sets of 8 repetitions each.

Exercise 3: Static Single-Leg Stand

Key Points: Stand with your arms crossed over your chest. Stand with your legs in a natural stance. Slowly and cautiously shift your weight onto the affected leg while lifting the unaffected leg so that only the toes touch the ground, then maintain a stable, motionless posture. Repeat this exercise, performing 2 sets of 8 repetitions each.

All three of the above exercises can be used as rehabilitation exercises following a proximal femur fracture. They should be performed daily, 40 minutes after meals, two to three times a day. These exercises help improve lower limb joint stability and promote the healing of the fracture.

Adjustable Dumbbells for Home Gyms: A Practical Buying and Use Guide

Adjustable dumbbells can provide the variety of a full weight rack while taking up the space of a single compact set. Instead of purchasing pairs in many different weights and finding room for a large stand, you can change the load on one handle as your workout changes. This makes adjustable dumbbells useful for apartments, garages, basements, and spare-room gyms where floor space and storage are limited.


One set can support light shoulder raises, presses, rows, lunges, curls, goblet squats, and many other strength movements. The ability to change weights quickly is also helpful during supersets, circuits, and progressive training. However, different adjustable mechanisms have different advantages, and the best option depends on how you train, how much weight you need, and how often you will move or store the equipment.


This guide explains the main types of adjustable dumbbells, the features to compare before buying, practical home setup considerations, safe use and maintenance, and how adjustable models compare with fixed dumbbells, barbells, kettlebells, and gym machines.


Why Adjustable Dumbbells Work Well at Home

Adjustable dumbbells offer versatility without requiring a large collection of equipment. A single pair can cover a broad weight range and make it easier to move from a warmup to a challenging strength set. Fast changes are especially useful when a workout includes supersets or alternating upper- and lower-body exercises.


They can also lower the total cost of building a home gym. A full rack of fixed dumbbells requires considerable floor space and can become expensive as the weight range increases. An adjustable set usually stores more easily under a bench, in a closet, or in another compact area. It can also be carried between rooms or taken outside when needed.


Their main limitation is that they are designed for dumbbell-based training rather than every kind of strength program. If your primary goal is maximum-load barbell squats, deadlifts, or bench presses, you will still need a barbell setup and suitable plates. For accessory exercises, unilateral work, general strength, and conditioning, adjustable dumbbells can be an efficient foundation.


Main Types of Adjustable Dumbbells

Dial and Selector Systems

Dial or selector models use a rotating dial, selector pin, or similar control to choose the desired weight. Unused plates remain in a molded cradle while the handle lifts the selected load. The main benefit is speed, which makes these dumbbells convenient for circuit training and workouts with frequent weight changes.


Look for clear settings, positive clicks, and a sturdy cradle that aligns the plates correctly. Selector systems are often more expensive and can feel heavier or bulkier than simpler designs, but their convenience may be worth the extra cost for frequent home use.


Plate-Loaded Handles

Plate-loaded adjustable dumbbells use a handle with removable plates secured by clips or collars. The design is familiar to anyone who has used standard weight plates and is often less expensive. It also provides flexibility because plates can be added or removed individually.


The trade-off is slower weight changes and the need to handle loose plates during a workout. Plates may also make more noise when moved, which matters in apartments or upstairs rooms. This style is a good choice for shoppers who value simplicity and lower cost over fast transitions.


Stack-and-Lock or Sliding Designs

These dumbbells connect a handle to a stack of plates through a sliding, snapping, or locking system. They aim to combine the speed of selector units with the security of a mechanical lock. Build quality varies, so test how firmly the mechanism engages and whether the weight selection feels precise.


Regardless of the mechanism, inspect the locks before purchase. A smooth adjustment system is useful only if the selected plates remain securely attached during the full movement.


Features to Evaluate Before Buying

Weight range: Choose a maximum weight that suits your current program and near-term goals. If you expect to become stronger, buying a set with additional capacity may provide better value than replacing a lighter set later.


Increment size: Small increases, such as 2.5- or 5-pound steps, make progressive overload easier to manage. Larger jumps may work for basic conditioning but can make strength progression less consistent.


Construction: Steel cores and durable housings generally withstand repeated use better than lightweight plastic components. Plastic may reduce total weight, but it can wear more quickly under heavy training or frequent adjustment.


Handle comfort: Handles should feel secure without creating painful pressure. Grip texture or knurling should prevent slipping during sweaty sets without irritating the palms.


Cradle and footprint: Confirm that the cradle fits your workout area and that the labels are easy to read. An optional stand can raise the handles to a comfortable height and reduce repeated bending.


Noise: Rubberized plates and low-impact mechanisms may reduce clanking on hard floors. This is especially useful for upstairs apartments and shared homes.


Warranty and returns: Check coverage for the mechanism, handles, plates, and normal wear. A practical return or exchange policy is important because heavy fitness equipment can be difficult and expensive to ship back.


Delivery and assembly: Review package weight and delivery terms. Some units arrive ready to use, while others require minor setup. Larger sets may need room-of-choice delivery or two people to move safely.


Setting Up Adjustable Dumbbells at Home

Protect hardwood, painted concrete, and other flooring with a quality rubber mat. A mat around 3 to 4 millimeters thick can reduce noise and help prevent surface damage. Avoid dropping adjustable dumbbells because their locking systems may be more vulnerable to impact than fixed metal weights.


Leave about three to four feet of clear space around your bench or training area. Overhead clearance is also important for shoulder presses and other movements performed above the head. Make sure your full range of motion will not bring the dumbbells into light fixtures, ceiling fans, or low beams.


A small stand can keep the cradle at a comfortable height and make weight changes easier. If storage space is limited, place the cradle under a workbench or inside a closet, provided it remains dry and easy to access. Heavy sets are dense, so plan for a two-person lift when moving them into a basement or upstairs room.


Before ordering, ask the retailer whether delivery stops at the curb or includes carrying the package indoors. Apartment residents should also schedule workouts at reasonable times and avoid dropping the weights on shared floors.


Safe Use and Maintenance

Follow the manufacturer’s weight-change procedure every time. Plates that are not aligned correctly can jam the mechanism, scratch the housing, or detach unexpectedly. Confirm that the selector, pin, collar, or lock is fully engaged before lifting the dumbbell.


Return the dumbbells gently to their cradle or to a protective mat. Repeated drops can damage internal components even when the exterior appears intact. Inspect the dials, locks, pins, fasteners, and handles regularly for looseness or wear. Tighten exposed bolts only as directed by the manufacturer.


Wipe the handles and housings after sweaty sessions. Keep sliding parts and adjustment tracks free of dust and debris. If the instructions permit lubrication, use a small amount of the recommended product on the appropriate moving component. Do not apply random oils to plastic or rubber parts.


Ask about replacement parts for common wear items such as pins, dials, collars, or plastic housings. A manufacturer that offers parts and responsive warranty service may provide better long-term value. Increase weight in manageable steps and make sure you can control the dumbbell through the complete range of motion. When training alone near your maximum, use a spotter or select a safer variation such as a supported single-dumbbell movement.


Adjustable Dumbbells Compared With Other Equipment

Fixed dumbbells are highly durable and immediately ready at one weight, but a complete collection takes much more room and costs more. Adjustable models can reproduce most fixed-dumbbell routines while reducing storage demands.


Barbells and plates remain the better choice for maximum-load squats, deadlifts, and other heavy compound lifts. Adjustable dumbbells are more convenient for unilateral movements, accessory exercises, and conditioning, but they do not provide the same loading potential or barbell feel.


Kettlebells are especially effective for swings, cleans, and other ballistic exercises. Adjustable dumbbells can perform many general strength movements, but their shape and weight distribution do not fully replicate kettlebell swing mechanics.


Selectorized gym machines guide the movement and may feel more accessible to complete beginners. Dumbbells require greater stabilization and can develop functional strength through a wider range of free movements. Choose the option that matches your preferred exercises, training experience, budget, and available space.


Final Buying Advice

Adjustable dumbbells can be a practical centerpiece for an apartment, garage, or basement gym. They provide a broad resistance range without filling the floor with dozens of fixed pairs. Focus on maximum weight, useful increment sizes, a dependable locking system, comfortable handles, a suitable cradle, and reliable warranty and delivery terms.


Prepare the room before the equipment arrives, protect the floor, and avoid dropping the dumbbells. Follow the correct adjustment procedure, inspect the mechanism regularly, and clean the handles after training. With careful selection and routine maintenance, one adjustable set can support progressive strength training while keeping your home gym organized.