What to Do If Middle-Aged and Older Adults Feel Down? Try This Method

If you have any queries or suggestions, please feel free to reach out via email to info@harisonfitness.com. We will do everything in our capacity to ensure that you love your experience with us.

The emotional states of joy, anger, sadness, fear, and surprise in the human body are closely linked to the five internal organs and six viscera. Therefore, improving mood can be very beneficial for middle‑aged and older adults whose physical condition is gradually declining.
01 The Importance of Improving Mood
As middle‑aged and older adults experience a decline in bodily functions and changes in brain function, the synthesis and metabolism of neurotransmitters in the central nervous system weaken. This leads to reduced sensory ability, poorer awareness, slower reactions, and difficulty concentrating. Poor mood not only affects internal organs but can also harm skin health, causing pigmentation, wrinkles, and accelerated aging. If it starts to affect the body, it’s even more important to take notice and act promptly.
The impact of mood on physical health is very clear. A relaxed and cheerful state of mind can refresh the spirit, promote whole‑body blood circulation, boost disease resistance, and contribute to overall health. It can also help reduce the risk of sudden onset of common illnesses in middle‑aged and older adults, and maintain a positive attitude toward new experiences.
02 Exercise to Improve Mood
For middle‑aged and older adults, exercise is an excellent way to lift mood. Moderate‑intensity exercise can stimulate the release of a polypeptide substance — endorphins​ — which gives people feelings of pleasure and excitement.
Exercise also helps shift attention away from negative thoughts, increases neurotransmitter levels to produce a sense of well‑being, allows negative emotions to be released in a timely manner, enhances the sense of achievement, and fosters positive emotions. After exercising, immunity improves and there is more energy for enjoyable activities.
03 Suitable Exercises for Middle‑Aged and Older Adults
Low mood can be regulated through aerobic exercise, such as running, walking, playing basketball, swimming, etc. On one hand, exercise helps prevent osteoporosis in middle‑aged and older adults; on the other hand, it lets participants enjoy the pleasant sensations that come from being active.
Take running as an example: regular running offers many benefits for health. Running is an aerobic activity that helps improve blood circulation, strengthens cardiorespiratory function, and assists in expelling harmful substances and toxins from the body.
On hot summer days, the most suitable exercise for seniors is swimming. For older adults, swimming is an ideal form of exercise. Thanks to water’s buoyancy, a person’s effective weight in the water is only about 10% of their body weight, so seniors can move without using much force. Swimming not only strengthens core muscles but also avoids injuries caused by falls during land‑based exercise. For elderly people whose balance declines with age, swimming can effectively reduce the risk of falls.
Finally, middle‑aged and older adults must pay attention to safety when swimming.

Ankle Sprain? Four Professional First-Aid Techniques​ Alternative versions

If you have any queries or suggestions, please feel free to reach out via email to info@harisonfitness.com. We will do everything in our capacity to ensure that you love your experience with us.

The ankle joint is a very important joint in the human foot. It bears the greatest amount of body weight of any joint in the body — in simple terms, it supports almost our entire body. Although the ankle is capable of bearing our full body weight, it is also prone to sprains.

In daily life, ankle sprains are very common. They often occur during intense exercise or from accidentally twisting the ankle — this is known as an acute ankle sprain. Causes of acute ankle sprain can include uneven ground, insufficient warm-up before exercise, or wearing unsuitable footwear for sports.
If an ankle sprain happens, what should we do? Don’t panic — rehabilitation experts will teach you first-aid methods. Save them quickly!
Ankle sprains are very common in everyday life. They often happen during intense exercise or from accidentally twisting the ankle — this is called an acute ankle sprain. Causes can include uneven ground, inadequate warm-up before exercise, or wearing unsuitable footwear for sports.
If an ankle sprain occurs, what should we do? Don’t panic — rehabilitation experts will teach you first-aid methods. Save them now!
01 Do Not Move It Randomly
When you discover an ankle sprain, avoid moving the ankle unnecessarily. Protect the injured area as much as possible and do not overstretch the affected site, as this can cause secondary injury. Don’t take it lightly just because it seems like a minor issue — walking around casually after a sprain may worsen the condition, leading to ligament strain, which will make recovery more difficult.
02 Apply Cold Therapy
Cold therapy is the best way to reduce swelling and also helps treat ankle sprains. Fix an ice pack to the injured area, applying cold for 10–20 minutes, then resting for 10 minutes. Repeat this cycle for up to two hours to achieve a swelling-reducing effect and relieve pain. Note: Experts advise against​ using heat. If possible, always use cold therapy — cold, cold, cold!
03 Immobilize the Injured Area
After a sprain, be sure to immobilize the area with a bandage. Wrap the ankle with appropriate pressure to increase joint stability, promote capillary constriction, and reduce fluid leakage. This approach helps prevent long-term complications. Keeping the limb at rest is the best state for healing.
04 Elevate the Affected Limb
When sleeping, reduce pressure on the injured area by placing a pillow or soft cushion under the ankle. This promotes blood circulation in the foot and leg.
The above are the first-aid steps for ankle sprains. Experts remind us that medication cannot replace later-stage rehabilitation. After managing the acute phase of an ankle sprain, appropriate functional exercises and rehabilitation training should be performed. If the sprain is severe, seek medical attention promptly so a doctor can determine the next treatment plan.
It’s also important to note: when running or participating in sports, it’s best to wear ankle braces and perform a proper warm-up. This is the best and lowest-cost preventive measure. Don’t wait until you sprain your ankle to regret it — that would be a loss rather than a gain.

How to Deal with Excessively Stiff Ankles? Learn How to Properly Improve Ankle Mobility

If you have any queries or suggestions, please feel free to reach out via email to info@harisonfitness.com. We will do everything in our capacity to ensure that you love your experience with us.

In daily life, most of us pay attention, to varying degrees, to the health of our shoulders, neck, knees, abdomen, legs, and so on, yet we rarely give much thought to an important part that affects our walking and movement—the ankle joint.

01 Do You Really Understand the Ankle Joint?

The ankle joint, also known as the talocrural joint, is located at the junction between the leg and the foot. It is formed by the medial malleolus (inner ankle) made of the tibia, the lateral malleolus (outer ankle) made of the fibula, and the trochlear surface of the talus. As one of the body’s major weight‑bearing joints, its primary functions are to provide stable support under load and allow flexible movement.
If your ankle has poor mobility — especially in dorsiflexion, which is the movement of the foot toward the shin — your movement patterns may become faulty, increasing the risk of injury during physical activity.
02 Is Your Ankle Mobility Up to Standard?
How can you tell if your ankle mobility is poor? Try these simple tests:
  1. Bodyweight squat (air squat)​ – Perform a squat and see whether your heels frequently lift off the ground during the movement.
  2. Stand with feet together​ – Stand upright with your feet side by side and check if you can lift the balls of your feet off the ground without shifting your body.
  3. Half-kneeling dorsiflexion test​ – Take off your shoes. Kneel on one knee with the other foot positioned about 5 inches (≈12–13 cm) away from a wall. Lean your torso forward and try to touch the wall with your front knee, keeping your heel in contact with the floor. If you can touch the wall, your ankle mobility can be considered adequate.

03 What to Do in Case of an Ankle Injury – Emergency First Aid

Ankle injuries are among the most common sports-related injuries. Most occur in activities that involve running, jumping, or rapid changes of direction. When the ankle is stiff and subjected to excessive or improper movement, the ligaments that help stabilize the joint can tear, resulting in an ankle injury.
If this happens, the following first-aid measures are recommended:
  • Rest​ – Stop walking and remain still. Avoid moving the ankle unnecessarily to prevent secondary injury.
  • Ice​ – Apply an ice pack to the injured area for 10–20 minutes, then rest for 10 minutes. Repeat this cycle for up to 2 hours.
  • Compression​ – Use an elastic bandage or stretchy clothing to wrap the ankle with moderate pressure to reduce swelling. Be careful not to apply too much pressure, as this can worsen swelling and restrict blood flow.
  • Elevation​ – Place something soft and supportive under the injured foot to raise it higher than the heart. This helps promote blood circulation in the foot and leg, reduces swelling, and aids recovery.
  • Medical care​ – Take oral medication that promotes blood circulation and resolves bruising, or use topical ointments or sprays. After on-site first aid, seek prompt medical attention at a hospital. X-rays should be taken to rule out ankle fracture, and an MRI may be necessary if needed.

04 How to Improve Ankle Mobility

No matter how good or poor your ankle mobility is, maintaining ankle function is very important for reducing your risk of injury during exercise.
If your ankle mobility is already good, performing one set of ankle exercises per week is enough to maintain it. However, if your ankle mobility does not meet the standard, you should do ankle exercises twice a week.
01 Foam Roller / Massage Ball Release for Calves
Movement Essentials:Place your calf on a foam roller (or massage ball). Roll slowly along the entire length of the calf and Achilles tendon for 1 minute. If you find a tender spot (trigger point), pause and focus on that area for 10–20 seconds. You can add active movements while rolling, such as actively dorsiflexing the foot or making ankle circles.
02 Resistance Band Dorsiflexion Stretch
Movement Essentials:Anchor one end of the resistance band to a fixed object and loop the other end around the top of your foot. Rest your calf on a basketball (or similar support) and lift the top of your foot backward against the band’s resistance.
03 Resistance Band Double-Leg Eversion
Movement Essentials:Loop the resistance band around the outside of both feet. Keep your heels on the ground and lift your toes, then evert (turn outward) your feet against the band’s resistance to improve ankle mobility.
These methods are simple and easy to follow, right? Get started now!

Core Chest Exercise: Chest Fly – The Key to Building Full, Rounded Pectorals

If you have any queries or suggestions, please feel free to reach out via email to info@harisonfitness.com. We will do everything in our capacity to ensure that you love your experience with us.

The chest fly is one of the core foundational exercises for chest training. Its primary movement logic involves the upper arms moving forward from behind, targeting the pectoral muscles while also engaging the anterior deltoids. The bench fly serves as its fundamental form, with variations like the butterfly machine fly and the cable fly evolving from it. Mastering the fundamentals of the chest fly can significantly enhance the contraction sensation in the chest muscles and improve sculpting results.

01. Supine Flying Bird: The go-to exercise for beginners to master chest squeezes

The Flying Bird exercise derives its name from the wing-flapping motion of the arms, making it the most accessible foundational chest-pressing movement. Its step-by-step breakdown is clear, and the force application is precise.

1. Starting Position: Lie flat on your back, chest lifted, shoulder blades naturally retracted to establish a foundation for chest muscle engagement.

2. Starting Position: Grasp dumbbells with hands, arms extended naturally, elbows slightly bent—never lock them straight.

3. Core Activation: Engage your chest as the power source, palms facing each other. Pull hands toward the center, feeling the pectoral muscles contract. Slowly return to starting position, maintaining a steady pace throughout.

02 Key Points for the Lying Fly Exercise

To maximize the effectiveness of the lying dumbbell fly exercise while avoiding joint injuries, strict adherence to movement details is essential. The core focus revolves around the elbow joints and range of motion.

1. Keep elbows naturally flared outward. Avoid pinching elbows together to generate force, as this may lead to insufficient pectoral muscle activation.

2. Maintain a slight bend in both elbows throughout the movement. Perform the exercise solely through shoulder joint action, excluding elbow joint involvement to reduce joint stress.

3. Control the range of motion. When lowering the weights, avoid excessive descent. Stop when a natural stretch is felt in the chest muscles to prevent shoulder joint compression.

03Incline/Decline Bench Variations: Incline Bench / Decline Bench

Flat bench flyes focus on overall chest sculpting. Using an incline or decline bench for flyes allows for precise targeting of specific chest areas, catering to diverse sculpting needs. The incline bench flye targets the upper pectoral muscles more effectively, making it ideal for building upper chest mass. The decline bench flye, on the other hand, focuses on developing the lower pectoral muscles, helping to sculpt the lower chest line and create a fuller, more balanced chest shape. The execution technique remains consistent with the flat bench flye; only the training equipment needs to be adjusted.

04 Butterfly Machine + Gantry Frame, Enhanced Power Generation in the Pull Phase

After mastering the basic supine fly, you can try fixed-machine and gantry-style chest flys to reduce compensatory movements and further enhance pectoral muscle contraction tension. Both variations adhere to the core principle that “the closing position determines the training focus.”

1. Butterfly Machine Chest Fly: Utilizing fixed equipment allows for easier focus on the chest muscles. Seat height determines the targeted area: – A higher seat position brings hands together below the chest, emphasizing the lower chest. – A lower seat position brings hands together higher up, primarily targeting the upper chest.

2. Cable Chest Fly: Offers greater flexibility, maintaining continuous tension on the chest muscles. Bringing hands together higher targets the upper chest, while a lower position stimulates the lower chest. This is a common chest-strengthening exercise in gyms.

Regardless of the chest fly variation chosen—whether incline dumbbell flyes, cable chest flyes, or cable pulley chest flyes—one universal principle remains inviolable: Maintain a constant slight bend in the elbows throughout the entire movement. The arm opening and closing motion should be performed solely through the shoulder joints, with the elbow joints never engaging in the effort. Only by adhering to this principle can the chest muscles become the true primary movers, preventing compensation and ensuring training effectiveness. To maximize efficiency in chest fly exercises, understand the synergistic muscle logic: the pectoralis major and latissimus dorsi are opposing muscle pairs. Contraction of the pectoralis major pulls the arms forward, while contraction of the latissimus dorsi pulls them backward.

Rotator cuff injuries may not cause significant pain, but rehabilitation care must not be taken lightly.

If you have any queries or suggestions, please feel free to reach out via email to info@harisonfitness.com. We will do everything in our capacity to ensure that you love your experience with us.

The shoulder contains numerous tendons, so when the rotator cuff is injured, patients may confuse it with other conditions such as frozen shoulder, acromioclavicular joint disorders, or long head of the biceps tendon issues. How can one make a simple distinction?

01 Distinguishing Rotator Cuff Injuries from Other Conditions

1. Frozen Shoulder

The primary symptom of frozen shoulder is also pain, accompanied by restricted movement. However, it differs slightly from rotator cuff injuries. Following a rotator cuff injury, the affected arm typically exhibits a slightly greater range of passive motion but a smaller range of active motion. In contrast, patients with frozen shoulder experience a relatively smaller range of motion for both active and passive movements in the affected arm.


2. Acromioclavicular Joint Disorders

Acromioclavicular joint disorders manifest as pronounced pain when the affected arm is raised to its highest point. In contrast, rotator cuff injuries cause significant pain only within a specific range of motion, without a clearly defined limit on that range.


3. Long Head of Biceps Tendon Pathology

Pathology in the long head of the biceps tendon presents with pronounced tenderness localized to the bicipital groove. In contrast, rotator cuff injuries typically cause pain at the humeral tuberosity, offering a clear distinction.


However, when experiencing pain without a confirmed diagnosis, it is best not to speculate. Instead, seek medical evaluation through a physical examination or MRI imaging for an accurate diagnosis.

02 How to Recover After Repeat Surgery for Rotator Cuff Injuries

Action 1: Supine Kettlebell Hold

Lie flat on your back with your lower back pressed against the floor and knees bent. Using the arm on the affected side, hold the kettlebell upside down with one hand while maintaining stability. Keep your shoulder pressed to the floor. Avoid using weights that are too heavy, as this can strain the rotator cuff. Hold for approximately 16 seconds.

Exercise 2: Prone Dumbbell Row

Lie prone with the affected arm extended off the bed, hanging naturally while holding a dumbbell. Exhale as you extend your arm backward, pulling the dumbbell upward. Inhale as you return to the starting position. Hold for approximately 16 seconds.

Exercise 3: Resistance Band Clamshell

Lie on your side with hips and knees bent. Position the resistance band just above your knees. Exhale as you open your legs outward. Inhale as you lower the raised leg, maintaining stability throughout. Place hands on your waist for support. Repeat for approximately 24 seconds.

Exercise 4: Lawnmower

Stand with the affected arm holding a dumbbell. Lean forward, then pull the dumbbell upward while slowly rotating your torso backward. Avoid rushing the movement. Repeat. Duration: Approximately 30 seconds.

Exercise 5: Advanced Lawnmower

Place the foot on the same side as the affected arm on a step platform. Stand upright with the affected arm holding a dumbbell, then lean forward. Pull the dumbbell upward while rotating your torso backward. Repeat the exercise. Perform for approximately 20 seconds.

All five exercises above help repair rotator cuff injuries. They enhance upper limb joint stability while aiding functional recovery and improving overall strength. Generally, practicing 2 to 3 times daily is sufficient to achieve the desired results.

How to Prevent Humerus Shaft Fractures and Promote Recovery After Surgery

If you have any queries or suggestions, please feel free to reach out via email to info@harisonfitness.com. We will do everything in our capacity to ensure that you love your experience with us.

The humerus shaft is a vital component of our arm, serving both as a structural support and a power generator. A healthy humerus shaft ensures the ability to perform daily activities and labor.

In daily life, this bone may sustain accidental fractures due to lifting excessively heavy objects, impact from heavy blows, landing on this area during falls, or even in throwing athletes. So, how can we prevent this issue?

01 How to Prevent Humerus Shaft Fractures

To prevent fractures of the humeral shaft, the solution is actually quite simple: avoid subjecting this area to heavy impacts, refrain from lifting weights beyond your physical capacity, and especially avoid landing on this part of the body during falls. Additionally, for throwing athletes—such as shot putters, javelin throwers, or basketball and soccer players—it’s crucial to not only warm up thoroughly before competition but also wear specialized protective gear. This provides better safeguarding against the pain of fractures.

02 Managing Daily Life After a Fracture

1. Dietary Considerations

Following a humeral shaft fracture, special attention must be paid to dietary habits. Prioritize foods rich in protein and vitamins, as these not only replenish essential nutrients but also promote bone healing. Avoid spicy or irritating foods, as they may aggravate the wound and hinder recovery. If the patient has habits like smoking or excessive drinking, these should be avoided during this period. Not only can they irritate the affected area, but the patient may also be taking antibiotics or other medications due to the injury. Medication safety must be prioritized during this time.


2. Lifestyle Management

Patients with humerus fractures should cultivate scientifically sound habits, including maintaining a regular sleep schedule with early bedtimes and wake-up times. Adequate rest facilitates recovery. Supplementing with vitamin D or calcium, combined with moderate sun exposure, supports healing at the injury site.


3. Psychological Aspects

Suddenly losing the use of one’s arm is profoundly distressing. Beyond physical pain, patients endure significant psychological strain. Therefore, maintaining a positive mindset is crucial. Stay optimistic and cheerful—avoid negativity or self-pity, as these attitudes hinder healing.

03 Postoperative Recovery Exercises

Exercise 1: Dumbbell Row

Key Points: Assume a bent-over position, supporting yourself with your healthy arm on a bench or table. Slightly bend forward to a comfortable angle. Hold the dumbbell with your affected arm, letting it hang naturally. Exhale as you pull the dumbbell backward, then inhale as you return to the starting position. Perform slowly without rushing, repeating continuously. Duration: Approximately 24 seconds. Perform 3 sets of this exercise, with each set consisting of 8 repetitions.

Exercise 2: Single-Arm Dumbbell Bench Press

Key Points: Lie supine (on your back), preferably on a bed. Place the healthy arm flat alongside your body. With the affected arm, grasp a dumbbell using one hand. Avoid using a weight that is too heavy, as this may cause strain. Slowly lift the dumbbell upward with one hand at a moderate pace. Push upward while exhaling and lower while inhaling. Repeat this motion. Each repetition should take about 10 seconds. Perform 2 sets of this exercise, with each set consisting of 5 repetitions.

These two exercises serve both training and recovery purposes. Perform them 2 to 3 times daily, approximately 40 minutes after meals. They effectively enhance upper limb joint stability, restore arm function, and improve overall strength.

Home vs Commercial Gym Equipment Guide | Key Differences & Selection | HARISON

Commercial vs Home Gym Equipment: Choosing the Right Setup for Your Needs 🏠🏢

The fitness world is evolving. Whether you’re a dedicated enthusiast creating a personal fitness sanctuary or an entrepreneur launching a revenue-generating facility, one critical decision shapes your success: choosing the right equipment. Understanding the distinct worlds of home and commercial gym setups is the first step toward a smart investment. At HARISON, we leverage our expertise in supplying durable, innovative equipment for both markets to guide your choice.

1. Understanding Home Gyms: Your Personal Fitness Haven 🏡

A home gym is a personalized space designed for convenience, privacy, and long-term wellness. Its primary driver is the individual or family’s commitment to an accessible, uninterrupted fitness routine.

Key Drivers for a Home Gym

The decision to build a home gym often centers on three factors: the ultimate convenience of working out on your schedule, long-term cost savings compared to membership fees, and the freedom to create a perfectly personalized space that motivates you.

Home Gym Equipment Characteristics

Equipment for the home prioritizes user-friendliness and adaptability. Look for:

  • Space Efficiency: Compact, foldable designs like the HARISON HR-349 Mini Stepper or HR-304 Under-Desk Elliptical.

  • Multi-Functionality: Equipment that serves multiple purposes, such as the HARISON HR-610 Adjustable Bench with its included dumbbell rack and resistance bands.

  • Smart Integration: Bluetooth connectivity and free apps (like the HARISON App) for tracking workouts and accessing guided sessions.

  • Value Focus: High quality at a direct-to-consumer price point.

Popular HARISON Home Gym Picks:

SKU Product Key Feature for Home Users
HR-X15 Magnetic Exercise Bike Bluetooth connectivity, space-saving design
HR-610 Adjustable Weight Bench 1000 lbs capacity, multi-functional with storage
HR-349 Mini Stepper Ultra-compact, perfect for small spaces

2. Demystifying Commercial Gyms: Building a Business on Strength 💼

A commercial gym is a business asset. Its equipment must withstand constant use, ensure member safety, and provide a return on investment by attracting and retaining clients.

The Business-Centric Nature of Commercial Gyms

Every choice in a commercial setting is measured against member satisfaction, equipment uptime, and liability management. Durability isn’t a luxury; it’s an operational necessity.

Commercial Gym Equipment Must-Haves

Commercial-grade equipment is built to a different standard:

  • Heavy-Duty Construction: Designed for high daily user volume (often 16+ hours) with robust frames and industrial-grade components.

  • Maximum Durability & Safety: Features like higher weight capacities (e.g., 400-500+ lbs on treadmills), reinforced welds, and commercial warranties.

  • Minimal Maintenance Design: Easy-to-service parts and reliable systems to reduce downtime.

  • Professional Aesthetic: Cohesive looks that build brand trust and a premium feel.

3. Side-by-Side Comparison: Key Differences That Matter ⚖️

Choosing wrong can lead to premature wear, safety issues, or wasted capital. Here’s how the core aspects differ.

Durability & Usage Intensity

  • Home Use: 1-2 hours daily, low user turnover. Materials are durable for personal use.

  • Commercial Use: 10-18 hours daily, constant user cycling. Requires commercial-rated steel, motors, and bearings. HARISON commercial products undergo strict U.S. quality inspection to meet these demands.

Cost & Investment Perspective

  • Home Gym: Lower initial investment per piece. The value is personal convenience and long-term health.

  • Commercial Gym: Higher upfront cost viewed as a capital expense. The ROI comes from member fees. HARISON supports businesses with flexible, no-MOQ shipping and one-stop solutions to optimize this investment.

Features & User Experience

  • Home Gym: Emphasizes comfort, entertainment (device holders, apps), and easy storage.

  • Commercial Gym: Prioritizes intuitive use, hygienic surfaces, and minimalistic controls for quick turnover. HARISON provides full marketing kits (videos, manuals) to help your staff and clients use equipment correctly.

4. Making Your Choice: Guided by HARISON Expertise 🤝

Your goals define your gear. For a personal sanctuary, prioritize space, versatility, and enjoyment. For a business, invest in durability, safety, and professional support.

No matter your path, HARISON is your partner. With over 350+ products across both categories, we offer tailored solutions. Our free gym design service helps you plan the perfect layout, and for our business partners, fast shipping from U.S. stock means you can launch or renovate without delay.

5. Frequently Asked Questions (FAQ) ❓

Q1: What is the typical weight capacity difference between home and commercial treadmills?

A: Home treadmills, like the HARISON HR-T101, typically support 250-350 lbs. Commercial models are engineered for 400-500+ lbs to handle constant, heavy use by diverse members. This reflects differences in motor power, deck construction, and frame integrity.

Q2: Can I use home gym equipment for light commercial use, like a small studio?

A: It’s not recommended. Even light commercial use exceeds “home” durability specs, voiding warranties and posing safety risks. For small studios, consider HARISON’s semi-commercial series (like the HR-X8F bike) or speak with our team about entry-level commercial options suited for your traffic.

Q3: How important is after-sales service for commercial gym equipment?

A: It’s critical. Downtime equals lost revenue. HARISON provides dedicated after-sales support, including troubleshooting guides and direct technician access, ensuring your business keeps running smoothly.

Q4: What are the space planning considerations for a home gym vs. a commercial gym?

A: Home gyms maximize flexibility in a spare room or corner. Commercial gyms require professional space planning for member flow, equipment spacing, and safety zones. Utilize HARISON’s free gym design service to optimize any space, big or small.

Q5: Does HARISON offer different warranties for home and commercial products?

A: Yes. Warranty terms are tailored to expected usage. Our commercial equipment comes with warranties that address high-frequency use, reflecting our confidence in their durability. Specific terms are provided with your quote.

Say Goodbye to Fertility Anxiety! A Scientific Guide to Preparing for Pregnancy for Working Women

If you have any queries or suggestions, please feel free to reach out via email to info@harisonfitness.com. We will do everything in our capacity to ensure that you love your experience with us.

Irregular schedules and inconsistent eating habits have long become the norm for modern working women. Caught between the dual pressures of life and work, women’s physical health and emotional well-being are prone to flashing warning signs, making the journey to conception increasingly challenging.

01 Hidden Obstacles to Pregnancy Planning in the Workplace

The seemingly stable office environment actually harbors numerous hidden risks that can impact fertility preparation, primarily concentrated in the following three areas:

1. Hidden Hazards in the Office Environment
Computers used daily emit trace amounts of radiation; printers release odors due to electrostatic effects during operation, which can cause dizziness and discomfort; bacteria and saliva on telephones serve as major carriers for virus transmission; prolonged exposure to air-conditioned, enclosed spaces can induce headaches and physical fatigue. The cumulative effect of these factors quietly adds resistance to conception efforts.

2. Sedentary Habits Impair Functionality For office-based women, prolonged sitting is a workplace norm. Tasks like document processing, data analysis, and communication are almost always completed at desks. Extended sitting not only causes back and leg pain but also impairs blood circulation, potentially increasing the risk of gynecological disorders and directly affecting fertility.

3. Work Stress Disrupts Hormonal Balance Workplace emergencies and heavy workloads can easily push women into a state of high mental tension. This invisible pressure breeds anxiety, which in turn triggers hormonal imbalances and menstrual irregularities, disrupting the body’s natural rhythm for conception.

02 Office Workout Tips for Preparing for Pregnancy

Given the limitations of office space, equipment, and time, high-intensity workouts are clearly impractical. Why not try these two simple exercises to effortlessly support your pregnancy preparation:

1. Rope-free Jumping Rope: Efficient Fat Burning to Boost Fertility
Jumping rope not only enhances cardiovascular function and promotes blood circulation but also effectively improves physical fitness, reducing the difficulty of childbirth. Wear loose, comfortable clothing and non-slip athletic shoes; Keep your body upright with eyes focused straight ahead. Maintain steady breathing while relaxing all muscles. Jump to a height of 3-5 cm, landing with knees slightly bent for cushioning. Generate rope momentum from the wrists, not by swinging the entire arm. Aim for 200-500 jumps daily, adjusting based on your fitness level. Women who are generally inactive should progress gradually to avoid overexertion.

2. Chair Yoga: Stretch Your Body and Relieve Fatigue While large yoga movements are difficult to perform in the office, simple poses like Goddess Pose, Chair Pose, and Crescent Pose can be easily done while seated. Mastering proper breathing techniques through yoga practice also lays a solid foundation for future childbirth.

Key Points: Beginners should practice under professional guidance to avoid muscle strains from improper form. Follow the “easy-to-difficult” progression principle, using props like yoga blocks or resistance bands as needed. Aim for 10-30 minute sessions, 5-7 times weekly for optimal results.


Beyond that, taking a few minutes to walk around during work breaks, strolling downstairs during lunch, and opting for the stairs instead of the elevator—these small bursts of movement, when accumulated over time, can build up significant energy reserves for preparing to conceive.

03 Preconception Exercise Guidelines
1. Avoid skipping rope during menstruation to prevent excessive endometrial shedding, which may trigger dysmenorrhea or discomfort.

2. Replenish fluids promptly with warm water after exercise to maintain hydration balance.

3. Prioritize moderation in exercise intensity. Always tailor workouts to your physical condition and avoid excessive high-intensity or high-frequency training.

During work breaks, take advantage of your lunch hour to stretch your limbs. Engage in light exercise to energize your body, making the journey to pregnancy feel less burdensome. You can easily kickstart your fertility journey right in the office.

Struggling to stick with preconception workouts? 6 tips to help you easily maintain your exercise motivation.

If you have any queries or suggestions, please feel free to reach out via email to info@harisonfitness.com. We will do everything in our capacity to ensure that you love your experience with us.

As we all know, exercise not only benefits physical health but can also specifically improve certain reproductive issues, aiding the process of preparing for pregnancy. Let’s discuss how to maintain enthusiasm for exercise throughout your preconception journey.

01 Awaken Your Inner Drive

The reason we struggle to stick with something and easily waver is often because we haven’t discovered its core value. When you truly love something, you persevere willingly without needing others to push you. For “must-do and right things” like preconception exercise, we must proactively anchor its meaning to ignite our passion and sustain our journey. The core value of preconception exercise is actually quite simple:

Strengthen your physical foundation to navigate the journey from preconception to pregnancy and childbirth with greater ease;

Enhance reproductive health by eliminating potential factors that may hinder conception or harm your body during pregnancy.

02 Adjust Your Mindset

Don’t treat preconception exercise as a “mandatory task,” and certainly don’t beat yourself up if you skip a day, worrying about poor fat loss results or disrupted ovulation. Set a weekly exercise plan for 4-5 days—it’s perfectly normal to skip a session now and then due to busyness or fatigue. Try viewing exercise as a relaxing, enjoyable activity. Only by shedding the mental burden can you stick with it long-term.

03 Fragmented Exercise

Many women trying to conceive juggle demanding careers, making it difficult to carve out a full 30 minutes for exercise. In such cases, try breaking up your workout into smaller chunks—splitting 30 minutes into 3 to 5 ten-minute segments. Stretch for a few minutes during lunch break, do a set of squats between tasks, practice a yoga sequence before bed… Utilize these scattered moments to move without needing to carve out large chunks of time—effortless and stress-free.

04 Unlock the Freshness of Movement

Repeating the same exercise routine over time causes your body to gradually adapt to the intensity, significantly reducing its effectiveness. Mentally, you may also become complacent, finding the routine monotonous and tedious. When you hit a plateau in your fitness journey, don’t hesitate to try new exercise routines: from cardio activities like running or swimming, to at-home workouts like Pamela’s Fat-Burning Workout, to recreational wellness pursuits like badminton or Baduanjin. Mixing things up keeps the novelty alive, ensuring your enthusiasm for exercise stays strong.

05 Refined Athletic Wear

When working out, don’t forget to dress up a little. A well-fitting workout outfit, a pair of comfortable sneakers—even just swiping on a touch of lipstick to brighten your complexion or spritzing on a hint of fresh perfume—can all add a little sparkle to your exercise routine. This small sense of ritual will help you enjoy the process more, get moving with a cheerful mindset, and naturally boost your motivation.

06 Push Each Other to Run Further

There’s a saying in the running community: “If you want to run fast, run alone; if you want to run far, run together.” The same applies to preconception exercise. Going solo makes it easy to give up, but running with others provides greater motivation. You can join a running group, yoga class, or dance community. Or team up with friends also preparing for pregnancy—keep each other accountable with daily check-ins, share workout insights, and become each other’s strongest source of motivation. If offline companions aren’t available, online check-ins are a solid alternative. Once you get into the habit of sharing your daily fitness updates, the invisible accountability makes it harder to quit.

During workouts, take moments to envision your bright future: every drop of sweat builds momentum for a healthy pregnancy; every stretch and jump propels you toward a more vibrant life. As exercise yields results, as you successfully conceive, hold your precious baby, enjoy robust health, and nurture a harmonious family—that’s your moment to claim victory in life.

Top 2026 US Fitness Equipment Recommendations: Smart Picks for Every Goal 🏆🇺🇸

The US fitness equipment market is evolving rapidly in 2026, blending smart technology with commercial-grade durability. Whether you’re setting up a home gym or sourcing for a commercial facility, choosing the right gear is crucial. This curated list of 10 top recommendations analyzes key products based on performance, innovation, and market demand to help you make the best investment.

2026 Market Trends: What’s Driving Equipment Choices 🚀

Three major trends are shaping purchases: integrated smart ecosystems that connect equipment to training apps, space-optimized designs for modern living spaces, and commercial-grade construction becoming standard in premium home equipment. Understanding these trends helps explain why certain products stand out.

Top 10 Equipment Picks for the US Market

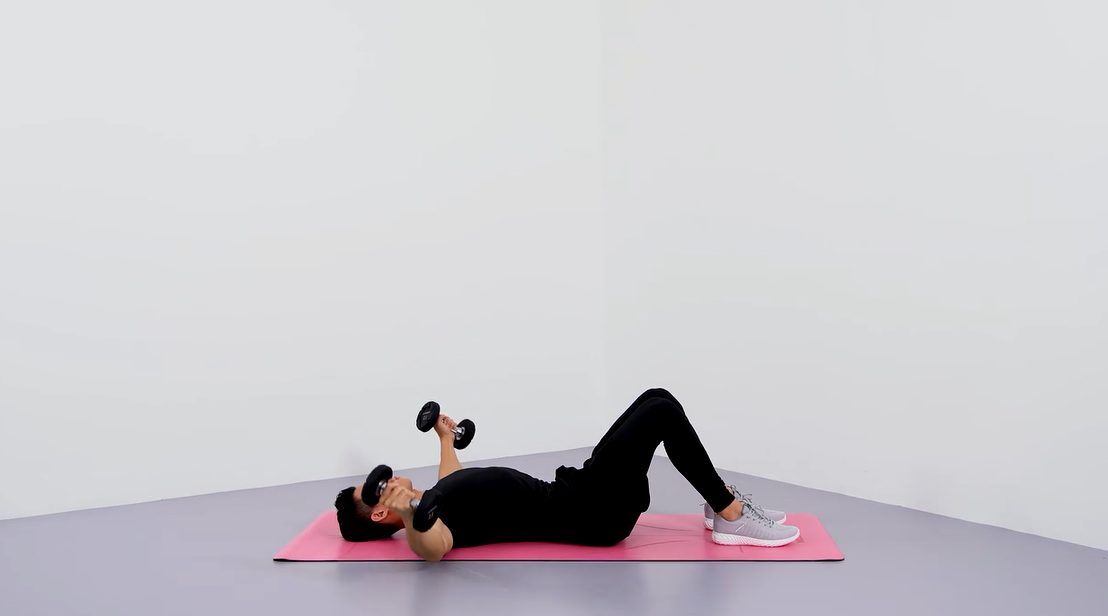
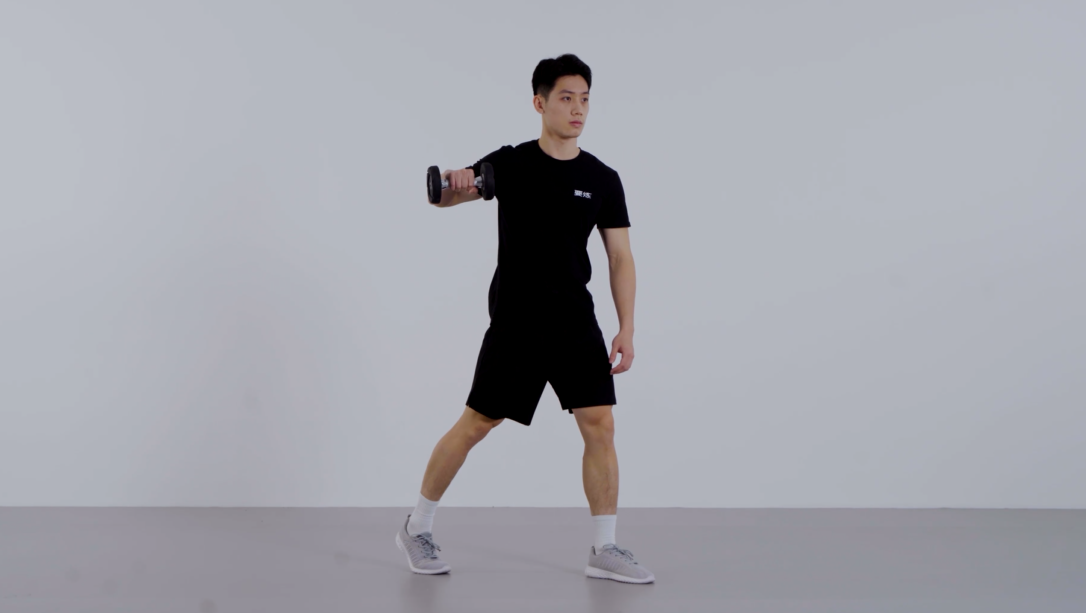
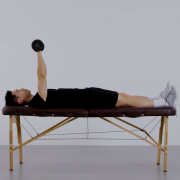
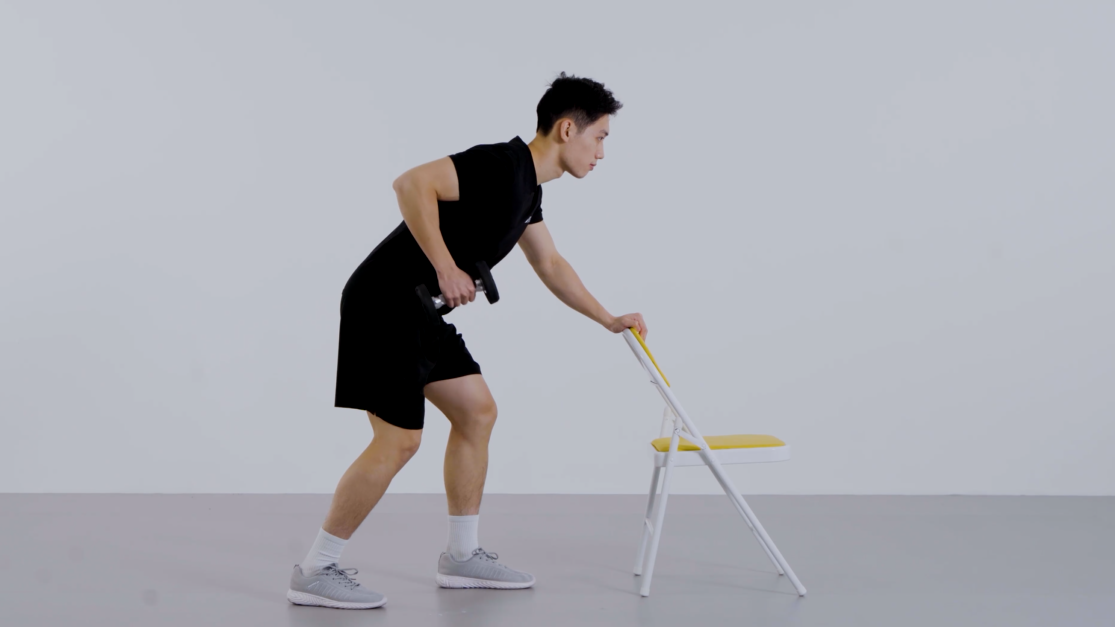
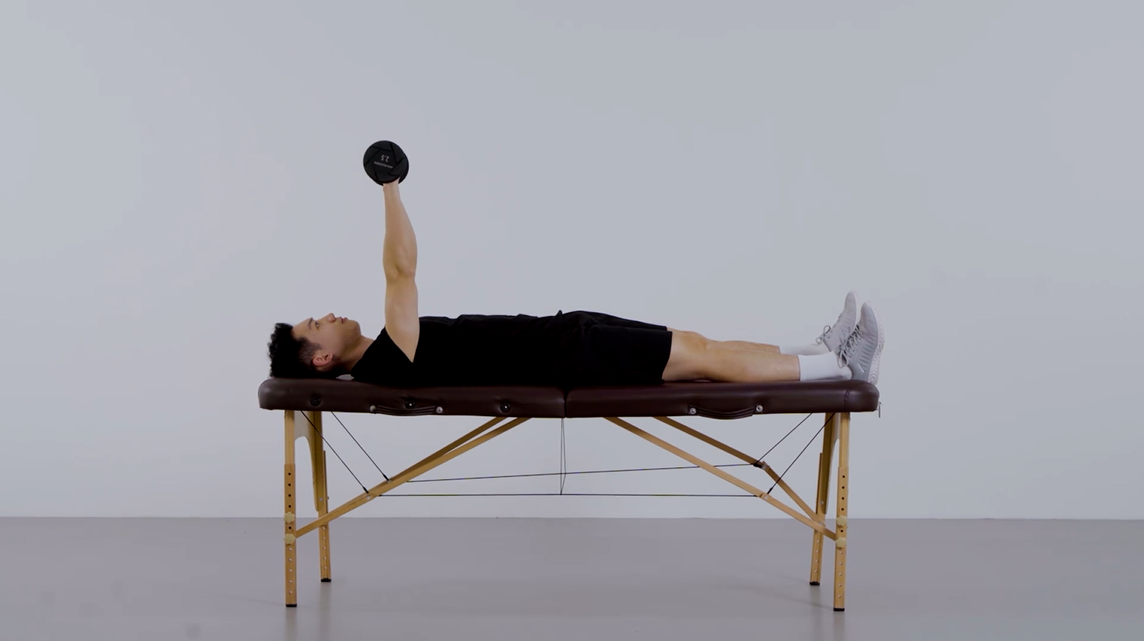
1. Smart Adjustable Dumbbells (e.g., Bowflex SelectTech 552)

These space-saving dumbbells replace entire racks with a single adjustable set. Their smart versions now track reps and sync with apps. Ideal for home users with limited space who want versatile strength training.

  • Best For: Home gyms, apartments, full-body strength

  • 2026 Edge: App integration and space efficiency

2. HARISON-X8 Tech Magnetic Exercise Bike

A leader in connected cardio, this bike features commercial-grade electromagnetic resistance and a console optimized for popular training apps. Its quiet operation and immersive experience make it a top choice for serious home cyclists.

  • Best For: Home cardio, app-based training, low-impact workouts

  • 2026 Edge: Studio-quality performance at home

3. HARISON All-in-One Power Rack Systems

Multifunctional racks like the HARISON-G30816 combine squat stations, pull-up bars, and accessory attachments in one footprint. These systems offer gym-quality versatility for dedicated home training spaces.

  • Best For: Serious lifters, functional training, space-efficient setups

  • 2026 Edge: Maximum functionality in minimal space

4. Smart Fitness Mirrors (e.g., Tonal, Mirror)

These wall-mounted systems provide AI-powered coaching in a minimalist design. They’re revolutionizing how people approach strength training at home with real-time form feedback.

  • Best For: Tech enthusiasts, guided workouts, small spaces

  • 2026 Edge: AI coaching and sleek design

5. HARISON-610 Adjustable Weight Bench

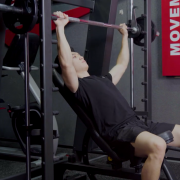
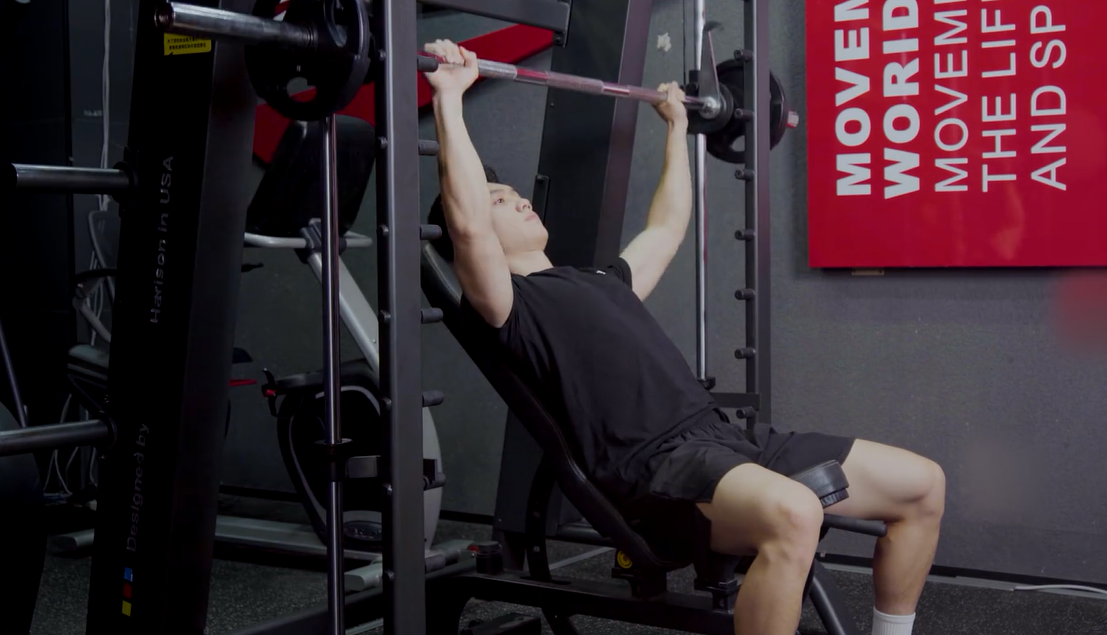
Built with commercial-grade steel and exceptional weight capacity, this Harison bench serves as the foundation for any serious strength training setup. Its multiple positions accommodate everything from bench presses to step-ups.

  • Best For: Strength training, home gym foundations, versatile workouts

  • 2026 Edge: Professional durability for home use

6. Immersive Treadmills (e.g., NordicTrack with iFIT)

High-end treadmills now offer large interactive screens with global course simulations. These machines make cardio engaging through virtual outdoor experiences and trainer-led sessions.

  • Best For: Runners, cardio enthusiasts, immersive training

  • 2026 Edge: Entertainment and engagement in cardio

7. HARISON-B51 Eco Recumbent Bike

Designed for comfort and accessibility, this Harison recumbent bike offers gentle, low-impact cardio with excellent back support. Its easy step-through design makes it suitable for all ages and fitness levels.

  • Best For: Seniors, rehabilitation, comfortable cardio

  • 2026 Edge: Accessibility and joint-friendly design

8. Harison Compact Under-Desk Ellipticals

The Harison-304 represents the growing “active workstation” trend. These mini-ellipticals enable movement while working or watching TV, addressing sedentary lifestyle concerns.

  • Best For: Office workers, active sitting, secondary cardio

  • 2026 Edge: Integrating movement into daily routines

9. Functional Trainers with Cable Systems

Versatile cable machines offer hundreds of exercise variations in a single unit. Brands like Force USA provide commercial-quality options suitable for both home and light commercial use.

  • Best For: Versatile training, physical therapy, full-body workouts

  • 2026 Edge: Unlimited exercise variety

10. Advanced Recovery Equipment

High-end massage guns and percussion therapy devices have become essential to modern fitness routines. They help with muscle recovery, soreness relief, and maintaining mobility.

  • Best For: Recovery, injury prevention, muscle maintenance

  • 2026 Edge: Scientific approach to recovery

Key Considerations When Choosing Equipment

Match Equipment to Your Primary Goals

Consider your main objectives: weight loss, strength building, cardiovascular health, or rehabilitation. Cardio machines suit weight loss goals best, while strength equipment is ideal for muscle building. Multi-functional pieces work well for general fitness.

Evaluate Space and Installation Requirements

Measure your available space carefully, considering both the equipment footprint and necessary clearance around it. Check power requirements, flooring needs, and whether professional installation is recommended or required.

Understand Warranty and Support Differences

Commercial equipment typically offers longer warranties (5-10 years on frames) but may require professional maintenance contracts. Home equipment warranties are shorter but often include more accessible customer support for DIY users.

Sourcing Strategies for Optimal Value

For Home Buyers: Focus on Versatility and Long-Term Value

Prioritize equipment that serves multiple purposes and grows with your fitness journey. Look for companies with strong customer service reputations and reasonable return policies, especially when buying higher-ticket items.

For Commercial Buyers: Prioritize Durability and Service Networks

When outfitting gyms, focus on manufacturers with proven durability in high-traffic environments. Consider total cost of ownership including maintenance, repair costs, and available local service technicians. Established commercial brands often provide better long-term support.

Emerging Direct-to-Consumer Models

Many 2026 manufacturers are bypassing traditional retail, offering better value through direct sales. These companies typically provide more competitive pricing, though buyers should research shipping logistics and assembly requirements.

Conclusion: Building Your Ideal 2026 Setup

The best fitness equipment investment aligns with your specific goals, space constraints, and budget. In 2026, successful setups combine smart technology with durable construction, whether for personal or commercial use. By focusing on versatile, well-built equipment from reputable manufacturers, you can create a fitness environment that serves your needs for years to come.

Research thoroughly, consider both immediate and long-term needs, and prioritize quality over quantity when building your perfect fitness space.


Q&A (Frequently Asked Questions)

Q1: What’s the single most versatile piece of equipment for a limited home gym space?

A: An all-in-one power rack system offers the best versatility-to-space ratio. These systems allow for squats, bench presses, pull-ups, and numerous accessory exercises in one compact footprint. When paired with adjustable dumbbells, they create a complete strength training setup in about 50-60 square feet.

Q2: How important is equipment connectivity and app integration in 2026?

A: App integration has become a significant differentiator but isn’t essential for everyone. Connected equipment offers structured workouts, progress tracking, and motivation through virtual communities. However, traditional equipment still provides excellent workouts at lower price points. Choose based on your preference for guided versus self-directed training.

Q3: What should I look for in warranties when buying commercial gym equipment?

A: Focus on frame warranty length and parts coverage. Quality commercial equipment should offer 7-10 year frame warranties and 2-3 years on parts and electronics. Also check if warranties require professional maintenance to remain valid and whether the manufacturer has a reliable service network in your area.

Q4: Are there significant quality differences between similar-looking equipment at different price points?

A: Yes, significant differences exist in materials, construction, and components. Higher-priced equipment typically uses heavier gauge steel, commercial-grade bearings, more powerful motors, and better upholstery. These differences translate to greater durability, smoother operation, and longer lifespans, especially important for frequent or commercial use.

Q5: How can I future-proof my equipment purchase for evolving fitness trends?

A: Focus on fundamentals with adaptability. Choose equipment with standard attachment points (like 1″ or 2″ holes on racks) that allow adding future accessories. Select cardio equipment with upgradeable consoles or compatibility with multiple apps. Prioritize durability over gimmicky features that may become outdated quickly.