If you have any queries or suggestions, please feel free to reach out via email to info@harisonfitness.com. We will do everything in our capacity to ensure that you love your experience with us.
From childhood to adulthood, whether in gym class or strolling through parks, we’ve witnessed all manner of peculiar running styles. Among them, the sheer variety of arm-swinging techniques leaves us both amused and bewildered—from “crab-like” arm movements to straight arms swinging vertically without bending the elbows, or even arms clamped tightly against the body… But just how crucial is the arm swing? What constitutes a proper arm swing? Let’s find out!
01 How Important Is the Swing Arm?
Increase rear push-off force to boost running speed: Proper arm swing technique enhances rear push-off force during running. Simultaneously, increasing the speed and amplitude of arm swings allows the thighs to lift higher and the hips to drive forward, thereby increasing stride length and accelerating running speed.Maintain body balance and reduce energy expenditure: Increasing the amplitude of forward-backward arm swings helps maintain balance as foot stride length and speed increase. This arm motion also stabilizes the body’s center of gravity, preventing unnecessary swaying. It allows movement to rotate primarily around the spine, minimizing wasted energy expenditure.
02 Correct Arm Swing Technique
The correct arm swing technique involves moving arms forward and backward, not side to side, as lateral swinging fails to balance the body or enhance propulsion. During running, arms should remain relaxed and swing naturally. When swinging backward, hands should align horizontally with the hips; when swinging forward, elbows should lift upward and move toward hip level.
Image
Bending elbows to approximately 90° during running may feel manageable short-term, but sustaining this angle and posture over extended periods causes increasing arm fatigue. Strong upper-body strength, however, enables a less strenuous second half of your run. Therefore, incorporating upper-body strength training into your routine is crucial. We’ve compiled the following exercises to enhance upper-body power—let’s get started!
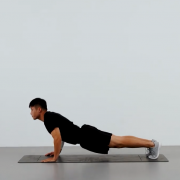
1. Push-ups
(1) Bend knees and hips, keeping feet flat on the ground. Keep your body straight and slightly arched backward, with elbows bent behind your head.
(2) Maintain a straight body and fully extend your elbows. Hold for 1-2 seconds at maximum muscle contraction, then slowly return to the starting position.
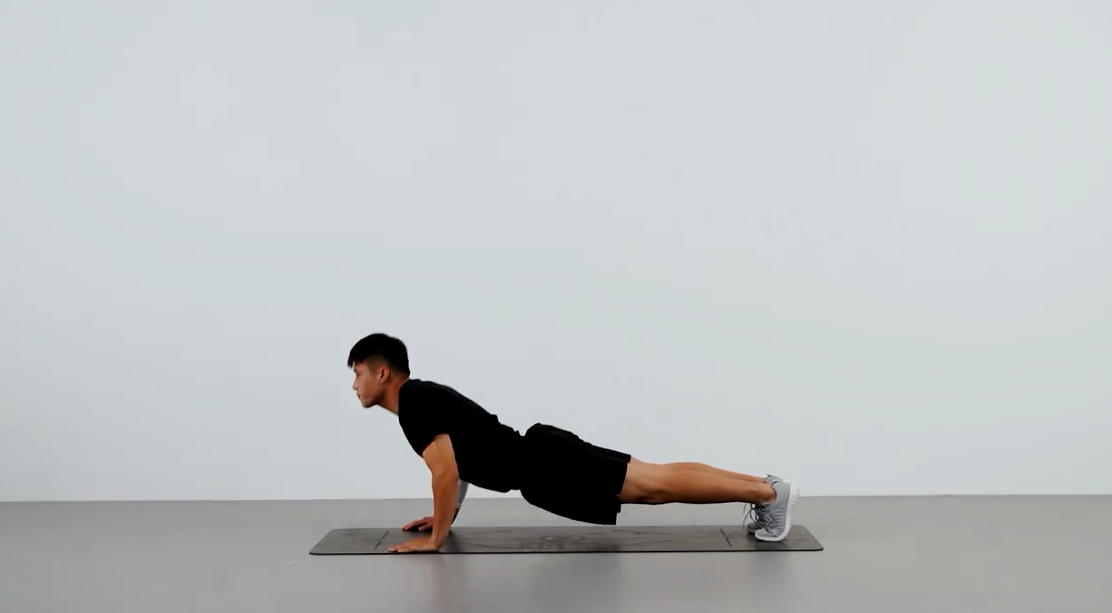
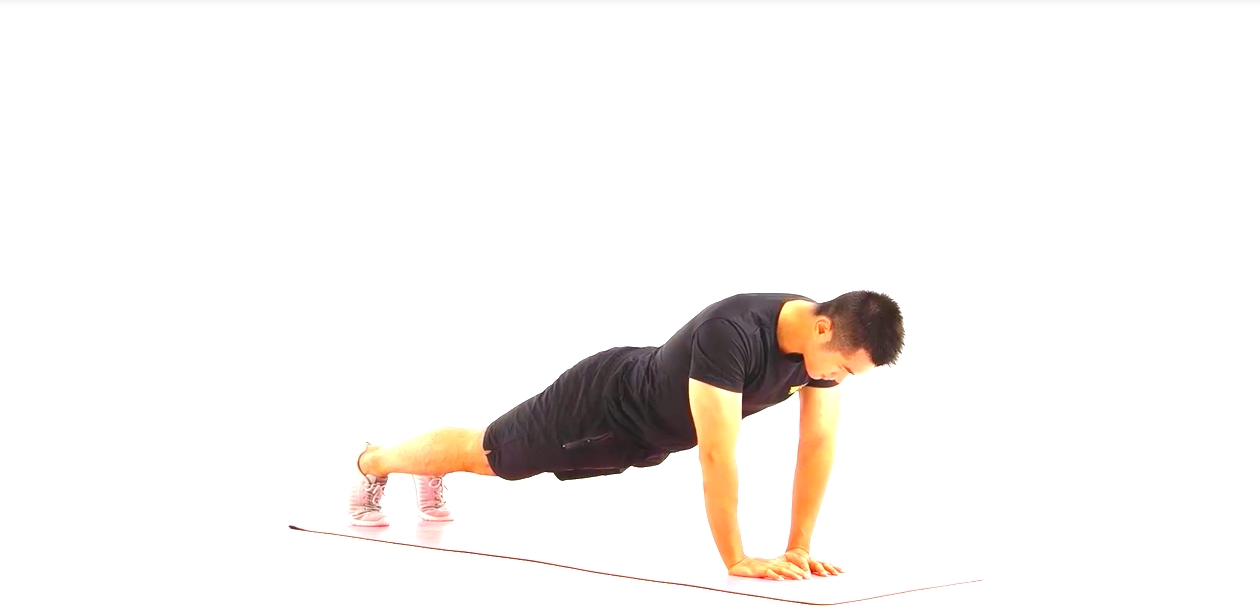
2. Standard Push-Up
(1) Keep your body as straight as possible, avoiding arching your lower back. Place your hands on either side of your chest, slightly wider than shoulder-width apart, and lower your body vertically.
(2) Maintain a steady rhythm: inhale as you lower down, exhale as you push back up.
3. Handstand Crawl
(1) Assume a four-point support position with hands and toes on the ground. Keep arms straight, hands directly beneath shoulders, and legs extended.
(2) Keeping feet stationary, alternate moving hands forward as far as possible. Slowly return hands backward to resume the starting position.
4. Dumbbell Training—Overhead Pass
(1) Stand upright with feet shoulder-width apart. Hold a dumbbell in your left hand and extend both arms out to the sides at shoulder height, palms facing upward.
(2) Keeping arms fully extended, simultaneously raise both arms overhead. Pass the dumbbell from your left hand to your right hand, then return along the same path to the starting position with both arms extended out to the sides. Repeat continuously.
Building powerful upper limbs enables stronger, more sustained arm swing. Mastering proper arm swing technique helps us glide effortlessly through each stride during runs! Consistent repetition trains muscle memory, allowing your body to execute natural arm swing motion during runs.