Pilates Reformer for Home Use: How to Choose the Best One for Your Space

A Pilates reformer can turn a spare room, basement, garage, or apartment corner into a more versatile home workout area. The machine adds guided resistance and moving support to Pilates exercises, allowing you to train your core, improve alignment, and build strength with relatively low impact on the joints. It is also useful for people who want more variety than mat Pilates can provide.


For home buyers, selecting a reformer involves more than comparing prices or choosing the most attractive design. You need to consider the carriage, rails, spring system, footbar, frame stability, accessories, storage, delivery, and available floor space. The right choice should match your experience level, workout goals, living situation, and plans for future upgrades.


This guide explains how a Pilates reformer works, how it differs from similar equipment, which features deserve attention, and how to set up and maintain one safely. The goal is to help U.S. shoppers compare models confidently without getting distracted by technical jargon or exaggerated marketing claims.


What a Pilates Reformer Does

A Pilates reformer consists of a sliding carriage connected to a frame. Springs create resistance, while ropes or pulleys, a footbar, shoulder rests, and straps support different exercises. The moving carriage challenges your control and stability while allowing you to work through a broad range of motion.


Compared with mat Pilates, a reformer offers adjustable resistance and guided movement. You can use it for footwork, leg presses, arm pulls, core exercises, standing movements, and stretching. Because the resistance can be changed in small steps, the machine can support gradual progression from beginner sessions to more demanding workouts.


A reformer is different from a Pilates Cadillac or tower. A Cadillac provides more attachment points and is often better suited to professional studios, therapy, or specialized training. However, it generally requires more room and costs more to install at home. A mini reformer is smaller and easier to move, but it may provide less carriage travel and fewer attachments.


If you want a long-term home setup with broad exercise options and greater support for larger users, a full-length reformer is usually the more versatile choice. Compact and mini models may be better when portability and limited floor space are your highest priorities.

Features to Evaluate Before Buying

When comparing Pilates reformers, focus on construction and usability rather than appearance alone. The following features influence comfort, performance, maintenance, and how long the machine can support your practice.


Carriage and rails: The carriage should move smoothly, quietly, and consistently. Durable rails, quality bearings, and balanced construction help prevent rough movement during repeated sessions. A stable carriage is especially important for single-leg and standing exercises.


Spring system: Check the number and strength of the included springs and whether the resistance range suits your current level. Hook springs are common, while some reformers use cartridge or magnetic systems. Choose a design that feels secure and allows resistance changes without interrupting your workout.


Adjustable footbar: A footbar with several locked positions can accommodate different body sizes and exercises. Look for settings suitable for footwork, standing movements, and exercises that require a longer spine position. It should remain firmly in place under pressure.


Straps, handles, and pulleys: Hand and foot loops should feel comfortable and withstand repeated use. Pulleys should roll smoothly, and replacement straps or other wear parts should be available from the manufacturer or retailer.


Frame stability and capacity: A solid frame reduces rocking and improves confidence during standing or unilateral work. Confirm the manufacturer’s recommended user weight and whether the rating includes accessories or only standard reformer use.

Accessories and upgrades: Some models accept a tower, jump board, box, or other attachments. If you expect your Pilates practice to expand, a modular reformer may provide better long-term value.


Warranty and service: Review the warranty, return period, parts availability, delivery terms, and customer support. For a large home machine, ask whether white-glove delivery or professional assembly is available.


Feature What to Check Why It Matters
Carriage and rails Smooth travel, durable rails, reliable bearings Supports quiet and consistent movement
Spring system Resistance range and easy adjustment Allows progression for different skill levels
Footbar Multiple secure positions Accommodates body size and exercise variety
Straps and pulleys Comfortable loops and replacement parts Improves control and long-term usability
Frame Stability and stated weight capacity Reduces rocking during demanding movements
Accessories Tower, box, or jump-board compatibility Makes future expansion possible
Warranty Clear coverage, returns, and service Protects a major home-equipment purchase

Space, Noise, and Setup Requirements

Measure your workout area before ordering a reformer. A full-length model needs enough room for the carriage to travel and additional clearance for mounting, getting on and off, and performing standing or extended movements. As a general planning rule, allow roughly two to three feet of extra space at each end when your routine includes long extensions or standing exercises.


Record the length and width of the available area in feet and inches. Also check ceiling height if you may add a tower or perform movements with your arms overhead. An eight-foot ceiling is often adequate for standard reformer exercises without a tower, but confirm the total height of the specific model and attachments.


Place the reformer on a firm, level surface. A suitable mat or rubber flooring can protect hardwood or concrete, improve stability, and reduce sound. Noise and vibration matter even more in an upstairs apartment or shared basement, where carriage movement and jumping attachments may disturb other occupants.


If you need to store the machine between workouts, look for wheels, a foldable frame, or a design that can be moved safely. Even a portable mini reformer may be heavier than expected and could require two people to lift. Before delivery, measure doorways, stairways, elevators, and garage access points. A seller’s assembly service may be worthwhile for a full-length machine.

Common Reformer Types

Full-length reformers provide the longest carriage travel and are usually the best option for dedicated studios, families, advanced movement, and users who want more capacity. They require the most floor space but generally offer the widest exercise range.


Compact or convertible reformers reduce the footprint or include a collapsible design. They can be a practical compromise for apartments and rooms that serve multiple purposes. Confirm that the shorter frame still provides enough travel for your preferred exercises.


Portable and mini reformers are lighter, less expensive, and easier to store. They can supplement mat Pilates effectively, but they may have fewer attachments, less resistance, and a more limited range of motion.


Hybrid fitness reformers combine Pilates components with features for general strength training. They may include sturdier footbars, anchored pulleys, or higher resistance settings. These models can be useful for cross-training but may feel different from traditional studio equipment.


Tower or clinical reformers add vertical attachments for more exercise and rehabilitation options. They are often heavier, taller, and more expensive, so they need careful planning in a home environment.


Choose a full-length model when movement range and future upgrades matter most. Consider a compact or mini model when storage and portability are more important than maximum versatility.

Safe Use and Basic Maintenance

Follow the manufacturer’s assembly instructions closely. If professional assembly is offered, it can help ensure correct pulley alignment, spring installation, and frame stability. Tighten hardware and recheck bolts after the first few sessions, since components may settle during initial use.


Before each workout, inspect the carriage, springs, straps, pulleys, and footbar. Replace frayed straps or weakened springs rather than continuing to use questionable parts. Wipe upholstery and handholds with a mild, nonabrasive cleaner after exercise, but avoid saturating the bearings, rails, or springs. Keep tracks free of dust, hair, and debris.


Some reformers require occasional rail or bearing lubrication, while others use sealed systems. Follow the specific maintenance schedule instead of applying products that the manufacturer does not recommend. Respect the stated user-weight limit and never overload the carriage with unapproved additional weight.


New users should learn basic alignment, foot placement, headrest settings, strap handling, and carriage control before using high resistance. An in-person lesson or reputable virtual class can help establish safe technique. Progress gradually, especially when adding a tower, jump board, or other attachment.


How to Select the Right Reformer for Your Home

Begin by identifying your main purpose. You may want to progress from mat Pilates, cross-train for another sport, perform general fitness sessions, or use a reformer for rehabilitation under professional guidance. Your goal will determine how much resistance, carriage travel, stability, and accessory support you need.


Next, measure the room and determine whether the reformer can remain assembled. Decide whether a full-length carriage is necessary or whether a compact design can meet your needs. Prioritize smooth carriage movement, an adjustable footbar, a resistance system that is easy to change, and a frame that feels stable.


Read product descriptions carefully. Confirm which springs, straps, headrests, boxes, and other accessories are included. Check the materials, assembly requirements, shipping method, return policy, warranty, and availability of replacement parts. For large or heavy models, ask whether delivery includes carrying the machine inside and whether white-glove setup is offered.


Final Buying Advice

A Pilates reformer can become the foundation of a low-impact home gym that grows with your practice. The best model is not necessarily the most expensive or feature-heavy option. It is the one that fits your room, supports your movement goals, offers a useful resistance range, and can be set up and maintained safely.


Compare reformers according to carriage quality, footbar adjustment, frame stability, space requirements, storage needs, and future accessories. Once you identify models that fit your measurements and priorities, review delivery terms and warranty coverage before ordering. With careful planning, a reformer can provide years of varied, controlled training at home.
Weighted Vest for Your Home Gym: How to Choose and Use the Right One

A weighted vest is a convenient way to make home workouts more challenging without adding a barbell, bench, or collection of weight plates. By placing resistance around the torso, it can increase the difficulty of push-ups, pull-ups, squats, lunges, step-ups, short runs, stair workouts, and conditioning circuits.


For people training in a garage gym, basement, or compact apartment, a weighted vest adds resistance while using very little storage space. It can provide measurable progression for bodyweight training, but choosing the right model requires more than selecting the heaviest vest available. Weight range, fit, load placement, closure design, breathability, and movement freedom all affect how useful it will be at home.


How a Weighted Vest Works and Who Benefits

A weighted vest adds mass to the body, making the muscles and cardiovascular system work harder during familiar movements. Because the load is distributed across the chest and back, it changes posture and core-stability demands differently than holding dumbbells or wearing a belt around the hips.


This makes a weighted vest useful for progressive bodyweight training and conditioning. Someone who already performs unweighted squats, push-ups, or step-ups can use a light vest to increase the training stimulus without changing the exercise. Runners, hikers, and stair climbers can also add resistance without carrying weights in their hands.


A weighted vest may suit people who rely on bodyweight training, want a compact progression tool, or need added resistance for conditioning circuits. It is less suitable for maximum-strength work such as very heavy bench presses, squats, or deadlifts, where a barbell and plates provide greater loading potential.


Features to Compare Before Buying

When shopping for a weighted vest, focus on features that affect comfort, movement quality, safety, and durability.


Weight range and adjustability: Select a vest with removable weights or small increments so you can start conservatively and progress gradually. If you plan to run, climb stairs, or perform high-repetition circuits, make sure the weight range suits those activities.


Fit and sizing: A properly fitted vest should sit snugly against the torso without restricting breathing. Measure your chest circumference and compare it with the manufacturer’s sizing chart. A vest that rides up or shifts can change movement mechanics and cause discomfort.


Weight distribution: Loads should sit close to the body and be distributed evenly. Individual pockets or removable inserts offer more flexibility and can reduce bouncing and shoulder strain.


Closures and adjustability: Wide straps, zippers, buckles, and adjustable shoulder or waist panels help stabilize the vest for different body shapes. The vest should remain secure without creating pressure points.


Materials and breathability: Breathable fabric, reinforced stitching, and abrasion-resistant materials improve comfort and service life, especially in humid basements or hot outdoor sessions.


Movement and storage: A low-profile design should leave the shoulders and arms free for push-ups, pull-ups, and overhead exercises. Consider whether the vest folds flat or requires more storage space. A clear warranty and return policy are also valuable if the fit is not right after several workouts.


Feature What to Look For Why It Matters
Weight range Small, removable increments Allows gradual progression
Fit Secure torso fit based on chest measurements Reduces shifting and discomfort
Weight placement Even loads close to the body Limits bouncing and shoulder strain
Closure system Adjustable straps, buckles, or secure zippers Improves stability during movement
Material Breathable fabric and reinforced stitching Supports comfort and durability
Design Low profile with open shoulder space Preserves range of motion
Return policy Clear return window and warranty Helps if the fit is unsuitable

Choosing the Right Weight and Fit

Your starting weight should reflect your current strength, planned exercises, and intended use. People new to weighted vests should begin with a light load for walking, step-ups, or bodyweight squats before trying weighted pull-ups or plyometrics. A vest that accepts one- to five-pound additions makes progression easier to control.


Experienced trainees may prefer a higher maximum capacity, but heavier inserts should remain tightly secured and evenly distributed. Match the load to the movement: heavier resistance can work for slow, controlled strength sets, while lighter and more stable loading is generally better for running, box jumps, and other high-impact exercises.


Try the vest with the clothing and shoes you normally wear. Perform controlled push-ups, squats, and pull-up movements to check whether it restricts your range of motion or shifts out of position. If your breathing, posture, or technique changes noticeably, reduce the weight or reassess the fit.


Safe Weighted Vest Training at Home

A weighted vest changes total load and movement mechanics, so prepare carefully before using one. Begin with dynamic mobility exercises and light bodyweight repetitions. Increase resistance in small steps and monitor form throughout every set. If alignment breaks down or joints become uncomfortable, reduce the load or stop the exercise.


Use the weight that matches the movement. High-impact exercises such as box jumps and plyometrics usually require a lighter vest because added mass increases impact. Heavier resistance is better reserved for controlled strength movements.


Check your training area before starting. If you use a pull-up bar, make sure the ceiling and surrounding space allow for any extra swing. Rubber mats or interlocking flooring can protect concrete, improve traction, and reduce noise during runs, jumps, and stair work. Vests can also increase body temperature, so take rest breaks, drink enough water, and watch for overheating.


Straps and closures should be snug enough to prevent bouncing but not so tight that they cause pinching or restrict breathing. When attempting a new heavy movement close to failure, use a spotter or choose a lighter, submaximal set.


Care, Maintenance, and Storage

Weighted vests require limited maintenance, but simple care can extend their useful life. Wipe fabric surfaces and removable weights after sweaty workouts. If the manufacturer permits machine washing, follow its instructions; otherwise, hand-wash the shell and air-dry it. Always remove the weights before washing.


Inspect seams, weight pockets, buckles, straps, and closures regularly. Stop using the vest if stitching fails or the weights shift significantly. Store it in a dry location rather than directly on a concrete floor, where moisture may collect. Remove the weights if the vest will remain unused for an extended period.


Maintenance Area Recommended Action Timing
Fabric and shell Wipe away sweat and dirt; follow care instructions After sweaty sessions
Seams and stitching Check for loose threads, tears, or separation Regularly
Weight pockets Confirm that inserts remain secure Before demanding workouts
Buckles and straps Check wear and closure function Before each use
Storage Keep the vest dry and off damp concrete During storage

Weighted Vest vs. Other Equipment

A weighted backpack may shift and place additional strain on the back, while a vest distributes resistance around the torso and is designed for exercise. A weight belt or dip belt supports heavier loading for weighted pull-ups and dips, but concentrates the load around the hips. A vest is generally better for full-body conditioning and movements that benefit from balanced torso resistance.


Ankle weights are useful for some leg-isolation exercises, but they can alter lower-leg mechanics. A vest places the load closer to the body’s center and is often more natural for compound movements, walking, and running. Barbells and dumbbells remain better for heavy, isolated strength training and maximum-load lifts. A vest is more portable for progressing bodyweight exercises or adding conditioning without a rack.


Final Buying Advice

A weighted vest can efficiently increase home-workout intensity when its size, weight range, and design match your goals. Prioritize secure fit, adjustable loading, even weight distribution, breathable materials, and a dependable return policy. Start with controlled exercises, progress gradually, and use lighter resistance for running and jumping.

Let’s talk about one of the smartest investments you can make for your strength journey—the Smith machine.

You’ve probably scrolled past a dozen “home gym must-haves” lists, but here’s the thing: if you train alone, want to push heavy weights safely, and don’t have a spotter on speed dial, a Smith machine isn’t just a nice-to-have—it’s a game-changer. Whether you’re converting a spare bedroom, claiming a corner of the basement, or building out a legit garage gym, choosing the right Smith machine can totally transform how you train, how you progress, and how confident you feel under the bar.

Let’s break down exactly what you need to know—no fluff, no fitness bro science, just the real talk that’ll help you make a smart, lasting decision.

What Exactly Is a Smith Machine—and Why Should You Care?

At its core, a Smith machine is a barbell locked into vertical (or near-vertical) steel guide rails. That means the bar moves along a fixed path, and here’s the kicker: you can rack it at any point during a rep by simply twisting your wrist. Those built-in safety catches and hook pins aren’t just bells and whistles—they’re your insurance policy against getting pinned under a heavy squat or bench press when you’re flying solo.

Compare that to a free-weight barbell, which demands constant stabilization from your core and smaller supporting muscles. With a Smith machine, that stabilization work is taken out of the equation, so you can zero in on the target muscle with laser focus. For beginners, it’s a fantastic way to learn proper movement patterns without the intimidation factor. For advanced lifters, it’s a tool to safely push past failure, overload specific muscles, and grind out those last few reps that build real size and strength.

And let’s be honest—training alone can feel a little sketchy when you’re loading up for a max-effort squat. The Smith machine gives you a psychological edge. You know you’re safe. You know you can bail if you need to. That confidence alone lets you train harder and smarter.

What to Look For When You’re Shopping

Not all Smith machines are created equal. Some are built like tanks; others will wobble the second you throw more than a couple plates on the bar. Here’s what actually matters when you’re comparing models.

Frame Construction and Weight Capacity

This is where the rubber meets the road. You want heavy-gauge steel—think 11-gauge or quality 14-gauge tubing. That’s what gives the machine its backbone, preventing flex, twisting, or fatigue over years of heavy use. A wide, sturdy base keeps everything planted during explosive movements or heavy squats, so you’re not worrying about the machine rocking while you’re grinding out a set.

Always check the manufacturer’s weight capacity—not just for the bar itself, but for any attached cable systems too. You’re not just buying for where you are now; you’re buying for where you’ll be in two or three years. Future you will thank you.

Guide Rods and Bearing Systems

The smoothness of the bar travel is a big deal. You don’t want a jerky, sticky, or uneven motion when you’re mid-rep. Linear bearings on chromed steel guide rails are the gold standard—they give you that butter-smooth, frictionless glide that serious lifters demand. Bushing systems are more budget-friendly, but they can feel a little less fluid under heavy loads and may need occasional maintenance.

Take a close look at the guide rods themselves. Chrome-plated solid steel resists corrosion, pitting, and wear way better than cheaper alternatives. This isn’t a place to cut corners if you want years of hassle-free use.

Built-In Attachments and Versatility

Space is precious in a home gym, so every square foot counts. That’s why many premium Smith machines come loaded with extras—adjustable cable pulleys, multi-grip pull-up bars, dip handles, and plate storage pegs. The question is: do you want a standalone Smith machine, or a full-on functional trainer combo unit?

If you’ve got the floor space and the budget, a combo unit is a no-brainer. It packs multiple stations into one footprint, so you can go from heavy squats to cable crossovers to pull-ups without shuffling equipment around. For most home gyms, that’s the sweet spot.

Here’s a quick cheat sheet to keep handy when you’re comparing options:

Feature What to Look For Why It Matters
Steel Gauge 11-gauge or heavy 14-gauge steel Long-term durability and high weight capacity
Bar Bearings Precision linear bearings or high-grade bushings Smooth, hitch-free bar travel on every rep
Safety Catches Adjustable spotter arms + robust hook pins Injury prevention for solo training
Footprint Compact vertical vs. multi-station combo Fits your space without cramping your workout

Don’t Skip the Space and Safety Check

Before you click “buy,” grab a tape measure and get real about your space. Manufacturers give you product dimensions, but that’s not the whole story. You need clearance around the machine—room to load plates, move comfortably, step in and out of the rack, and do accessory work without bumping into walls or shelves.

Ceiling height is the sneaky one. Smith machines often run over seven feet tall, and if you’ve got low basement ceilings, that pull-up bar attachment might not clear. Same goes for overhead pressing—you don’t want to punch a hole in the drywall mid-set.

And please—invest in high-density rubber gym flooring. It protects your subfloor, absorbs impact from dropped weights, cuts down noise, and keeps everything stable under load. Your downstairs neighbors (or your spouse) will appreciate it.

Last but not least: learn your safety catches. Set the hooks at the right height before you start lifting. Test the racking mechanism with an empty bar. Know exactly how to bail out of a rep. These aren’t optional—they’re the difference between a scary moment and a safe one.


How to Actually Train on Your Smith Machine

Once your machine is set up, the possibilities are huge. You’re not limited to squats and bench presses—you’ve got a full-body toolkit.

For lower body, you can crush Smith machine squats, reverse lunges, Bulgarian split squats, and Romanian deadlifts with locked-in form. The guided bar lets you load up without worrying about balance, so you can really hammer those quads, hamstrings, and glutes.

For upper body, incline and flat bench presses, overhead shoulder presses, and upright rows all feel incredibly controlled. You can push to failure safely, crank out drop sets, and really dial in your mind-muscle connection.

And if your machine has cable attachments? That’s where the magic happens. You can flow from heavy compound barbell work straight into cable flyes, tricep pushdowns, or face pulls—all on the same piece of equipment. That’s efficiency you just don’t get with a power rack alone.

Pro tip: track your lifts. Write down the weight, reps, and rest times. Over weeks and months, that data becomes your roadmap for progressive overload. Consistency, good nutrition, and smart recovery are still the real pillars of progress—but a versatile Smith machine makes the work a whole lot more effective.

Final Thoughts—and Your Next Move

Here’s the bottom line: the right Smith machine balances your fitness goals, your available space, and your budget. Prioritize a rock-solid frame, smooth bearings, and reliable safety catches, and you’re setting yourself up for years of productive, injury-free training at home.

Take your time. Measure twice (okay, three times). Read the specs carefully. And don’t be afraid to invest a little more upfront for quality that’ll last.

Once you’ve done your homework, check out our curated lineup of top-tier home gym equipment and accessories—we’ve done the vetting so you don’t have to. Whether you’re just starting out or leveling up a serious home gym, we’ve got options that’ll fit your space and your style.

This is your journey. Your gym. Your progress. Make the choice that sets you up for success—and get ready to lift smarter, safer, and stronger than ever.

The Complete Guide to Selecting and Using a Cable Machine for Your Home Gym

Creating a well-equipped home gym takes more than buying a few pieces of strength equipment. You need tools that deliver variety, reliable resistance, and efficient use of space. A home gym cable machine is one of the smartest options for full-body strength and conditioning. Unlike free weights, which primarily challenge you against gravity in a vertical path, a cable system maintains tension across nearly the entire range of motion. That consistent resistance helps you train individual muscles with greater control, follow more natural joint paths, and limit the momentum that can compromise technique. For anyone building a capable workout space in a garage, basement, or spare room, learning about cable machine features, dimensions, and training benefits is an important step before purchasing.

How a Cable Machine Works

A cable machine uses a weight stack or plate-loaded carriage connected to cables and pulley wheels. You apply resistance by pulling a handle, bar, rope, or other attachment connected to the cable. Its greatest advantage is adjustable pulley placement. On many functional trainers, swivel pulleys move up, down, and sometimes side to side, allowing you to set the line of pull at a high, low, or mid-level position. As a result, one machine can support dozens of compound and isolation exercises, including lat pulldowns, triceps pressdowns, cable flyes, wood chops, rows, and rotational core movements.

Cable training also differs from dumbbells and barbells because it can keep resistance more consistent throughout a repetition. During a dumbbell curl, the challenge often decreases near the beginning and end of the motion. A cable curl can continue loading the target muscle from the starting position through the contraction. This uninterrupted tension may support muscle growth, muscular endurance, and better movement awareness while reducing the temptation to force a joint into a weak angle. Cable equipment can also be practical for people who train alone: the system lowers the risk of dropping a barbell or becoming trapped beneath a failed bench press when no spotter is available.

Popular Types of Cable Systems

Cable machines come in several configurations, and the best choice depends on your available floor area, budget, and training goals. Single-stack functional trainers are a common solution for home gyms. They typically include one independent weight stack and two adjustable swivel pulleys, creating a broad range of exercise angles without taking over the room. Their relatively small footprint makes them easy to place along a wall or in a corner of a garage, basement, or dedicated workout room.

Dual-stack functional trainers use two separate weight stacks. Two people can train at the same time, and one user can perform unilateral exercises with independent resistance on each side. These commercial-style units are useful for advanced lifters and busy households, but they require more floor space and usually cost more. A third option is a wall-mounted or rack-mounted pulley system. These cable attachments bolt to wall studs or connect to an existing power rack, using weight plates or a compact stack for resistance. They are a budget-friendly, space-saving choice for lifters who already own a stable rack and want cable exercises without adding a freestanding machine.

Cable Machine Type Space Requirements Best For Main Benefits
Single-Stack Functional Trainer Moderate; wall or corner placement General home gyms and full-body training Compact design and two adjustable swivel pulleys
Dual-Stack Commercial Functional Trainer High; dedicated floor area Advanced lifters and multi-user homes Independent stacks and greater loading potential
Rack-Mounted or Wall-Mounted Pulley Low; uses an existing rack or wall Budget-conscious lifters with a power rack Low cost, minimal footprint, and plate loading

Features to Check Before Buying

Choosing the right cable machine means looking beyond its appearance. Start with the cable travel and pulley ratio, because these specifications affect how much resistance reaches your hands. With a 2:1 ratio, the user generally feels about half of the selected weight. For example, a 50-pound stack may provide roughly 25 pounds of resistance, while allowing a longer, smoother cable path and smaller effective weight increments. A 1:1 ratio delivers the selected load more directly and is often preferred by powerlifters, strong trainees, and bodybuilders who need higher resistance.

Construction quality has a direct impact on smoothness, durability, and safety. Look for nylon-coated aircraft cable that resists fraying, sturdy guide rods, and sealed bearings that help the pulleys rotate without sticking or producing sudden jerks. The frame should be made from heavy-gauge steel and remain stable during powerful movements such as cable chops, rows, and athletic pulls. Also examine the weight-stack enclosure, selector-pin design, and included accessories. A useful package may include a straight bar, lat bar, triceps rope, ankle strap, and single-grip handles, allowing you to begin training without immediately buying additional attachments.

Home Gym Space, Flooring, and Safety

Before installing a cable machine, measure both the ceiling height and the available floor area. Many freestanding functional trainers are seven to eight feet tall, so a low basement ceiling may create a clearance problem. You also need room to step away from the frame, extend your arms, and move freely during cable crossovers, rows, lunges, and rotational exercises. A dedicated training zone with open space on every side helps reduce the chance of hitting a wall, another machine, or a nearby piece of furniture.

Floor protection is equally important. Steel frames and loaded weight stacks can place considerable pressure on a subfloor. High-density rubber gym flooring or interlocking rubber tiles help protect hardwood, concrete, and tile while providing a stable, slip-resistant surface. Rubber mats can also absorb some noise when plates move or weights are set down. For safe operation, inspect cables regularly for fraying, loose connections, or other wear. Lubricate guide rods as recommended, usually with a silicone-based product, and confirm that the selector pin is completely inserted before every set. If you train alone, use controlled form and choose a manageable load rather than sacrificing shoulder or lower-back safety for heavier resistance.

Building Effective Cable Workouts

The best way to get more from a cable machine is to make it part of a balanced weekly program. Combine compound movements that train several muscle groups with isolation exercises that address specific weaknesses. Because cables allow resistance in multiple directions, they work especially well for functional strength, sports conditioning, and carefully controlled rehabilitation work.

A lower-body workout could include cable pull-throughs to emphasize the glutes and hamstrings, standing cable hip abductions for hip stability, and supported single-leg Romanian deadlifts for balance and posterior-chain strength. You can adjust the pulley height and stance to match your mobility and training objective without changing to a completely different machine.

Cable equipment is just as effective for upper-body training. Pair vertical pulling movements, such as kneeling lat pulldowns, with horizontal presses like standing cable chest presses. Add face pulls for the rear deltoids, standing cable curls for the biceps, and overhead triceps extensions to build a complete upper-body session. Since the selector pin changes resistance in seconds, cable machines are also ideal for drop sets and supersets. Quick transitions keep the workout moving, maintain intensity, and make better use of limited training time.

Final Buying Decision and Next Steps

A cable machine can significantly expand a home gym by combining exercise variety, adjustable resistance, progressive overload, and a training experience that is often safer for solo users. To narrow your choices, compare the machine’s footprint, ceiling requirements, pulley ratio, maximum load, attachment package, and total price with your long-term fitness goals. Give priority to a rigid frame, quiet and smooth cable travel, dependable hardware, and durable materials instead of choosing based only on color or cosmetic features.

After the unit is assembled and securely anchored, test several attachments and pulley heights to find the positions that feel most natural for your body. Learning how the angles change each exercise will help you use the machine more effectively and continue progressing over time. If you are ready to upgrade your workout space, explore our curated selection of durable home gym cable machines, functional trainers, and strength-training accessories designed to support efficient, high-performance workouts.

The Ultimate Guide to Choosing and Using a Walking Pad for Home and Office Fitness

In recent years, the fitness landscape has shifted dramatically. With more people working remote or hybrid schedules, finding time for daily physical activity has become a significant challenge. Long hours spent sitting at a desk can lead to fatigue, stiffness, and a sedentary routine that is difficult to break. This is where the walking pad has emerged as one of the most popular and practical fitness accessories for modern households. Unlike traditional bulky treadmills that demand dedicated room space and heavy installation, a walking pad offers a streamlined, low-profile solution designed specifically for light movement, multitasking, and compact living environments.

A walking pad is essentially a slim, lightweight, often handleless treadmill engineered for walking speeds. It slides effortlessly under a standing desk, tucks away beneath a sofa, or stands upright in a closet when not in use. For individuals seeking to integrate more steps into their workday without sacrificing productivity, it provides an accessible entry point to cardiovascular health. However, navigating the market can be overwhelming with dozens of models boasting varying motor sizes, deck dimensions, and smart features. This guide explores everything you need to know about selecting, setting up, and safely using a walking pad to enhance your daily wellness routine.

Understanding the Rise of Walking Pads in Modern Workspaces

The modern sedentary lifestyle is a well-documented obstacle to long-term health and vitality. Sitting for eight to ten hours a day restricts blood circulation, lowers metabolic rate, and places continuous strain on the lower back and neck. While evening gym sessions or outdoor runs are beneficial, they often fail to counteract the sheer volume of consecutive sitting hours accumulated during a standard workday. Standing desks offered the first wave of relief, yet standing still for hours can also cause discomfort, fatigue, and venous pooling in the lower extremities.

Dynamic movement during sedentary hours bridges this gap. Walking at a gentle pace of one to two miles per hour while typing, reading emails, or attending virtual meetings keeps the body engaged without disrupting cognitive focus. Users quickly discover that light walking stimulates mental alertness and curbs the afternoon slump. Furthermore, because walking pads are engineered specifically for low-impact movement, they place minimal stress on the joints compared to high-intensity running or sprinting. This makes them exceptionally well-suited for individuals of all fitness levels, whether you are a seasoned athlete looking to maintain baseline activity or a beginner taking your first steps toward an active lifestyle.

Key Features to Evaluate Before Purchasing Your Walking Pad

When shopping for a walking pad, evaluating technical specifications ensures that your investment matches your living space and usage habits. Not all compact treadmills are created equal, and understanding core components prevents buyer’s remorse.

Feature Category What to Look For Why It Matters
**Motor Power** 1.5 HP to 2.5 HP continuous duty Ensures smooth belt movement under load without stalling or overheating.
**Belt Dimensions** At least 40 inches long by 15-16 inches wide Provides adequate stride space for safe, natural walking without clipping the motor housing.
**Maximum Weight Capacity** 220 lbs to 300 lbs Indicates overall build quality, structural integrity, and frame durability.
**Storage Profile** Foldable decks or wheels with sub-6-inch height Allows seamless sliding under beds, couches, or upright closet storage.
**Noise Level** Under 65 decibels during operation Ensures uninterrupted phone calls, virtual meetings, and quiet apartment living.

Motor performance is the heartbeat of any walking pad. Unlike gym treadmills built for running at high speeds, walking pads typically operate in the zero to four or five miles per hour range. A reliable motor should engage smoothly, accelerate without sudden jerking motions, and maintain consistent speed even when stepping down with body weight. Noise reduction is equally critical, especially in multi-family housing or shared home offices. Brushless motors generally offer quieter performance and longer lifespans compared to traditional brushed alternatives.

Deck construction and cushioning technology dictate user comfort. Walking for extended periods places repetitive impact on ankles, knees, and hips. Quality walking pads incorporate multi-layer running belts equipped with shock-absorbing elastomers or EVA cushioning layers that disperse impact shock before it reaches your joints. Additionally, pay close attention to the walking surface dimensions. Narrow or excessively short belts force an unnatural, shortened stride, which can lead to awkward posture and foot fatigue over time.

Designing Your Ergonomic Work-From-Home Setup

Integrating a walking pad into a home office requires careful attention to workstation ergonomics. Simply placing a walking pad in front of a standard fixed-height desk will result in poor posture, neck strain, and potential wrist injury. Achieving a harmonious setup involves synchronizing your desk height, monitor placement, and peripheral configuration.

Your standing desk must be fully adjustable to accommodate both standing and walking heights. When walking, your arms should rest comfortably on the desk surface with your elbows bent at a ninety-degree angle while typing. If the desk is too low, you will hunch forward, putting undue pressure on your cervical spine. If the desk is too high, your shoulders will elevate, leading to tension headaches and shoulder fatigue. Monitor placement should position the top third of the screen at eye level so that your gaze remains forward rather than looking down at a laptop screen.

Cable management is another crucial consideration. Because walking pads require a wall power outlet, loose power cords or USB charging cables trailing near the moving belt create severe tripping hazards. Secure all cords using clips, run them along desk legs, or invest in wireless peripherals to maintain a clean, unobstructed workspace. Furthermore, always start your walking session at the lowest speed setting (0.5 mph) to allow your body to adapt to the moving surface before adjusting upward once you feel balanced and stable.

Safety Protocols and Best Practices for Daily Use

While walking pads are remarkably user-friendly, operating electrical fitness equipment in a home or office environment demands strict adherence to safety protocols. Establishing routine habits protects both the user and the equipment from unnecessary wear and tear.

First and foremost, footwear matters significantly. Never use a walking pad barefoot or in slippery socks. Supportive athletic shoes with textured rubber outsoles provide essential traction and grip, preventing slips as the belt cycles backward. Additionally, lightweight, breathable athletic clothing prevents overheating during extended walking sessions, even at gentle speeds.

Maintaining spatial awareness is another vital precaution. Position your walking pad in an open area with adequate clearance behind the deck in case of a misstep or sudden stop. Most walking pads feature emergency stop mechanisms, such as a magnetic safety tether clipped to your clothing or a remote control with an immediate pause button. Familiarize yourself with these controls before stepping onto the belt.

Maintenance routines ensure longevity. Walking pads accumulate dust, carpet fibers, and pet hair beneath the belt, which can friction-lock the motor or wear down the deck lubrication. Periodically inspect the belt alignment to ensure it tracks centrally without rubbing against the side rails. Apply silicone-based lubricant underneath the walking belt every few months according to the manufacturer specifications to reduce friction and maintain whisper-quiet operation.

Maximizing Health and Productivity Benefits

The true value of a walking pad lies in its ability to seamlessly weave physical activity into the fabric of a busy day. Rather than viewing exercise as a separate chore that requires changing clothes, driving to a facility, and carving out an hour of free time, under-desk walking transforms sedentary hours into productive movement.

Beginners should start gradually. Aim for short ten-to-fifteen-minute walking intervals twice a day at a slow pace of 1.2 to 1.5 miles per hour. This allows your neuromuscular system to adapt without causing excessive fatigue or interfering with your concentration. As your balance and endurance improve, you can gradually extend the duration of your walking blocks and increase the speed up to 2.0 or 2.5 miles per hour. Many users find that certain tasks—such as reading long documents, reviewing spreadsheets, listening to podcasts, or participating in listening-only conference calls—are ideally suited for walking, while intricate writing or complex problem-solving may be better reserved for standing or sitting.

Consistency outperforms intensity when building sustainable wellness habits. Accumulating five thousand steps throughout your workday via multiple light walking sessions delivers profound cumulative benefits for cardiovascular circulation, metabolic health, and mental well-being. By removing the friction points associated with traditional exercise, a walking pad empowers you to take control of your daily movement right from your home or office. Explore our curated collection of high-performance walking pads to find the ideal model that complements your space and supports your journey toward a healthier, more active lifestyle today.

The Complete Guide to Choosing and Using Dumbbells for Your Home Gym

Building an effective home workout space requires careful consideration of the equipment you bring into your living area. Among all strength training tools available on the market today, dumbbells remain the undisputed cornerstone of functional fitness. Whether your personal objective is to build lean muscle mass, enhance overall athletic performance, or simply maintain consistent physical conditioning, incorporating dumbbells into your daily or weekly routine offers unmatched versatility. Unlike bulky multi-station cable machines that dominate an entire room, a well-chosen set of dumbbells provides a comprehensive full-body workout while requiring minimal storage footprint. This makes them exceptionally ideal for apartments, suburban garages, and dedicated residential fitness rooms alike, ensuring you can achieve a professional-grade workout without sacrificing your living space.

When embarking on a fitness journey at home, understanding the various types of dumbbells available is the first crucial step. The strength training market generally divides into fixed-weight dumbbells and adjustable dumbbells, each serving distinct training preferences and spatial limitations. Fixed-weight dumbbells, often coated in heavy-duty rubber, durable urethane, or comfortable neoprene, offer a traditional gym feel with zero setup time between exercises. You simply walk up to your storage rack, pick up the exact weight you need, and begin your set immediately. On the other hand, adjustable dumbbells utilize innovative dial, pin, or lever mechanisms to let you cycle through multiple weight increments within a single compact unit. This makes adjustable models exceptionally popular for homeowners looking to maximize training versatility without cluttering their workout area with dozens of individual pairs.

Evaluating your specific training style and fitness objectives will naturally guide your weight selection process. Beginners often benefit from starting with lighter, highly versatile increments that allow for proper form mastery across both compound and isolation movements, such as bicep curls, shoulder presses, and goblet squats. As your muscular strength and endurance progress, having access to heavier loads or expandable weight systems becomes essential for progressive overload, which is universally recognized as the fundamental driver of muscle hypertrophy and functional strength gains. Furthermore, material construction plays a vital role in both product durability and floor protection. Rubber-encased heads absorb impact effectively and significantly reduce noise during accidental drops, while neoprene or vinyl coatings offer comfortable grips and gentle exterior surfaces for floor-based aerobic routines and core stability movements.

Key Factors to Consider When Selecting Dumbbells

Feature Category Fixed Dumbbells Adjustable Dumbbells Neoprene / Light Weights
**Primary Use** Heavy lifting, commercial & home gyms Space-saving strength training Aerobics, rehabilitation, light toning
**Space Efficiency** Requires a rack; takes up more room Highly compact; replaces up to 15 pairs Minimal footprint; easy to store in a closet
**Adjustment Speed** Instant (grab and go) Requires a few seconds to switch pins/dials Fixed weight; no adjustment needed
**Durability** Extremely durable solid steel/cast iron core Complex mechanical parts require careful handling Vinyl/neoprene coating can chip if dropped

Creating a functional home gym layout also demands strict attention to safety and spatial ergonomics. Dumbbells, by the inherent nature of being loose weights, present potential rolling hazards if not stored correctly after a strenuous set. Investing in a sturdy vertical or horizontal storage rack not only protects your home flooring and extends the structural lifespan of your weights but also keeps your active workout zone organized and completely hazard-free. When lifting in confined residential spaces, always ensure you maintain adequate physical clearance around your body for dynamic exercises like lateral raises, reverse lunges, and overhead presses. Placing high-density rubber flooring mats underneath your primary lifting area further cushions accidental drops and dampens mechanical vibrations, effectively preserving your home’s subfloor and maintaining household harmony.

Proper ongoing maintenance ensures that your financial investment in strength equipment lasts for many years of heavy use. Rubber-coated and cast-iron dumbbells require only occasional wiping down with a mild, non-abrasive soap and water solution to remove accumulated sweat, skin oils, and dust. For modern adjustable systems, keeping the internal track mechanisms clean and free of debris ensures smooth weight transitions and prevents mechanical jamming during quick supersets. Avoid exposing uncoated cast-iron weights to excessive moisture, dampness, or high humidity environments to prevent oxidation and rust formation, particularly if your home workout space is situated in a garage, basement, or outdoor patio setting.

Developing an Effective Full-Body Routine with Free Weights

Structuring your weekly training regimen around free weights allows for unlimited progression and targeted muscle stimulation. To maximize the effectiveness of your home workouts, it is beneficial to alternate between upper-body and lower-body focus days while ensuring adequate rest and recovery periods between strenuous sessions. A well-rounded program incorporates multi-joint compound movements that recruit multiple muscle groups simultaneously, leading to greater hormonal responses and improved functional coordination. For instance, combining dumbbell bench presses, bent-over rows, and overhead shoulder presses creates a balanced upper-body stimulus that targets the chest, back, shoulders, and arms efficiently.

Lower-body training with dumbbells offers exceptional freedom of movement compared to traditional smith machines or fixed-path leg presses. Exercises such as goblet squats, Romanian deadlifts, and Bulgarian split squats challenge your stabilizing muscles while building exceptional lower-body strength and unilateral balance. Because dumbbells allow your limbs to move through their natural anatomical arcs, you can easily customize your stance and range of motion to accommodate individual mobility levels and joint comfort. This adaptability makes dumbbell training exceptionally safe and sustainable over the long term for practitioners of all ages and fitness backgrounds.

Nutrition, Recovery, and Long-Term Progress

Achieving your fitness aspirations involves more than just lifting weights; it requires a comprehensive and holistic approach that encompasses proper daily nutrition, adequate hydration, and sufficient rest. Muscles grow and repair themselves during periods of rest outside the gym environment, making sleep quality and stress management critical components of any successful strength training program. Additionally, consuming balanced meals containing adequate protein sources, complex carbohydrates, and healthy fats provides the necessary building blocks for muscle recovery, tissue repair, and sustained energy levels throughout your demanding workouts.

Tracking your progress over time is another vital practice that keeps you motivated and ensures continuous physical improvement. Maintaining a simple training log where you record exercises, weight loads used, and repetition counts allows you to implement progressive overload systematically. When a specific weight increment feels manageable for your target repetition range, you know it is time to progress to the next heavier setting or increase your total working volume. This methodical approach eliminates guesswork and fosters steady, measurable physical gains week after week.

Making Your Final Purchasing Decision

When you are finally ready to invest in your home fitness setup, carefully evaluating your available budget, spatial constraints, and long-term training goals will point you toward the ideal equipment configuration. Whether you choose the seamless convenience of fixed-weight sets or the remarkable space-saving capability of modern adjustable systems, high-quality dumbbells represent one of the smartest investments you can make in your personal health and overall well-being. We cordially invite you to explore our carefully curated selection of strength training equipment to discover the perfect setup for your home gym today.

A Simple Progress Plan

Use a weight that lets you complete the prescribed reps with control, then repeat the same movement one or two times per week. When the final reps feel consistently comfortable, add the smallest available increment or add a few reps. This measured approach helps you build confidence without rushing past sound technique.

How to Choose the Best Home Exercise Bike for Your Workout Space

When you are building a home gym, the right cardio machine should do more than look impressive in a corner. It should fit your available space, match your fitness goals, feel comfortable during regular use, and be simple enough to keep you coming back. Treadmills can deliver effective walking and running workouts, but they often require more floor space and can create significant impact. A home exercise bike offers a practical alternative for steady cardio, calorie-burning workouts, and low-impact conditioning.

The challenge is choosing the right type of bike. Upright bikes, recumbent bikes, and indoor cycling bikes can look similar at first glance, but they provide different riding positions and training experiences. Resistance systems also vary, with magnetic resistance becoming a popular choice for home users who want a smoother and quieter workout. Understanding these differences can help you choose equipment that supports your routine for the long term.

What Types of Exercise Bikes Are Available?

Most home exercise bikes fall into three main categories: upright bikes, recumbent bikes, and indoor cycling bikes. An upright bike places the rider in a position similar to a traditional bicycle. It is a versatile option for everyday cardio, moderate resistance training, and compact home gyms.

A recumbent exercise bike places the pedals in front of the rider and includes a wider seat with a backrest. This design provides more support and makes it easier to get on and off the machine. It can be a good option for older adults, beginners, people returning to exercise, or anyone who prefers a more supported, low-impact workout.

Indoor cycling bikes typically use a more forward-leaning riding position and are designed to create a stronger connection between the rider and the pedals. They are often chosen for cadence-based workouts, interval sessions, and users who enjoy a more athletic cycling experience.

Why Magnetic Resistance Is Popular for Home Gyms

Resistance is one of the most important features to evaluate. Magnetic resistance works by changing the relationship between magnets and the bike’s flywheel. Because the resistance mechanism does not require a friction pad to press directly against the flywheel, magnetic bikes generally provide a quieter and smoother riding experience.

Many magnetic exercise bikes include multiple resistance levels, allowing users to move from an easy warm-up to a more challenging cardio session. Beginners can start with lighter resistance and focus on maintaining a comfortable pace. More experienced users can increase the resistance for interval training or a stronger leg workout. This flexibility also makes a magnetic bike practical for households where several people with different fitness levels share the same equipment.

Magnetic resistance can be especially useful in apartments, bedrooms, and shared living spaces. A quieter bike makes it easier to work out early in the morning or later in the evening without creating unnecessary disturbance. It also reduces the need for frequent replacement of friction components, although every product should still be maintained according to the manufacturer’s instructions.

The Main Benefits of a Home Exercise Bike

Low-Impact Cardio for Consistent Training

Exercise bikes provide a seated pedaling motion rather than repeated running or jumping. This makes them a lower-impact choice for people who want to protect their knees, ankles, and lower back from excessive pounding. A low-impact workout can still raise your heart rate and support cardiovascular conditioning, while allowing you to control the pace and resistance more gradually.

This is one reason exercise bikes work well for consistent home routines. You can begin with a short, easy session and increase the duration as your fitness improves. The goal is not to make every workout exhausting. A bike that feels comfortable enough to use regularly can be more valuable than a machine that only works for occasional high-intensity sessions.

Adjustable Intensity for Different Fitness Levels

A bike with adjustable resistance can support several types of workouts. You might use low resistance for a warm-up, moderate resistance for steady-state cardio, or alternating levels for interval training. The ability to adjust intensity also makes the bike more useful over time, because your workouts can progress as your endurance and strength improve.

Stable, Controlled Movement

A well-designed exercise bike should feel stable when you pedal. A supported riding position also makes it easier to manage workout intensity and maintain consistent form. On a recumbent bike, the backrest and wider seat can reduce fatigue during longer sessions. On an upright or indoor cycling bike, correct seat positioning is essential for a comfortable and efficient pedal stroke.

Features to Check Before You Buy

Evaluation Area What to Look For Why It Matters
Frame construction Solid steel frame, stable base, and levelers Helps reduce movement during harder workouts
Resistance system Magnetic resistance and clearly defined levels Supports quiet, controlled intensity changes
Drive system Belt or chain drive Affects noise, smoothness, and maintenance
Seat adjustment Height, forward-and-back movement, and padding Helps improve comfort and leg alignment
Display and connectivity Time, distance, speed, calories, and Bluetooth options Makes it easier to track workout progress
Weight capacity A clearly stated maximum user weight Helps confirm that the frame fits your needs

Frame stability should be a priority. When you increase resistance or pedal quickly, the bike receives more force through the pedals, seat, and handlebars. A lightweight frame or narrow base may feel unstable, especially during longer or more demanding workouts. Look for a substantial frame, a secure base, and non-slip feet that help keep the machine in place.

The drive system also affects the everyday experience. Belt-driven bikes are often quieter and require less routine maintenance, making them attractive for apartments and shared spaces. Chain-driven systems can provide a more traditional mechanical feel, but they may require occasional inspection, lubrication, or tension adjustment. For most home users, smooth operation, manageable noise, and easy upkeep are more useful than unnecessary complexity.

Seat adjustment is equally important. Your knee should remain slightly bent when the pedal is at its lowest point. If the seat is too high or too low, the riding position may feel uncomfortable and could place extra stress on your joints. Recumbent bike users should also check the seat rail and backrest design to make sure the bike can accommodate their height and preferred posture.

Planning Your Workout Area

Measure the space before ordering a bike. A recumbent model may have a longer footprint because the pedals sit in front of the seat, while an upright bike may require less floor space. Regardless of the style, leave enough room to get on and off safely, adjust the seat, and move around the equipment without bumping into furniture.

A dense rubber exercise mat can help protect hard floors, reduce vibration, and keep the bike from shifting. It also makes cleanup easier if sweat reaches the floor during training. Place the bike in an area with adequate ventilation, especially if you plan to perform longer or higher-intensity workouts.

Maintenance is usually straightforward. Wipe the seat, handlebars, frame, and other exposed surfaces after use. Check the pedals, bolts, and seat adjustment points periodically to make sure they remain secure. Avoid spraying liquid directly onto the console or internal components. Keeping the bike clean and dry can help preserve its quiet, smooth performance.

How to Make the Final Decision

The best home exercise bike is not necessarily the one with the most features. It is the one that fits your body, your home, and the way you actually plan to exercise. If quiet operation and smooth intensity changes are important, a magnetic exercise bike may be the right choice. If you want extra back support and an easier step-through design, a recumbent bike may be a better fit. If you enjoy a more active cycling position, compare upright and indoor cycling models based on seat adjustment, pedal feel, and frame stability.

Before purchasing, compare the bike’s dimensions, resistance levels, weight capacity, drive system, warranty, and customer feedback. A reliable home cardio machine should feel comfortable enough to use repeatedly and simple enough to maintain. Consistent workouts are easier to build when your equipment supports your daily routine instead of creating new obstacles.

The Ultimate Guide to Choosing and Using a Barbell for Your Home Gym

Building a home gym is an exciting milestone for any fitness enthusiast, and at the center of nearly every serious strength training setup sits the barbell. Whether your goal is powerlifting, Olympic weightlifting, general strength building, or functional fitness, a quality barbell is the most versatile and enduring investment you can make. Unlike single-purpose machines, a barbell allows you to perform compound movements that recruit multiple muscle groups simultaneously, maximizing your training efficiency and functional strength.

However, with so many options available on the market, selecting the right barbell can feel overwhelming. From sleeve rotation and tensile strength to knurling patterns and coating types, understanding the technical specifications of a barbell ensures that you make a safe, durable, and performance-driven purchase. This guide explores everything you need to know about choosing, using, and maintaining a barbell for your home training space.

Understanding Barbell Anatomy and Specifications

Before evaluating specific types of barbells, it is crucial to understand the fundamental components and engineering metrics that define barbell performance. A standard Olympic barbell consists of a steel shaft, two rotating sleeves where weight plates are loaded, and collars or snap rings that secure the sleeves to the shaft.

Tensile Strength and Steel Quality

Tensile strength, measured in Pounds per Square Inch (PSI), is one of the most reliable indicators of barbell quality and durability. High-grade steel bars typically feature a tensile strength ranging from 190,000 to 200,000 PSI or higher. Bars in this range offer excellent memory, meaning they will spring back to their original straight position even after enduring heavy deadlifts or squats. Lower-quality bars with lower PSI ratings are prone to permanent bending under heavy loads, making them unsafe and unsuitable for serious strength training.

Whip and Rotation

Whip refers to the natural flexibility of the steel shaft. In Olympic weightlifting movements such as the clean and jerk or snatch, a barbell with moderate to high whip allows lifters to harness the bounce of the bar to transition under the weight more efficiently. Conversely, powerlifters generally prefer a stiffer bar with minimal whip to maintain stability during heavy squats, bench presses, and deadlifts. Sleeve rotation—governed by bushings or needle bearings—is another critical factor. Bushings offer a smoother, more controlled rotation suited for powerlifting, while needle bearings provide rapid, frictionless spin required for explosive Olympic lifts.

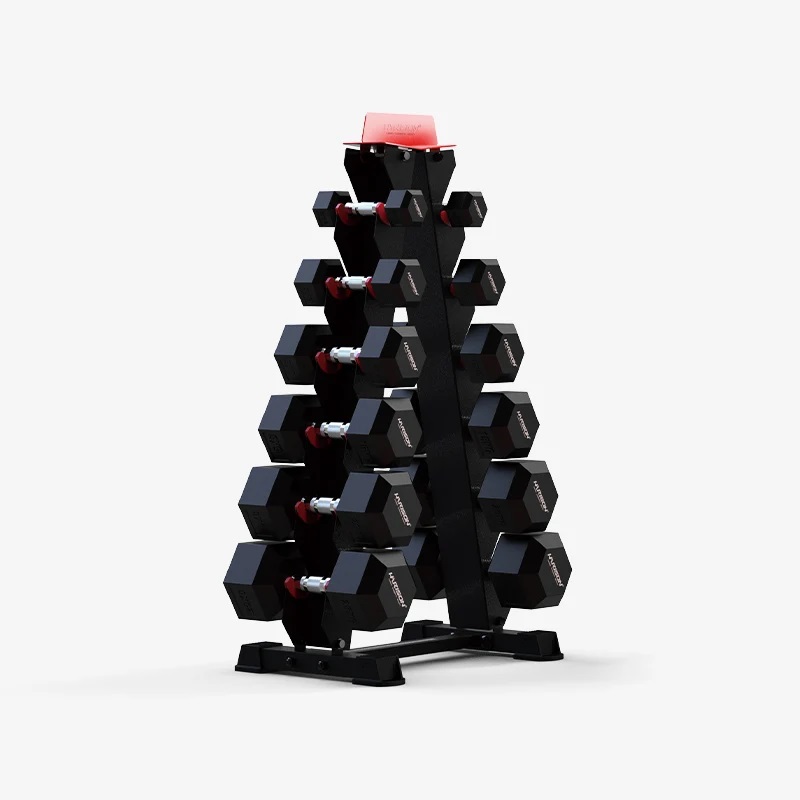
HARISON HR-325 Tower Dumbbell Frame

Key Types of Barbells for Different Training Goals

Not all barbells are created equal. Different training disciplines demand specialized bar designs to optimize performance and reduce injury risk. Choosing the correct bar type depends entirely on your primary training focus.

Barbell Type Typical Length Shaft Diameter Primary Use Case Key Characteristic
**Men’s Olympic Bar** 7 feet (220 cm) 28 mm Olympic lifting, CrossFit High spin, moderate whip
**Women’s Olympic Bar** 6.5 feet (201 cm) 25 mm Olympic lifting, general training Thinner grip, high spin
**Powerlifting Bar** 7 feet (220 cm) 28.5–29 mm Squat, bench, deadlift Stiff shaft, aggressive knurling
**Multi-Purpose Bar** 7 feet (220 cm) 28.5 mm General strength, garage gyms Balanced whip, dual knurling

Multi-Purpose and Garage Gym Barbells

For most home gym owners who enjoy a diverse routine combining powerlifting, bodybuilding, and general conditioning, a multi-purpose bar is the ideal choice. These bars feature dual knurling marks to accommodate both powerlifting and weightlifting grips, moderate whip, and a reliable bushing system that balances durability with smooth rotation. They provide the versatility needed to transition seamlessly from bench presses to bent-over rows without needing multiple specialized bars.

Specialized Bars: Trap Bars and EZ Curl Bars

Beyond standard straight bars, specialized bars can enhance your home gym setup. A trap bar (or hex bar) places your center of gravity inside the weight frame, reducing lower back strain during deadlifts and making it an exceptional tool for beginners and experienced lifters alike. An EZ curl bar features angled grips that reduce wrist and elbow stress during bicep curls and skull crushers, promoting joint health during arm isolation work.

Knurling and Finishes: Grip and Corrosion Resistance

The tactile interface between your hands and the steel is determined by the knurling—the textured pattern etched into the barbell shaft. Knurling ensures a secure grip when your palms get sweaty during intense sets.

Knurling Patterns and Center Knurling

Knurling aggressiveness varies widely. Powerlifting bars often feature sharp, deep knurling to lock into the hand during maximal deadlifts. Multi-purpose bars feature moderate knurling that provides a secure grip without tearing your skin during high-rep training. Additionally, many bars feature a center knurling, which helps the bar stick to your back during heavy squats. However, some lifters prefer center-knurling-free bars to avoid skin abrasion during chest-to-bar movements or front squats.

Protective Coatings

Because barbells are exposed to sweat, chalk, and humidity, steel maintenance is vital. Different finishes offer varying levels of defense against rust and wear:

  • **Bare Steel:** Offers the purest, most natural grip feel, but requires regular oiling and maintenance to prevent oxidation.
  • **Black Oxide:** Provides a sleek matte appearance and moderate grip retention, though it offers limited corrosion resistance compared to plated options.
  • **Hard Chrome and Stainless Steel:** The gold standard for home gyms. Stainless steel provides unmatched grip and rust resistance without requiring heavy coatings, while hard chrome delivers a durable, highly corrosion-resistant shield.

Integrating a Barbell into Your Home Gym Space and Safety Routine

Setting up a barbell training station at home requires careful consideration of spatial dimensions, flooring, and safety equipment. A standard Olympic barbell is 7 feet long, which means you need at least an 8-foot to 10-foot clearance to safely load and unload plates without striking walls or surrounding equipment.

Flooring and Protection

Dropping heavy weights on bare concrete or standard household flooring can damage both your equipment and your foundation. Installing high-density rubber gym flooring or interlocking rubber horse stall mats absorbs impact, protects your barbell sleeves, and reduces noise. When performing deadlifts or Olympic lifts, pairing your rubber flooring with wooden lifting platforms provides a stable, professional-grade surface.

Safety Essentials: Racks, Spotter Arms, and Collars

Training safely at home means anticipating fatigue and equipment failure. A sturdy power rack or squat stand equipped with adjustable safety spotter arms is non-negotiable for bench presses and squats. Spotter arms catch the bar if you fail a rep, preventing injury. Additionally, always use reliable barbell collars to secure your weight plates and prevent plate shift during dynamic movements, ensuring balanced load distribution across the bar.

Maintenance Practices for Long-Term Durability

A high-quality barbell is an investment that, with proper care, can last a lifetime. Establishing a routine maintenance schedule prevents rust, maintains sleeve rotation, and ensures safe training sessions.

Cleaning and Oiling Routine

Sweat and magnesium carbonate chalk are corrosive agents that accelerate rust formation. After intense workouts, wipe down the barbell shaft and sleeves with a microfiber cloth to remove sweat and chalk residue. Every few months, apply a light coat of 3-in-1 oil or specialized gun oil to the knurling and rub it in, allowing it to sit before wiping away the excess. This creates a protective barrier against ambient humidity.

Maintaining Sleeve Rotation

If your barbell sleeves begin to feel sluggish or make grinding noises, the internal bushings or bearings may require cleaning and lubrication. For bushing bars, removing the end cap and snap ring allows you to clean out old debris, apply fresh lithium grease or machine oil, and reassemble the sleeve for buttery-smooth rotation. Regular upkeep prevents premature wear and keeps your lifts feeling crisp and responsive.

Conclusion and Next Steps for Your Home Gym

Investing in a reliable barbell transforms your home gym from a basic collection of weights into a versatile training sanctuary. By understanding core metrics such as tensile strength, whip, knurling texture, and steel finishes, you can select a bar that matches your lifting style and endures years of rigorous training. Pair your barbell with a sturdy rack, protective flooring, and a set of calibrated weight plates to unlock endless strength-building possibilities. Explore our curated selection of fitness equipment and home gym accessories to find the ideal barbell that supports your long-term fitness journey today.

The Ultimate Guide to Exercise Bike Resistance Levels

Are you looking to supercharge your indoor cycling workouts and achieve your fitness goals faster? Understanding and effectively utilizing exercise bike resistance levels is key. Whether you’re aiming for fat loss, improved endurance, or increased strength, mastering resistance can transform your ride from a casual pedal to a powerful training session. This comprehensive guide will break down everything you need to know about resistance, helping you get the most out of your cardio machines and elevate your fitness journey.

Why Resistance Matters: Beyond Just Pedaling

Resistance on an exercise bike simulates riding uphill or against the wind, making your muscles work harder. It’s not just about how fast you pedal, but how much effort you put into each stroke. Different resistance levels engage various muscle groups and energy systems, allowing for targeted training. Ignoring resistance means missing out on the full potential of your fitness equipment.

When you pedal with zero resistance, momentum does most of the work. Your heart rate might increase slightly, but your muscles are not being challenged enough to trigger significant growth or calorie burn. By adding resistance, you force your quadriceps, hamstrings, glutes, and calves to push against a counter-force. This mechanical tension is what builds lean muscle mass, increases bone density, and drastically elevates your metabolic rate both during and after your workout.

Understanding Resistance Types

Most exercise bikes use one of three primary resistance mechanisms. Knowing which type your bike uses will help you understand its capabilities and limitations.

1. Magnetic Resistance

Magnetic resistance is common in modern exercise bikes. Magnets near the flywheel create resistance without physical contact, resulting in a smooth, quiet, and virtually maintenance-free ride. Adjusting the resistance moves the magnets closer or further from the flywheel, increasing or decreasing the challenge. This type is excellent for consistent, precise adjustments. Because there is no friction, the parts do not wear out over time, making magnetic bikes highly durable.

2. Friction Resistance (Brake Pad)

Often found in traditional spin bikes, friction resistance uses a brake pad (usually made of felt or leather) that presses directly onto the flywheel. This provides a more authentic “road feel” and allows for theoretically infinite resistance levels—you simply turn the knob until the wheel stops. However, because it relies on physical contact, the brake pads wear down over time and require periodic replacement. Friction bikes can also be slightly noisier than magnetic ones.

3. Air (Fan) Resistance

Air resistance bikes, commonly known as assault bikes or fan bikes, use a large fan driven by the pedals. The resistance is dynamic: the harder and faster you pedal, the more air resistance you generate. There are no knobs or buttons to adjust. This makes air bikes incredibly effective for High-Intensity Interval Training (HIIT) because the machine automatically matches your maximum effort. However, they are generally the loudest type of exercise bike.

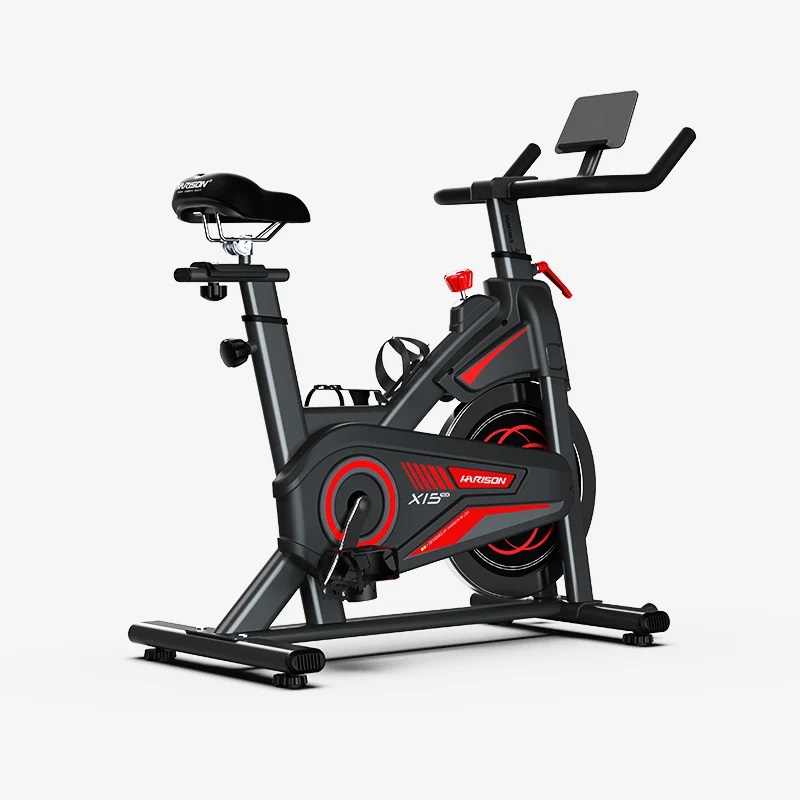
Muti-functional Magnetic Exercise Bike HR-B15 Eco

Decoding Resistance Levels: A Practical Breakdown

Most magnetic and digital exercise bikes feature a numbered resistance scale, typically ranging from 1 to 20, 1 to 32, or even 1 to 100. While the exact numbers vary by manufacturer, the physiological impact can be categorized into four main zones.

Level 1: The Warm-Up and Recovery Zone (Low Resistance)

Typical Range: 1–25% of your bike’s maximum resistance.

How it feels: Like riding on a flat, smooth road with a slight tailwind. There is very little pushback against your legs.

Best used for:

Warm-ups: Spending 5 to 10 minutes here increases blood flow to your muscles and lubricates your joints before heavy exertion.

Cool-downs: Gradually lowering your heart rate and flushing lactic acid from your legs after a hard session.

Active Recovery: On rest days, a 20-minute light spin promotes circulation without causing muscle fatigue.

Level 2: The Endurance and Fat-Burning Zone (Moderate Resistance)

Typical Range: 26–50% of your bike’s maximum resistance.

How it feels: Like riding on a flat road with a steady headwind, or a very slight, continuous incline. You feel the tension, but you can maintain a steady cadence (80–100 RPM) for a long time.

Best used for:

LISS (Low-Intensity Steady State) Cardio: Riding in this zone for 30 to 60 minutes keeps your heart rate in the aerobic zone (roughly 60-70% of your maximum heart rate), which is highly effective for burning stored body fat.

Building Aerobic Base: Improving your cardiovascular system’s efficiency over time.

Level 3: The Strength and Muscle-Building Zone (High Resistance)

Typical Range: 51–75% of your bike’s maximum resistance.

How it feels: Like climbing a steep hill. Your pedaling speed will naturally drop (usually to 60–80 RPM), and you will feel a deep burn in your quadriceps and glutes.

Best used for:

Simulated Hill Climbs: Building lower-body strength and muscular endurance.

Standing Climbs: Lifting out of the saddle to push through heavy resistance engages your core and upper body for stabilization.

Threshold Training: Pushing your muscles just below the point of failure to increase your lactate threshold.

Level 4: The Power and HIIT Zone (Maximum Resistance)

Typical Range: 76–100% of your bike’s maximum resistance.

How it feels: Like pedaling through thick mud or climbing a mountain. Every pedal stroke requires maximum effort, and you cannot sustain this level for more than 15 to 60 seconds.

Best used for:

HIIT Sprints: Short bursts of all-out effort followed by periods of low-resistance recovery.

Peak Power Development: Forcing your fast-twitch muscle fibers to adapt and grow stronger.

HARISON HR-X15 Tech Home Exercise Bike

How to Match Resistance to Your Fitness Goals

Your resistance strategy should directly align with what you want to achieve. Here is how to manipulate the dial for specific outcomes.

Goal 1: Weight Loss and Fat Burning

If your primary goal is to lose weight, you need a combination of calorie expenditure and metabolic stimulation.

The Strategy: Mix moderate-resistance steady-state rides with high-resistance HIIT sessions.

Steady State: Ride at a moderate resistance (Zone 2) for 45 minutes, maintaining a brisk cadence. This burns a high percentage of calories from fat.

HIIT: Warm up, then alternate between 30 seconds of maximum resistance (Zone 4) pedaling as fast as possible, and 60 seconds of low resistance (Zone 1) recovery. Repeat 10 times. This triggers the “afterburn effect” (EPOC), causing your body to burn calories for hours after the workout ends.

Goal 2: Cardiovascular Endurance

Endurance athletes, such as outdoor cyclists or runners cross-training, need to train their heart and lungs to sustain effort over long periods.

The Strategy: Focus on prolonged intervals in the moderate to high zones.

Tempo Rides: Ride for 20 minutes at a resistance level that feels “comfortably hard” (the upper end of Zone 2 or lower end of Zone 3). You should be breathing heavily but still able to speak in short sentences. Recover for 5 minutes, then repeat.

Goal 3: Lower Body Strength and Toning

If you want to build defined quadriceps, hamstrings, and glutes without lifting heavy weights, the exercise bike is an excellent tool.

The Strategy: Treat your bike like a leg press machine.

Heavy Hill Climbs: Crank the resistance up to Zone 3 or 4. Keep your cadence slow and controlled (around 60 RPM). Focus on pushing down hard through your heels and pulling up smoothly. Do 5-minute heavy climbs followed by 2 minutes of light recovery.

HARISON HR-B8A Recumbent Exercise Bike

Common Mistakes to Avoid

Even experienced gym-goers make errors when it comes to bike resistance. Avoid these common pitfalls to prevent injury and maximize results.

1. Riding with Zero Resistance

Pedaling furiously with absolutely no resistance causes your hips to bounce in the saddle. This not only burns very few calories but also puts dangerous stress on your knee joints and lower back. Always keep at least a baseline level of resistance (Level 1) to maintain control of the pedals.

2. Too Much Resistance, Too Soon

Cranking the dial to maximum before your muscles are warmed up is a recipe for strained tendons. Furthermore, if the resistance is so high that your cadence drops below 50 RPM and you have to throw your entire body weight side-to-side just to move the pedals, you are risking lower back injury. Lower the resistance until you can pedal smoothly.

3. Ignoring Cadence (RPM)

Resistance and cadence go hand-in-hand. High resistance requires a lower cadence; low resistance allows for a higher cadence. If you try to sprint at 110 RPM on maximum resistance, you will exhaust yourself in seconds. Use the bike’s display to monitor your RPM and adjust your resistance accordingly.

HARISON HR-X3L Foldable Magnetic Exercise Bike

Conclusion

Exercise bike resistance is the dial that controls your fitness destiny. By moving beyond the habit of mindless pedaling and actively managing your resistance levels, you can transform a basic piece of cardio equipment into a comprehensive tool for fat loss, endurance, and strength building. Start incorporating varied resistance zones into your next ride, listen to your body, and watch your indoor cycling results soar.

Recumbent Exercise Bike vs. Upright Bike: Which One Is Right for You?

Introduction

If you’ve been shopping for a home cardio machine, chances are you’ve come across two very different-looking options: the recumbent exercise bike and the upright exercise bike. At first glance, they might seem like completely different pieces of equipment — and in many ways, they are. But both deliver solid cardiovascular workouts, burn calories, and support long-term fitness goals. So which one should you buy?

The answer depends on your body, your fitness goals, and how you plan to use it. This guide breaks down everything you need to know so you can make a confident, informed decision.

What Is a Recumbent Exercise Bike?

A recumbent exercise bike features a reclined seat with a backrest, placing you in a laid-back, almost chair-like position while you pedal. Your legs extend forward rather than downward, which distributes your body weight more evenly and reduces pressure on your lower back, hips, and joints.

This design makes recumbent bikes an excellent choice for seniors, people recovering from injury, or anyone dealing with chronic back or knee pain. The supported seating position allows for longer, more comfortable workout sessions without the strain that upright cycling can sometimes cause.

What Is an Upright Exercise Bike?

An upright exercise bike mimics the feel of riding a traditional outdoor bicycle. You sit in a more vertical position, engaging your core, glutes, and upper body more actively than you would on a recumbent model. Many upright bikes — especially spin bikes — also allow you to stand and pedal, which significantly increases workout intensity.

Upright bikes tend to be more compact, making them a popular choice for smaller spaces. They’re also a better fit for users who want a more intense, sport-style workout and don’t need the extra back support.

Key Differences at a Glance

Comfort and Joint Impact

Recumbent bikes win here. The reclined position and larger seat take pressure off the spine and knees, making them far more comfortable for extended sessions. Upright bikes, while manageable for most healthy adults, can cause discomfort during longer rides if you’re not used to the saddle position.

Calorie Burn and Workout Intensity

Upright bikes generally allow for higher-intensity workouts, especially if you incorporate standing intervals or high-resistance sprints. That said, a recumbent bike at moderate-to-high resistance can still deliver an effective calorie-burning session — it just requires more intentional effort to push the intensity.

Muscle Engagement

Both bikes primarily target the lower body — quads, hamstrings, calves, and glutes. However, upright bikes engage the core and stabilizer muscles more actively due to the unsupported seating position. Recumbent bikes shift more of the workload to the hamstrings and glutes because of the forward pedaling motion.

Who It’s Best For

Recumbent bikes are ideal for older adults, beginners, people with back or joint issues, and anyone prioritizing comfort and low-impact exercise. Upright bikes are better suited for younger, more active users who want a challenging cardio workout and don’t require additional back support.

Which One Should You Buy?

If comfort, accessibility, and joint health are your top priorities, go with a recumbent exercise bike. It’s one of the most user-friendly pieces of home gym equipment on the market, and it’s easy to stick with a routine when your workouts don’t leave you sore or uncomfortable.

HARISON HR-B51A Eco Recumbent Exercise Bike

HARISON HR-B8A Re Home Recumbent Exercise Bike for the elderly

If you’re looking to push your limits, replicate the feel of outdoor cycling, or maximize calorie burn in a shorter amount of time, an upright or spin bike is likely the better fit.

HARISON HR-X15 Tech Home Exercise Bike

HARISON HR-X3L Foldable Magnetic Exercise Bike

The good news? Either option is a smart investment in your long-term health. Both bikes offer low-impact cardio that’s easy on the joints compared to running, and both can be used consistently for years without significant wear on your body.

Final Thoughts

Choosing between a recumbent and upright exercise bike doesn’t have to be complicated. Think about how your body feels during workouts, what kind of experience you want, and how much space you have at home. Whether you go recumbent or upright, committing to regular cardio is what truly moves the needle on your fitness goals.

Ready to find the right bike for your home gym? Explore HARISON’s full lineup of recumbent and upright exercise bikes — built for durability, comfort, and real results.